Axle Seal Leak Repair: A Homeowner’s Step-by-Step Guide
Learn how to identify, diagnose, and fix axle seal leaks safely with practical, step-by-step guidance. Tools, safety, and maintenance after repair for homeowners.

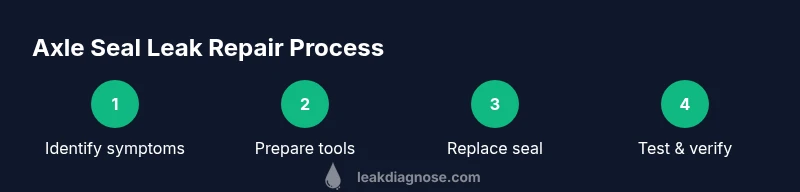
Learn how to identify, diagnose, and perform an axle seal leak repair. This quick guide highlights common signs, essential safety steps, and a practical repair flow you can follow before deciding whether to DIY or hire a pro. The steps cover inspection, preparation, seal replacement, and post-repair checks to minimize downtime and prevent further damage.
Understanding axle seal leak repair basics
An axle seal leak occurs when the seal between the axle shaft and the housing fails, allowing gear oil to escape. For homeowners, diagnosing and performing an axle seal leak repair can prevent deeper damage to bearings and the differential. According to Leak Diagnosis, taking quick action can save time and money by avoiding collateral damage. In most cars, the seal sits at the end of the axle housing and is pressed into place or held by a clip. Early signs include oil spots under the vehicle, a burning gear oil smell after operation, or reduced oil level on the dipstick. Recognize that not every damp area means a failed seal—drips could come from other components, but axle seal leak repair is a common culprit and worth checking when you notice persistent leaks.
This guide uses the term axle seal leak repair to describe the process of locating, resealing, and testing for leaks at the axle end. Throughout, emphasize safety, proper torque, and using the correct replacement seal to ensure a durable fix. If your vehicle has high mileage, consider inspecting related bearings and the housing surface for wear, as these can impact seal life and re-leak risk. The goal is a reliable, long-lasting repair that minimizes downtime and protects the axle assembly.
Signs that point to an axle seal leak
- Oil spots on the garage floor beneath the vehicle, especially near the axle end
- Visible oil on the wheel hub, brake rotor, or driveline area
- A noticeable drop in gear oil level on the dipstick or sight glass
- A distinctive gear oil odor after driving or parking
- Puddles or dampness around the axle seal area after a drive
- Increased oil consumption or staining on the underside of the vehicle
When you notice these signs, plan for an axle seal leak repair and verify that the issue is not caused by nearby components such as the drain plug gasket or a loose drive shaft clamp. According to Leak Diagnosis, early identification improves outcomes and reduces the risk of bearing damage.
Safety considerations and precautions
Working on a vehicle to fix an axle seal leak repair involves potential hazards including heavy machinery, hot surfaces, and slippery oil. Always prioritize personal protection and workplace safety:
- Stabilize the vehicle with floor jacks and jack stands on a flat, solid surface; never rely on a jack alone. Use wheel chocks to prevent movement.
- Wear safety glasses and gloves to protect against oil splashes and sharp edges.
- Work in a well-ventilated area and have a suitable oil-compatible containment plan for drips and spills.
- Disconnect the battery if there’s any risk of short circuits or when near electrical components.
- Dispose of used oil and old seals per local regulations. Do not pour gear oil down the drain.
Safety first: axle seal leak repair can be completed safely at home with careful planning, but if you encounter bent housings, seized fasteners, or uncertain seals, consider professional help. As you proceed, keep in mind that the Seal's seating surface must be pristine for a reliable seal.
Diagnosing the leak: tests and checks
Effective axle seal leak repair starts with a careful diagnosis. Start by cleaning the suspected area to clearly identify fresh seepage. Check the gear oil level and confirm whether the seep is consistent or intermittent. A simple test is to rotate the axle by hand (with the vehicle safely supported) to observe any fresh leakage during movement. If you have access to dye and UV light, applying a dye into the gear oil can help visualize seep paths over time. Compare both sides of the axle housing and inspect the mating surface for scoring, grooves, or corrosion that could affect seal seating. Document findings and plan your repair approach, keeping in mind that the axle seal’s integrity depends on a clean, smooth seating surface. For homeowners, this diagnostic phase is critical to deciding whether a DIY axle seal leak repair is feasible or if professional assistance is warranted.
Planning the repair: when to DIY vs pro decisions
The feasibility of a DIY axle seal leak repair depends on your vehicle’s design, your tool availability, and your comfort with mechanical work. Front-wheel-drive and rear-wheel-drive layouts differ in how the axle seal is accessed, which can affect whether you remove the axle assembly or replace the seal in place. If the seal is pressed into a modular housing and the axle shaft must be removed, you may need specialty tools and precise torque specs. In some cases, the seal and race are a single add-on part that requires press-in equipment. If you encounter a damaged bearing, warped housing, or uncertain alignment, professional service is advisable. The goal is a complete seal replacement with proper seating and torque to prevent future leaks. Always consult your vehicle manual for torque specs, seal type, and lubricant requirements. In many situations, a carefully performed axle seal leak repair by a skilled DIYer is achievable, but when in doubt, it is safer to rely on a professional.
Maintenance to prevent future axle seal leaks
After completing an axle seal leak repair, implement preventive maintenance to extend seal life. Regularly inspect the seal area for early signs of seepage, keep the seal housing clean, and replace seals only with correct, vehicle-specific parts. Use the manufacturer-recommended gear oil type and maintain proper fill levels to avoid over-pressurizing the housing. Avoid harsh oil contaminants by performing periodic drain-and-fill intervals and addressing any leaks promptly before they worsen. The Leak Diagnosis team emphasizes proactive maintenance and routine inspection as a practical strategy to reduce the risk of future axle seal leaks, preserving the axle assembly’s reliability and minimizing downtime. By coupling careful replacement with ongoing maintenance, you can achieve a durable repair and long-term peace of mind.
Tools & Materials
- Floor jack and jack stands(Use jack stands rated for your vehicle; never rely on a jack alone)
- Wheel chocks(Place on both sides of the wheels opposite the lifting side)
- Socket wrench set (metric and standard)(Common sizes include 10-19mm; verify with your vehicle manual)
- Oil drain pan(To catch gear oil from the differential or axle housing)
- Replacement axle seal (seal kit matching your vehicle)(OEM preferred for best fit and longevity)
- Seal puller or pick tool(For removing old seal without damaging the housing)
- Torque wrench(For setting bolts to manufacturer specs)
- Shop rags and solvent(Keep area clean to spot leaks)
- Gear oil or differential fluid(Use the correct type and amount per the vehicle manual)
- Gloves and safety glasses(Personal protective equipment)
- Gasket maker or RTV (optional)(Only if specified by the vehicle manual)
Steps
Estimated time: 2-6 hours
- 1
Prepare the workspace and safety gear
Clear the work area, gather tools, and review the vehicle manual. Put on PPE and ensure a stable, level surface. This sets the foundation for a safe axle seal leak repair.
Tip: Double-check that all chosen replacement parts match your vehicle model. - 2
Secure the vehicle and drain gear oil
Block the wheels, raise the vehicle with the floor jack, and support with jack stands. Place an oil-collection pan under the axle area and drain the gear oil into the pan.
Tip: Allow the oil to drain fully before proceeding to avoid spills. - 3
Inspect the axle seal and related components
Visually inspect the seal, housing, and bearings for wear or damage. Check for scoring, grooves, or corrosion that could affect seating. Document findings to guide replacement decisions.
Tip: If bearings look worn, plan to inspect and possibly replace them as part of the repair. - 4
Remove the axle shaft (if required)
Carefully detach the axle shaft according to the manual. Support the shaft to avoid damage and note alignment for reassembly.
Tip: Use a helper if the shaft is heavy or difficult to maneuver. - 5
Install a new axle seal and reseal the housing
Press or fit the new seal into the housing as per the seal manufacturer’s instructions. Clean the seating surface and verify there are no burrs. Reassemble components with proper torque settings.
Tip: Lubricate the seal lips with gear oil before installation for a smooth seating. - 6
Reinstall the axle and refill oil
Reinstall the axle shaft, torque fasteners to spec, and refill with the correct gear oil to the recommended level. Ensure the fill plug and seals are secure.
Tip: Avoid overfilling, which can cause pressure buildup and leaks. - 7
Check for leaks and perform a test drive
Start the engine, observe the axle area for leaks, and perform a short test drive. Recheck for seepage after the vehicle has cooled.
Tip: Take note of any unusual noises or vibrations during the test drive. - 8
Cleanup and final inspection
Clean the work area, dispose of waste oil responsibly, and perform a final leak check after reassembly. Document the repair and monitor for the first few miles of operation.
Tip: Save the replaced seal as a reference for future maintenance.
Questions & Answers
What is an axle seal and why does it leak?
An axle seal blocks gear oil from leaking out of the axle housing. It can fail due to wear, improper installation, or contamination, leading to oil seepage and potential damage to bearings and the differential.
An axle seal keeps gear oil inside the axle. It can wear out or be improperly installed, causing leaks and possible bearing damage.
Can I replace the axle seal myself?
Yes, in many vehicles you can replace the axle seal with the right tools and careful following of the vehicle manual. Some designs are more complex and may require professional service.
You can replace it yourself if you have the right tools and follow the vehicle manual, but some designs are trickier.
What tools do I need for axle seal repair?
Essential tools include a floor jack with stands, a socket set, torque wrench, seal puller, oil drain pan, and replacement axle seal. Other supplies include rags, gloves, and gear oil as specified by your vehicle.
You'll typically need a jack, stands, socket set, torque wrench, seal puller, and the new seal, plus gear oil.
How long does axle seal repair take?
Duration varies by vehicle design and your experience. Plan for a session that could take a couple of hours to several hours, including setup, removal, replacement, and testing.
It can take a couple to several hours, depending on your vehicle and experience.
Is it safe to drive with an axle seal leak?
Driving with a noticeable axle seal leak is not advised. Leaks can lead to low oil levels and potential damage to the differential or bearings. Address the leak promptly.
No, driving with a leak can cause serious damage; fix it promptly.
Will a damaged bearing need replacement?
If the bearing shows wear from oil exposure or shaft movement, replacement may be necessary. Inspect bearing surface and housing for damage during the repair.
If the bearing is worn or damaged from the leak, it should be replaced along with the seal.
Watch Video
Main Points
- Identify signs early to prevent bearing damage.
- Use the correct seal and follow torque specs.
- Refill oil to proper level and verify no leaks after test drive.
- When in doubt, seek professional help.