Rear Oil Seal Leak Troubleshooting Guide
Learn how to identify, diagnose, and fix a rear oil seal leak in your vehicle with a practical, step-by-step guide designed for homeowners and DIY enthusiasts.

According to Leak Diagnosis, a rear oil seal leak is most often caused by a worn rear main seal allowing engine oil to escape at the back of the engine. The quick fix is to stop driving, top up oil to a safe level, and seek a professional seal replacement paired with gasket checks.
What a rear oil seal leak actually is
A rear oil seal leak refers to oil seeping from the rear end of the engine where the rear main seal sits between the engine block and the crankshaft. Over time, heat cycles, crankshaft wear, and improper installation can wear this seal, creating a path for engine oil to escape. When you see oil on the ground near the transmission bell housing or oily residue on the back of the engine, a rear oil seal leak is a prime suspect. In many vehicles, a rear oil seal leak will produce a slow drip that worsens with idle time and can cause oil spots on your driveway or garage floor. For homeowners, this is more than a nuisance: a failing seal can allow oil loss that leads to engine damage if ignored. According to Leak Diagnosis, addressing rear oil seal leak promptly reduces the risk of costly repair.
Signs that point to a rear oil seal leak
Front-of-house oil leaks are common, but a rear oil seal leak shows specific patterns. Look for fresh oil on the bell housing area, dark, damp patches near the rear of the engine after parking, and oil on the transmission input area. A sudden rise in oil consumption or a visible puddle near the back of the engine are strong indicators. Because oil can travel along surfaces, you might notice staining along the subframe or exhaust components as it drips rearward from the seal. If you notice a burning oil smell or smoke from the exhaust after a cold start, a rear oil seal leak could be the culprit. Leak Diagnosis stresses verifying the source with a controlled engine run and careful inspection of the back of the engine.
Safe initial checks you can perform tonight
Safety comes first when dealing with engine oil leaks. Begin by parking on a flat surface, turning off the engine, and letting it cool. Check the oil level in the dipstick to ensure it hasn’t dropped dangerously low. Clean the suspect area with rags, then run the engine for a minute and inspect under the car for fresh drips near the rear of the engine. A flashlight scan around the transmission bell housing can reveal wetness indicating a rear oil seal leak. Always wear gloves and eye protection when handling oil. If you’re unsure about the leak source, don’t drive long distances; have the car towed if needed.
How vehicle design affects rear oil seal leaks
The rear oil seal sits between the engine block and the crankshaft, a junction that bears substantial heat and pressure. Engine design, crankshaft end play, and vibration influence seal wear. Vehicles with high mileage or frequent hard launches may experience accelerated seal wear. Comparative to other seals, the rear seal is more prone to leaks because any oil that escapes can drip down toward the bell housing, making leaks seem more serious than they are. Understanding your engine layout helps you identify whether a rear oil seal leak is the likely culprit versus a failed valve cover gasket or oil pan gasket that can obscure the real source.
Immediate actions to minimize damage and when to call a pro
If you observe a rear oil seal leak, minimize driving. Oil leaks can cause low oil levels quickly, risking engine damage. Top up oil with the correct grade if the level is low, but do not drive far. Schedule a professional inspection promptly; the rear main seal replacement usually requires transmission removal and specialized tools. A shop can also inspect for secondary leaks, test for crankshaft end-play, and replace any worn seals or gaskets. Bottom line: don't ignore a rear oil seal leak; professional diagnosis saves time and money in the long run. The Leak Diagnosis team recommends seeking professional diagnosis promptly to minimize damage.
Steps
Estimated time: 4-8 hours
- 1
Prepare safely and gather tools
Park on a level surface, apply parking brake, disconnect the battery, and allow the engine to cool. Gather drainage pans, rags, a flashlight, and the appropriate hand tools. This prepares you for a careful inspection of rear oil seal areas without risking shock or shorts.
Tip: Never work under a car supported only by a jack; use jack stands. - 2
Clean suspected area and relieve pressure
Wipe away existing oil to expose fresh leaks. If your vehicle has crankcase pressure, release pressure through the oil filler cap with the engine off to prevent splatter. This makes it easier to see the path of the leak from the rear oil seal area.
Tip: Keep track of oil quantity; a large drop might indicate a fast leak. - 3
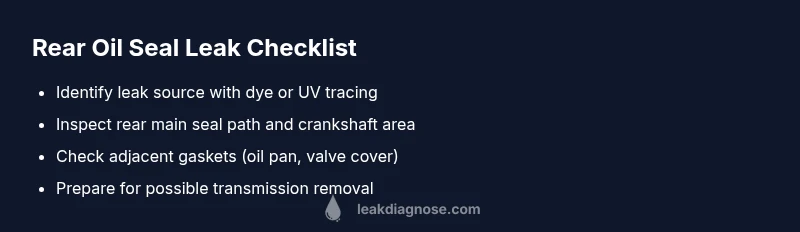
Dye test or UV for leak tracing
Add a UV dye to the engine oil and run the engine briefly to allow the dye to travel along potential leak paths. Inspect the back of the engine and bell housing with a UV light to locate the source of the rear oil seal leak.
Tip: Wear eye protection and gloves; UV dye can irritate skin. - 4
Inspect rear main seal path
With the engine off, visually inspect the seal area at the rear of the engine and along the crankshaft. Look for oil trails that originate at the seal. Note any seepage that suggests the path of the leak toward the bell housing.
Tip: Use a gasket scraper carefully to expose the seal area if needed. - 5
Plan for replacement if confirmed
If the leak is confirmed at the rear main seal, prepare for a transmission drop or removal to access the seal. Gather the replacement rear main seal, seals, and gasket set; follow the service manual for torque specs and procedures.
Tip: Read the service manual for your exact engine and transmission combo. - 6
Replace and reassemble
Carefully remove the transmission to reach the rear main seal. Clean the crankshaft surface, install the new seal with the proper orientation, and reassemble the drivetrain components. Refill engine oil to the correct level.
Tip: Inspect the slip-fit of the seal and verify there are no nicks on the crank surface. - 7
Test and monitor for leaks
Start the engine and monitor the rear seal area for any fresh seepage. Check under the vehicle after a short drive and again after parking. Verify oil level stays stable.
Tip: Take photos during disassembly to aid in reassembly. - 8
Final checks and preventive steps
Ensure all fasteners are torqued to spec, replace any worn gaskets, and clean up spill areas. Schedule regular oil changes and monitor for new signs of leakage to catch issues early.
Tip: Document maintenance and check for other potential leaks around the engine.
Diagnosis: Oil dripping from the rear of the engine or visible oil on the bell housing after parking
Possible Causes
- highWorn or damaged rear main seal
- mediumLeaks from adjacent gaskets (oil pan, valve cover) that run down to the rear area
- lowTransmission input shaft seal or rear transmission housing leak
Fixes
- easyInspect the rear main seal area; confirm whether the leak originates at the seal or another nearby gasket
- hardIf the rear main seal is failing, plan for a full seal replacement and related gasket checks (often requires transmission removal)
- mediumReplace adjacent gaskets (oil pan, valve cover) if they are contributing to the observed leak and path of oil
Questions & Answers
What are the signs of a rear oil seal leak?
Common signs include fresh oil near the rear of the engine or bell housing, a puddle under the car after parking, and a burning oil smell after startup. Confirm by tracing the path of the oil to the rear oil seal.
Look for fresh oil near the back of the engine and a puddle under the car; this often points to a rear oil seal leak.
Can I fix a rear oil seal leak myself?
Replacing the rear main seal is a major job that usually requires transmission removal and specialized tools. A professional repair is typically recommended for safe, reliable results.
It's a big job—often best left to a pro who has the right tools.
How much does a rear main seal replacement cost?
Costs vary by vehicle and region; a shop quote will detail parts and labor. Expect professional replacement to involve labor and potential related gasket work.
Prices vary; get a detailed quote from a qualified shop.
Is it safe to drive with a rear oil seal leak?
Driving with an active rear oil seal leak can lead to low oil levels and engine damage. Limit driving and seek professional help as soon as possible.
Avoid long trips; seek professional evaluation soon.
What maintenance helps prevent rear oil seal leaks?
Regular oil changes, using the recommended oil grade, and checking for seal wear as part of routine maintenance can help prevent rear oil seal leaks.
Keep up with oil changes and monitor seals during service.
What tools do I need for inspection?
A basic mechanic’s toolkit, flashlight, rags, UV dye (optional for tracing leaks), and a proper jack and stands are useful for locating a rear oil seal leak safely.
Have a flashlight, rags, and the right pads ready.
Watch Video
Main Points
- Identify rear oil seal leak early to prevent engine damage
- Rear main seal replacement is complex and usually requires transmission work
- Check for secondary leaks that mimic a rear oil seal leak
- Use proper safety procedures and reference manuals during repairs