Rear Main Seal Leak: Quick Diagnosis and Fix Guide 2026
An urgent, comprehensive guide to diagnosing and fixing a rear main seal leak in engines. Learn symptoms, diagnostic flow, safety tips, repair options, and prevention to minimize damage and costly repairs.

A rear main seal leak is a common engine oil problem at the back of the block. The quickest fix is to stop the flow and prepare for a repair, usually involving seal replacement, engine access, and possible oil pan work. If you notice oil on the driveway, address it promptly to prevent engine damage.
What is a rear main seal leak and why it matters
A rear main seal leak happens when the seal around the rear crankshaft, where the engine connects to the flywheel and transmission, begins to fail. Over time, heat, pressure, and normal wear can cause the seal to crack, shrink, or lose its seal, allowing oil to escape. This is more serious than a simple oil pan leak because oil entering the bell housing or transmission area can lead to misdiagnosed failures and significant damage if ignored. Addressing a rear main seal leak quickly protects engine oil levels, reduces the risk of oil on hot components, and helps prevent costly repairs later on.
Where leaks originate and how they present
Although oil leaks may appear to come from the rear of the engine, the actual source can be multiple inches away. The most common symptom of a rear main seal leak is oil pooling at the back of the engine, near the bell housing, sometimes forming a dark stain along the transmission. You might notice oil on the engine oil pan area, a burning odor from hot oil, or smoke from the exhaust after oil contacts hot exhaust components. If the leak is severe, the oil level will drop faster than expected, triggering low-oil warnings.
Safety and prep steps before you begin
Before you start, park on a dry, level surface and allow the engine to cool. Wear gloves and eye protection; used oil can be hazardous. Gather tools: jack stands, a drip pan, rags, wedges, and possibly a new rear main seal kit. Work in a well-ventilated area and use proper lifting points. If you are not comfortable or your car is under warranty, consider professional service to avoid personal injury and mechanical risk.
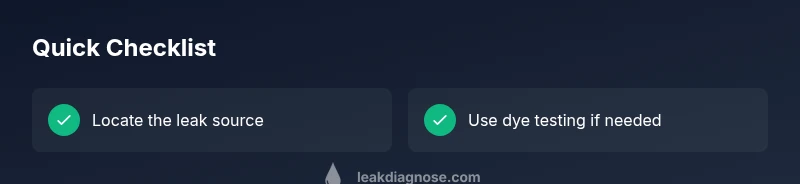
Diagnostic clues and flow to verify the source
Begin by cleaning the area to better see the origin. If oil leaks at the rear, you will often see oil weeping along the rear main seal housing, the crankshaft pulley, or the transmission bell housing. Use UV dye to improve visibility if allowed. Check oil pressure and note whether the leak persists when the engine is warm or cold. Compare the color and type of fluid: engine oil is amber to dark brown; transmission fluid is red or pink. Tracing the exact origin helps prevent unnecessary replacement of the wrong seal.
Diagnostic flow you can follow at home
This flow helps distinguish rear main seal leaks from other rear-area leaks. Start with surface inspection near the bell housing; wipe clean and run the engine briefly to observe flow direction. If oil appears on the inside of the bell housing and near the crankshaft snout, the rear main seal is a strong candidate. If you observe oil only on the outside of the oil pan around the rear, the leak may originate from the oil pan gasket or rear main cap area. If you are unsure, capture a sample with dye and monitor for 24 hours to confirm the source. Remember: safety first, and do not drive long distances if oil is actively leaking.
Repair options and what to expect
In many engines, repairing a rear main seal leak is a major job because it often requires removing the transmission or engine itself to access the seal. If the leak is caused by a bad seal, replacement is necessary. Some engines allow seal replacement with engine removal only, while others permit rear main seal service from below with proper access. Cost and time vary significantly by vehicle, but this is typically a high-difficulty repair that benefits from professional experience.
Prevention and maintenance tips
To minimize future leaks, follow a regular oil-change schedule using the manufacturer's recommended oil and filter, and replace any worn gaskets or seals during major service intervals. Keep the oil level within the recommended range and fix minor oil leaks promptly to prevent build-up around the rear seal area. Regular inspections of the bell housing, transmission area, and flexible lines help catch leaks early.
Steps
Estimated time: 6-10 hours
- 1
Prepare and safety check
Secure the vehicle on a level surface, chock wheels, and let the engine cool. Gather PPE, a drip pan, and the tools needed for access to the rear of the engine. Confirm you have a clean workspace and adequate lighting before you start.
Tip: Always support the vehicle with jack stands; never rely on a jack alone. - 2
Identify and confirm the leak source
Wipe the area around the bell housing and rear seal, then run the engine briefly to observe flow direction. Use dye if available to improve visibility and pinpoint the origin more reliably.
Tip: Note whether oil appears only when the engine runs hot or cold. - 3
Inspect related seals and components
Check nearby seals such as the oil pan gasket and rear main cap area. Look for seepage along the crankshaft snout and bell housing interface to avoid misdiagnosis.
Tip: Take photos from multiple angles for reference before disassembly. - 4
Decide repair path
Evaluate whether the repair can be done with engine removal or if a lower-access service is possible. Consider your skill level and available tools; this is often a high-difficulty task.
Tip: Consult the service manual for your specific engine model. - 5
Perform the repair (or prepare pro help)
If you proceed, follow the specific service steps for replacing the rear main seal and any affected gaskets. Ensure all fasteners are torqued to spec and the crank and seals are clean before reassembly.
Tip: Do not reuse worn bolts; replace any gaskets with new parts as recommended. - 6
Test, road-test, and monitor
Start the engine and check for leaks at idle and after a short drive. Recheck oil level and look for fresh seepage. If leaks persist, re-evaluate the seal seating or consider a second service call.
Tip: Record a short video of the first drive to compare post-repair behavior.
Diagnosis: Oil dripping or pooling at the rear of the engine near the bell housing, often with a burning oil odor or a dark stain on the transmission.
Possible Causes
- highRear main seal wear or damage
- mediumOil pan gasket or rear main cap gasket leak near the rear
- lowMisidentified external leak from nearby seals
Fixes
- hardReplace rear main seal; engine removal is often required; this is a major repair
- mediumReplace rear main cap or oil pan gasket if the leak traces to the rear area
- easyAddress adjacent seals (valve cover, transmission seal) if the source is misidentified
Questions & Answers
What is a rear main seal leak?
A rear main seal leak occurs when the seal around the rear crankshaft begins to fail, allowing engine oil to escape toward the bell housing and transmission. It can lead to low oil levels and potential engine damage if ignored.
A rear main seal leak is when the seal at the back of the engine starts to fail, letting oil escape toward the transmission. It's important to address it to avoid engine damage.
Can I drive if I notice a rear main seal leak?
Driving with a rear main seal leak is not recommended long-term. If you must drive, limit distance, monitor oil level closely, and arrange a professional inspection as soon as possible to avoid further damage.
It's risky to drive long distances with a rear main seal leak; get it checked soon to prevent engine damage.
Will I need to remove the engine to fix it?
In most cars, replacing the rear main seal requires significant access, which often means removing the transmission or engine. Some models may allow service from below, but it is typically a major repair.
For most vehicles, repairing a rear main seal leak means removing the transmission or engine, so expect a major repair.
How can I tell if the leak is the rear main seal or another part?
Trace the oil trail to the rear of the engine and bell housing. If seepage occurs at the seal area and along the crankshaft snout, the rear main seal is likely culprit; otherwise, it could be the oil pan gasket or valve cover. Dye testing helps confirm.
Trace the leak to the back of the engine; dye testing can confirm if it's the rear main seal or another gasket.
What is the typical cost range to repair a rear main seal leak?
Repair costs vary widely by vehicle and whether engine removal is required. Expect that the service is generally expensive due to its complexity and the labor involved; check with a local shop for a precise estimate.
Costs vary, but rear main seal repairs are usually costly due to the labor and access required.
Is a dye test necessary to diagnose a rear main seal leak?
A dye test helps clearly identify the leak source when the origin isn’t obvious. It’s a valuable tool for confirming the rear main seal vs other nearby components before committing to a major repair.
Dye testing can confirm the leak source and prevent unnecessary repairs.
Watch Video
Main Points
- Identify the exact source before tearing down components
- Rear main seal leaks are high-difficulty repairs; plan for engine access
- Use dye tests to confirm the leak origin and prevent misdiagnosis
- Regular maintenance helps prevent rear-area leaks from forming