Fixing Oil Leak: A Homeowner’s Step-by-Step Guide
Learn how to locate, diagnose, and safely fix a common oil leak with practical, home-friendly steps. This guide from Leak Diagnosis covers inspection, tools, safety, and disposal for a cleaner, leak-free system in 2026.

Goal: locate, diagnose, and safely fix a common oil leak in household equipment or a vehicle. You'll inspect likely sources, gather essential tools, and follow a step-by-step approach to seal the leak, restore oil levels, and test for persistent drips. This guide emphasizes safety, environmental care, and proper disposal of used oil.
Why Fixing Oil Leaks Matters
Fixing oil leaks is a practical skill for homeowners and DIY enthusiasts. A leak not only wastes valuable lubricant but can pose safety and environmental risks, including fire hazards and soil or water contamination. In this guide to fixing oil leak, you’ll learn a structured approach that reduces mess, minimizes harm to your equipment, and protects your family. According to Leak Diagnosis, addressing leaks promptly helps limit damage and keep systems running efficiently in 2026. This section sets the stage for a clear, methodical repair pathway that you can perform with common tools and sensible precautions.
Oil leaks can escalate quickly if ignored. They may originate from slightly worn gaskets, loose drain plugs, or damaged seals that slowly degrade over time. By understanding the typical sources and how each one behaves, you can triage more effectively and decide when a DIY fix is appropriate versus when to call a professional. The information here focuses on home maintenance and non-professional contexts, with safety and environmental responsibility as guiding principles.
What Causes Oil Leaks in Home Equipment
Oil leaks arise from several failure points, often related to wear, heat, or improper maintenance. Common culprits include the oil pan gasket, drain plug seal, valve cover gasket, and oil filter housing. In machinery and cars alike, imperfect seals around pumps or lines can also drip oil, especially after a replacement part or heavy use. By recognizing typical failure patterns—such as drips near the bottom of the engine indicating the pan or drain area—you’ll narrow down the suspected source more quickly.
When diagnosing, it’s useful to consider recent maintenance history. A recently changed oil filter or gasket may have been installed with insufficient torque or a misaligned seal. Remember that oil viscosity and temperature affect leakage behavior, so leaks may appear more after operation than at rest. Keeping a simple log of leak activity helps you detect persistent issues versus temporary drips from recent service.
Safety and Environmental Considerations
Working with oil requires respect for safety and the environment. Oil is flammable, can irritate skin, and should never be disposed of in ordinary trash or storm drains. Before beginning, ensure you have a clean workspace with good ventilation, no open flames, and a source of absorbent materials for spills. Wear PPE such as gloves and safety glasses, and keep a fire extinguisher nearby if you’re working on equipment that could overheat or ignite. Dispose used oil through authorized recycling centers; many auto parts stores accept used oil for recycling. This approach aligns with responsible DIY practices and reduces risk for you and your family.
Leak Diagnosis emphasizes a cautious, stepwise workflow to prevent accidental spills and exposure. If you’re unsure about the fuel or lubrication system, do not pressurizedly test a suspect leak; consult a professional. In all cases, minimize skin contact with oil and clean spills promptly to prevent slips and environmental damage.
How to Inspect and Locate the Leak Source
A methodical inspection starts with cleaning the suspected area, then running the engine or device briefly to observe the leak in action. Place a large sheet of cardboard or a brown paper under the device to capture fresh drips, and note where the oil trails originate as soon as the unit stops. Inspect common points: the drain plug and oil pan gasket, the valve cover gasket, filter seals, and the housing around the oil filter. A bright flashlight helps identify tiny pinholes or seepage that might be missed by the naked eye. When you identify a likely source, gently wipe the area clean again and re-run the engine for a short period to confirm the leak’s origin.
Pay attention to the time of day and temperature. Heat expands gaskets and can intensify leaks after a hot run. If the leak changes with engine speed, it may indicate a timing cover or pump seal issue rather than a simple gasket. Documentation of your observations speeds up future diagnostics if you need professional help. Finally, check related fluids (coolant, transmission fluid) to rule out cross-contamination that could complicate the diagnosis.
Preparing the Repair: Tools, Safety, and Setup
Before you begin a fix, assemble the necessary tools and set up a controlled workspace. A draining pan, absorbent pads, rags, and a sealant or gasket set are often required for gasket-related leaks. A torque wrench and a basic socket set help you tighten fasteners to spec, while a flashlight and mirror assist in tight engine bays. Have replacement gaskets or seals on hand—don’t reuse old components that look worn or cracked. If you’re working on a car, consider using ramps or a jack and stands for a stable, level workspace. Always engage the parking brake and disconnect the battery if you’ll access electrical components near the leak area.
The “three-step” preparation—safety first, identifying all leaking components, and cleaning the area—reduces the chance of missing a second leak and makes the repair more reliable. If the oil pan or valve cover area is especially dirty, use a degreaser and a brush to improve visibility. Finally, ensure you have a plan for post-repair disposal of used oil and rags, including sealed containers and local recycling options.
Step-by-Step Overview of a Basic Fix (Non-vehicle Example)
Note: If you’re repairing a vehicle, many steps apply similarly, but consult the service manual for torque specs and sequence. This outline focuses on a straightforward gasket-related fix in household equipment or a simple engine bay repair.
- Shut down and secure the unit; allow it to cool; put a drain pan in place. This prevents hot oil contact and minimizes spills. Tip: Work in a well-ventilated area and keep a bucket handy for disposal.
- Loosen and remove the leaking component (for example, the oil pan drain plug or valve cover screws) just enough to inspect for gasket wear without fully disassembling. This helps verify the source. Tip: Use penetrating oil on stubborn bolts and avoid stripping threads.
- Replace the faulty gasket or seal with a new one of identical size and material; ensure mating surfaces are clean and dry. Re-seal in the correct orientation. Tip: Lightly coat gasket surfaces with a thin layer of non-ploymer sealant if recommended by the manufacturer.
- Reinstall fasteners to the recommended torque in a criss-cross pattern for even sealing; do not overtighten. This prevents warping or crushing of the gasket. Tip: Use a torque wrench if the service manual provides spec values.
- Refill any lost oil to the proper level with the recommended grade; check for leaks with the unit running briefly. Wipe away drips and re-check after a minute. Tip: Have absorbent materials ready for any residual drips.
- Perform a clean-up pass: collect all used oil, wipe the area, and dispose of rags and containers per local regulations. This step reduces environmental impact and improves safety. Tip: Place oily waste in a sealed container labeled for recycling or disposal.
estimatedTime":"45-120 minutes"},
toolsMaterials
Tools & Materials
- Oil drain pan(Large, sturdy pan appropriate for catching hot oil without spillover)
- Absorbent pads or kitty litter(Used to contain spills before cleanup)
- Shop towels/rags(Lint-free when possible; dispose after use)
- Gloves (nitrile or mechanics)(Protect hands from hot oil and solvents)
- Safety glasses(Eye protection against splashes)
- Flashlight(Inspect tight spaces and dark engine bays)
- Torque wrench(Helpful for re-tightening to spec if repairing a gasket or bolt in a car; optional for small equipment)
- Socket set and ratchets(For removing bolts and fasteners around the leak area)
- Replacement gaskets or seals(Exact part match for the leaking component (pan gasket, valve cover gasket, etc.))
- Oil-compatible sealant or RTV(As recommended by manufacturer; do not exceed amount)
- Replacement oil(If oil was lost during repair, refill to proper level with the recommended grade)
- Jack and stands or ramps(Only if you need to access a raised area; ensure stability)
Steps
Estimated time: 45-120 minutes
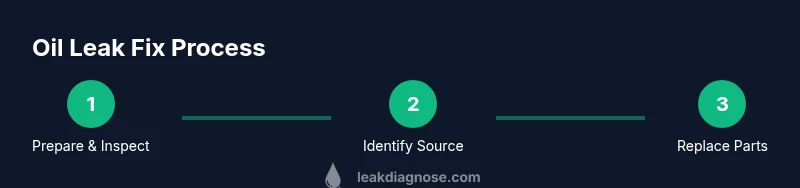
- 1
Prepare workspace and safety gear
Clear the area, set the drain pan, and don PPE. Ensure you have absorbents ready and a plan for oil disposal. This reduces risk and keeps the repair orderly.
Tip: Double-check that the vehicle/device is powered off and cooled before touching any components. - 2
Identify the leak source
Clean the suspected area, run the engine or device briefly, and observe where oil originates. Use a flashlight to inspect hard-to-see spots. Confirm the exact origin before disassembling.
Tip: If unsure, narrow down to the closest likely point (drain plug, filter housing, or valve cover). - 3
Remove the leaking component
Loosen and remove the component associated with the suspected leak, such as a drain plug or cover. Do not force bolts; apply penetrating oil if threads are stuck.
Tip: Keep track of fasteners and their locations; mixed hardware can cause incorrect reassembly. - 4
Replace gasket or seals
Install a new gasket or seal in the corresponding location. Clean mating surfaces thoroughly and ensure all surfaces are dry before reassembly.
Tip: Check that the gasket sits evenly and isn’t twisted or pinched. - 5
Reassemble and tighten to spec
Reinstall the component and tighten bolts in a criss-cross pattern to the manufacturer’s torque specification. If you don’t have a spec, tighten evenly until snug and test gently.
Tip: Do not overtighten; overtightening can crack or warp components. - 6
Refill oil and test
Top off oil to the proper level with the recommended grade. Start the engine briefly and observe for drips. Recheck after a few minutes of operation.
Tip: Monitor for a steady leak; a small initial drip is common but should stop after proper seating of gaskets. - 7
Cleanup and disposal
Wipe all spills, collect used oil in a sealed container, and recycle according to local guidelines. Safely dispose of oily rags and empty containers.
Tip: Label containers for recycling or hazardous waste if required by local rules.
Questions & Answers
What are the most common sources of an oil leak in a vehicle or home equipment?
Most leaks originate from gaskets, seals, drain plugs, or filter housings. Start by inspecting the oil pan gasket, valve cover gasket, and the drain plug. A clean surface helps you see fresh drips and pinpoint origins.
Common sources are gaskets and seals around the oil pan and filter area. Start by checking the drain plug and valve cover gasket.
Can I fix an oil leak myself, or should I hire a professional?
Many minor leaks can be addressed by replacing gaskets or tightening connections with the right tools. If you’re unsure about torque specs, safety risks, or the location of a critical seal, consult a professional.
You can fix simple leaks yourself, but don’t hesitate to get a pro if you’re unsure about torque or safety.
Is it safe to drive with an oil leak?
Driving with an active oil leak can cause engine damage and fire risk. If you notice a leak, avoid extended driving and arrange a repair as soon as possible.
No, don’t drive long with a leak. Get the repair done or towed to a shop.
How should I dispose of used oil and oily rags?
Store used oil in a sealed container and take it to an approved recycling or hazardous waste facility. Oily rags should be placed in a metal container with a lid and disposed of per local regulations.
Recycle used oil at authorized centers; seal oily rags in a metal container and follow local rules.
What signs indicate a failing gasket or seal beyond simple tightening?
Progressive seepage, fresh drips after shutdown, or oil on unusual surfaces suggest gasket or seal wear. If tightening doesn’t stop the leak, replace the gasket or seal.
If tightening didn’t stop the leak, the seal or gasket is likely worn and should be replaced.
When should I call a mechanic for an oil leak?
If the source is unclear, leaks persist after basic fixes, or you’re uncomfortable with safe handling of automotive components, seek professional help. A mechanic can diagnose and replace hard-to-access seals.
Call a mechanic if you’re unsure, or the leak continues after a basic fix.
Watch Video
Main Points
- Identify the leak source through careful observation and cleaning.
- Use proper PPE and containment to prevent spills and exposure.
- Replace worn seals or gaskets with correct parts and torque to spec.
- Refill oil to the correct level and verify by testing the system.
- Dispose of used oil responsibly to protect the environment.