Why Would a Heater Leak Water? A Practical Troubleshooting Guide
Urgent, practical guide to diagnose and fix a water leak from your heater. Learn common causes, quick checks, safety steps, and when to call a pro. Leak Diagnosis analysis supports practical home repair with clear steps.

Most heater leaks come from a faulty pressure relief valve or a condensate drain line, especially on older units. This quick fix check helps you spot a simple, non-emergency issue and avoid unnecessary replacement. If water keeps dripping after these checks, stop using the heater and call a licensed pro immediately.
What makes a heater leak water? Key sources
Leaks usually come from one of several components or failures. A tank that has rust or corrosion can leak, but more often the source is a valve or fitting that has loosened or worn out over time. In many homes, the first places to inspect are the pressure relief valve (also known as the T&P valve), the drain valve on the bottom of the tank, and the cold-water inlet or hot-water outlet pipes. Condensation from humidity around the heater can look like a leak, but true leaks leave drips or a steady stream. The difference matters because condensation is often a harmless byproduct, while a genuine leak can cause water damage and mold. According to Leak Diagnosis, addressing leaks early reduces damage and prevents wasted energy—the budget-friendly approach for homeowners. If your unit is old or has multiple weak spots, plan for a professional assessment. In this section, you’ll learn to identify the likely source, note the symptoms, and decide whether to attempt a safe fix or call a pro.
Safety first: immediate steps you should take
Leaking heaters require urgent but careful action. Start by turning off power to electric heaters at the breaker, or shut off the gas supply and the thermostat for gas units. Close the cold-water valve to minimize incoming water. Place a bucket or towels under the area to catch drips and avoid electrical hazards. Do not touch exposed electrical wiring or crank open relief valves. If you smell gas, evacuate the area immediately and call emergency services. If the leak continues after these steps, do not operate the heater again until a qualified technician inspects it.
Inspecting the water heater components
Begin with the accessible parts: drain valve, T&P valve and discharge tube, cold-water inlet and hot-water outlet fittings, and nearby connections. Look for visible cracks, corrosion, or loose fittings. Check the anode rod access (if your model has one) and ensure the drain valve is fully closed but not seized. A simple wipe-down can reveal moisture patterns that indicate where the leak originates. Note any puddles, rusty crust, or mineral deposits which signal long-term leakage. In this step, you’re not repairing, just locating the source for an accurate diagnosis.
Diagnose: condensate vs active leak
One common confusion is mistaking condensation for a leak. Condensation should evaporate or dry within a few hours; persistent dampness that reoccurs after heating cycles suggests a true leak. If the water is clear and clean, the source is likely a valve or fitting; if you see rusty water, the tank may be failing. Track when you first notice moisture: after a long heating cycle? After shutting off and cooling? Age of the unit matters. If the relief valve drips briefly after a hot cycle, that can be normal, but continuous drips indicate a fault. Document the symptoms with a photo, note the time of day, and compare with your system’s manual. The goal is to determine whether you can perform a safe fix or you need a replacement.
Common fixes you can perform safely
Some fixes are simple and safe for DIYers with basic hand tools. If the drain valve is leaking slightly, tighten it with a wrench just finger-tight, then re-check after a few hours. If the T&P valve is leaking, it should be replaced with the same model and installed with a discharge tube directed to a safe location. Flush the tank to clear sediment building up at the bottom; this may temporarily reduce leaks and improve efficiency. Replace any worn gaskets or fittings and reseal loose connections with plumber's tape or thread-sealant approved for potable water. Do not attempt to repair a cracked tank; a leaking tank is a major safety risk and requires a professional.
When to call a professional
When you detect a crack in the tank, extensive rust, or a consistent leak from the body of the heater, call a licensed plumber or HVAC technician. If you smell gas, hear hissing, or see visible fire risk, evacuate and contact emergency services. A professional can assess whether a valve replacement, a full rebuild, or a replacement unit is the safest option. If your heater is under warranty, check coverage before paying out-of-pocket.
Maintenance to prevent future leaks
Regular maintenance reduces the chance of leaks. Schedule an annual flush to remove sediment that corrodes the tank, and test the T&P valve to ensure it releases water under pressure. Inspect hoses, fittings, and pressure settings, ensuring your water heater operates at its rated temperature (usually 120°F to 140°F). Install a drainage pan and ensure the area around the heater remains dry. Consider an expansion tank if your plumbing system experiences significant pressure changes. Consistent maintenance extends the life of the unit and minimizes the risk of unexpected leaks.
Condensation vs leak: a quick mental model
Think of condensation as a moisture fog around metal in a humid space—it dries up as the unit cools. A leak is moisture that continues to appear, collects, or runs away from a joint or the tank. Treat any persistent moisture as a potential leak and test different scenarios (cooling down the unit, turning off water) to see if the moisture persists. This mental model helps homeowners avoid misinterpreting a temporary event as a leak.
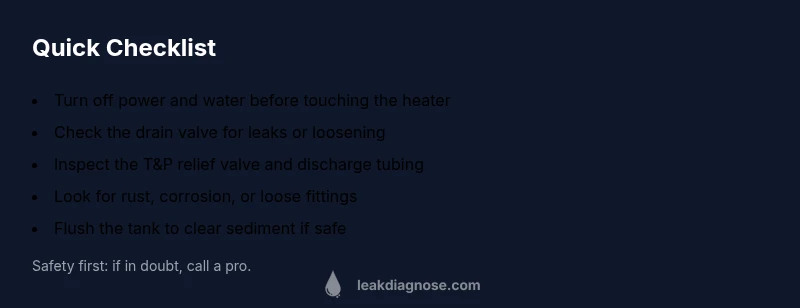
Quick safety checklist and next steps
- Turn off power and water when you suspect a leak
- Close the cold-water supply and place a bucket
- Inspect drain and relief valves, plus nearby fittings
- If unsure, contact a licensed pro and avoid home remedies on a live system
Steps
Estimated time: 45-60 minutes
- 1
Power off and water shutoff
For electric heaters, switch off the breaker and for gas heaters, shut off the gas supply and thermostat. Then close the cold-water valve to stop new water from entering the tank. This minimizes risk while you inspect.
Tip: Always unplug or switch off power first to avoid shock. - 2
Catch and prepare
Place a bucket or towels under the connections and the drain valve. Have a flashlight ready to inspect dark corners. Label any disconnected hoses to avoid mix-ups.
Tip: Take a quick photo of the connections before loosening anything. - 3
Inspect drain and relief valves
Check the bottom drain valve for seepage and ensure the T&P valve and discharge tube are intact and not blocked. Look for rust, mineral buildup, or loose fittings.
Tip: Do not force open a stubborn valve; if in doubt, skip to step 5. - 4
Differentiate source of moisture
Look for dripping versus persistent moisture. Condensation fades as the unit cools; a steady drip suggests a leak at a valve or the tank. Document with photos.
Tip: Note the water color—rusty water signals tank failure. - 5
Apply safe fixes where appropriate
Tighten a loose drain valve by hand or with a wrench (finger-tight; don’t overtighten). Replace a faulty drain or relief valve with a model that matches your unit.
Tip: Never bypass safety valves or patch a corroded tank. - 6
Flush and test safety valves
If safe, perform a controlled flush to clear sediment. Re-test the T&P valve by briefly lifting the test lever if your model has one.
Tip: Only perform a test if you are confident and the area is dry. - 7
Restore power and water
Slowly open the cold-water supply and restore power or gas. Observe for new leaks over the next few hours.
Tip: If leaks recur, stop using the unit and contact a pro immediately. - 8
Document and plan next steps
Record every finding, including photos and the valve model. Decide whether to repair or replace based on age, cost, and safety.
Tip: Budget for possible replacement if the tank is corroded.
Diagnosis: Water leaking from heater
Possible Causes
- highFaulty pressure relief valve
- highLeaking drain valve
- lowCracked tank or corrosion
- mediumLeaking water line or fittings
- lowCondensation from humidity
Fixes
- easyTurn off power and water supply; place bucket to catch drips
- mediumTighten or replace drain valve; replace faulty T&P valve
- easyFlush the tank to remove sediment
- hardCall a licensed plumber or HVAC tech for tank replacement
Questions & Answers
What should I do first if I notice water leaking from my heater?
Turn off power and water supply, place a bucket to catch drips, and assess whether the leak is from a valve or the tank. Do not attempt to repair live electrical components or a cracked tank. If unsure, contact a licensed professional.
First, shut off power and water, then check the valves. If the leak seems serious or you aren’t sure, call a professional.
Can a leaking water heater be repaired?
Many leaks from valves, fittings, or sediment buildup can be repaired or mitigated. If the tank itself is cracked or heavily corroded, replacement is typically required.
Yes, often, if it’s a valve or fitting. A cracked tank usually means replacement.
Is a leaking T&P valve dangerous?
A leaking T&P valve can indicate overpressure or a faulty valve. It’s a safety feature, but persistent leaks require inspection to prevent further damage.
The relief valve is a safety feature; if it leaks continuously, you should have it checked promptly.
How often should you flush a water heater?
Most experts recommend flushing once a year to remove sediment and extend the tank’s life. Some hard-water homes may benefit from more frequent flushing.
Flushing once a year is a good rule of thumb, more often if you have hard water.
What signs indicate you need a replacement rather than a repair?
Frequent leaks, large cracks, extensive corrosion, or an age approaching the unit’s expected life are strong indicators that replacement is wiser than repair.
If the tank is badly corroded or leaking in multiple spots, replacement is usually best.
What affects the cost of repairing a leaking heater?
Costs depend on the leak source, part prices, and labor. Valve replacements are typically cheaper than tank replacement, but every situation varies.
Repair costs vary; valve work is cheaper than a full tank replacement.
Watch Video
Main Points
- Identify the source before acting
- Turn off power and water for safety
- Tighten/replace faulty valves only if safe
- Call a pro for tank cracks or complex leaks
- Prevent leaks with annual maintenance