What to Do If a Water Heater Leaks
Urgent steps to diagnose a leaking water heater, stop damage, and safely fix common issues. Learn power shutoff, water shutoff, and when to call a pro.

A leaking water heater is most often caused by a loose valve, worn fittings, or a failing drain valve. Quick fix: switch off power (breaker for electric, gas shutoff for gas), shut off the cold water supply, and place a bucket under the drain valve to catch drips while you inspect. If leaks persist, contact a professional.
Why a Water Heater Leaks: Common Scenarios
A home water heater can start leaking for several reasons, and the most common are usually simple to address. In many cases the culprit is a loose connection at a valve or a worn-out gasket where pipes meet the tank. Sediment buildup can accelerate corrosion at the tank bottom, causing slow seepage over weeks or months. The tank itself is rarely the first thing to fail in modern residential units, but age and misuse can lead to gradual rusting that produces a leak. When you ask what to do what leaking water heater, begin by recognizing the most likely sources and the safety steps you must take before touching any metal or electrical components. According to Leak Diagnosis, leaks typically originate at fittings or valves rather than the tank itself, which informs how you inspect and repair.
- Inspect the cold-water inlet and hot-water outlet connections for looseness or damaged seals.
- Look at the drain valve and any threaded joints for drips or moisture pooling.
- Check the pressure-relief valve (T&P valve) for signs of leakage or a discharge line that’s wet.
- If you see rust, corrosion, or crust around the tank seam, the tank may be compromised and replacement could be necessary.
If you detect a steady or aggressive leak, do not delay safety steps: power off the unit and limit water exposure to the surrounding area to prevent water damage and mold.
Immediate Safety Steps You Should Take Right Now
Leaking water heaters create both electrical and water hazards. Your first moves should prioritize safety, then diagnosis. If you have an electric unit, switch off the circuit breaker for the heater at the main panel. For gas units, shut off the gas supply valve and then turn off the cold-water supply to the heater. If there’s standing water near electrical outlets or wiring, avoid touching anything wet and evacuate children or pets from the area. Place a bucket or towel under the suspected leak point to monitor flow and protect floors until you can complete the shutoff. If you smell gas or hear hissing near the unit, evacuate and call emergency services. After the power and water are off, you can begin a careful visual inspection. If you’re unsure, pause and call a professional—your safety comes first.
Common Leak Sources in a Water Heater
In residential systems, leaks usually come from fittings or external components rather than the steel tank. Common culprits include the cold-water inlet valve, hot-water outlet valve, drain valve, and the pressure-relief valve, which may discharge if pressure is too high or if the valve is worn. Leaks at the top or sides of the tank often indicate corrosion inside the tank or a failed gasket, while a persistent drip from the drain valve suggests a faulty valve that can sometimes be replaced. Understanding these sources helps you decide whether you can safely tighten a fitting, replace a valve, or need a full tank replacement. Remember: never assume the problem is the tank itself without checking fittings first.
Diagnostic Flow: From Symptom to Solution
Diagnosing a leaking water heater follows a logical path: confirm the leak source, rule out simple fixes, then address more complex issues. Start by verifying power and water shutoffs, then inspect each potential source in a systematic order: (1) drain valve, (2) cold-water inlet and hot-water outlet fittings, (3) T&P relief valve and discharge line, (4) tank seams or corrosion. If moisture is present near the drain valve, try tightening the valve fist; if drips persist, replace the valve. For leaks at fittings, ensure threads are clean and gaskets are intact. If the leak appears at the tank seam or rust is visible, plan for tank replacement. If you’re unsure at any step, stop and call a professional. Leak Diagnosis highlights that quick, careful checks keep damage minimal and guide appropriate action.
Step-by-Step Fixes for the Most Common Causes
- Tighten loose connections: With power off, gently tighten the cold-water inlet and hot-water outlet fittings using a wrench. Check for moisture and re-tighten if necessary, taking care not to over-tighten and strip threads. Tip: replace worn gaskets as you tighten. 2) Replace the drain valve: If the drain valve leaks or remains damp after tightening, shut off water, drain the tank portion below the valve, and replace the valve with a compatible unit. 3) Inspect the T&P valve: If you see discharge, do not block it. If the valve is old or fails to seal after testing, replace it and ensure the discharge line runs to a safe location. 4) Assess the tank: If you observe corrosion on the tank body or a persistent leak near the seam, replacement is usually the safest long-term fix. 5) Refill and test: Reconnect power and water, restore pressure gradually, and monitor for fresh leaks. 6) When to replace: If leaks recur or you notice frequent valve issues, consider replacing the unit rather than continuing repairs. 7) Safety reminder: If you’re uncomfortable performing any step or detect a gas smell, stop and call a professional immediately.
Maintenance to Prevent Future Leaks
Regular maintenance reduces leak risk. Flush the tank at least once a year to remove sediment that accelerates corrosion. Inspect valves and fittings annually and replace any that show wear or corrosion. Use a pressure regulator or check the home’s incoming water pressure to avoid over-stressing the tank. If you notice mineral buildup near valves, remove scale with a manufacturer-approved cleaner. Consider installing a leak detector near the heater to catch drips early and prevent hidden water damage. A proactive maintenance plan helps extend the life of your water heater and minimize costly repairs.
When to Replace vs Repair: Making the Right Call
If the tank shows significant corrosion, rust around the seam, or leaks persist after repairing loose fittings and valves, replacement is the prudent choice. The typical lifespan of a residential water heater varies, and repeated leaks are often a sign that the unit is nearing the end of its usable life. Evaluating age, repair history, and energy efficiency can guide the decision. In some cases, upgrading to a more efficient model with a longer warranty can save money over time, even if upfront costs are higher. If you’re unsure, consult with a licensed plumber or appliance technician for a professional assessment.
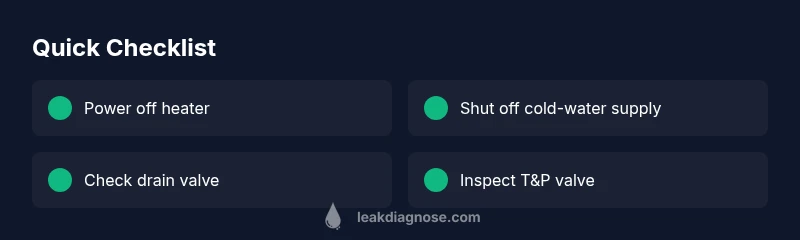
Quick Reference Safety Checklist Before You Work
- Power off at the breaker or gas supply before touching the heater.
- Shut off the cold-water supply to the heater.
- Use a bucket or towels to catch drips and keep floors dry.
- Do a slow, measured inspection; don’t pry at fittings or pipe joints.
- If you smell gas, evacuate and call emergency services.
- If you feel unsure about any step, stop and call a pro.
Steps
Estimated time: 60-90 minutes
- 1
Assess safety and identify leak source
Power off the heater and shut off the cold-water supply. Visually inspect the most likely points: drain valve, inlet/outlet connections, and T&P valve. Note where moisture accumulates to guide your next move.
Tip: Take photos before disassembly for reference. - 2
Isolate the water and drain small portion
If you can safely access the drain valve, place a bucket and open the valve to observe flow. Do not drain the entire tank unless you’re prepared to handle large water volumes.
Tip: Only drain when you know the drain valve is working. - 3
Tighten or reseal fittings
Gently tighten the cold-water inlet and hot-water outlet fittings with a wrench. Check for moisture after tightening and apply new gaskets if seals are worn.
Tip: Avoid over-tightening that could strip threads. - 4
Test the drain valve replacement
If the drain valve leaks after tightening, replace it with a compatible valve following the manufacturer’s instructions. Refill the tank carefully and watch for leaks.
Tip: Use a new washer or gasket with the new valve. - 5
Inspect and test the T&P valve
Ensure the discharge line is clear and verify that the valve seals after a gentle test. Replace if the valve discharges spontaneously or sticks.
Tip: Do not cap or block the discharge outlet. - 6
Decide on the next step
If leaks persist at the tank seam or you notice severe corrosion, plan for replacement. If it’s an older unit with repeated leaks, replacement is often more cost-effective in the long run.
Tip: Consult a professional if you’re uncertain.
Diagnosis: Water heater shows a leak from top, side, drain valve, or piping
Possible Causes
- highLoose or damaged valve connections (inlet/outlet/drain)
- mediumWorn drain valve or faulty drain system
- lowLeak at tank seam due to corrosion or age
Fixes
- easyTighten or reseal loose valve connections (power off first)
- easyReplace drain valve or install a new compression fitting
- mediumReplace T&P valve if discharging abnormally or install new valve and inspect discharge path
- hardReplace the water heater if tank corrosion is evident or leaks continue after fixes
Questions & Answers
What should I do first if I notice a leak from my water heater?
First, ensure safety by turning off power to the heater and closing the cold-water supply. Place a bucket to catch drips and inspect the most common leak points—drain valve, inlet/outlet fittings, and T&P valve. If the leak persists, proceed to the diagnostic flow or call a professional.
Turn off power and water, catch the drip, and inspect common leak points. If it keeps leaking, call a professional.
How do I shut off the water supply to the heater?
Locate the cold-water shutoff valve on the pipe feeding the tank and turn it clockwise until snug. If you can’t reach it safely, shut off the main water supply to the house and plan repairs when service is interrupted.
Find the cold-water valve on the heater line and turn it clockwise to close. If hard to reach, shut off the main water supply.
When should I replace a water heater rather than repair it?
If the tank shows significant corrosion, the leak recurs after multiple repairs, or the unit is older and energy-inefficient, replacement is usually the better option. Consider long-term costs and safety when deciding.
If the tank is corroded or leaks keep returning, replacement is often the safer, more cost-effective choice in the long run.
Is a leaking T&P relief valve dangerous?
A leaking T&P valve indicates pressure is too high or the valve is failing. It can be dangerous if the discharge line is blocked or near an electrical source. Do not ignore it—address the valve and consult a pro if needed.
A leaking T&P valve means high pressure or a bad valve—don’t ignore it; fix or replace as needed.
Can a leaking drain valve be fixed without draining the whole tank?
Often yes. Shutting off water, draining a small amount, and replacing the drain valve can stop leaks without full tank drainage. If the valve is corroded, replacement is recommended.
Yes, you can replace the drain valve and test without fully draining the tank. If corroded, replace it.
What maintenance helps prevent future leaks?
Regular annual flushing to remove sediment, inspecting and replacing worn fittings, and monitoring the T&P valve help prevent leaks. Consider installing a leak detector near the heater for early alerts.
Flush annually, check fittings, replace worn parts, and use a leak detector for early warnings.
Watch Video
Main Points
- Shut off power and water immediately when a leak is spotted.
- Most leaks come from fittings or valves, not the tank itself.
- Do not ignore persistent leaks—water damage can escalate quickly.
- Call a professional if you’re unsure or the leak remains after fixes.