Can a Leaking Water Heater Be Fixed? A Practical Guide
Urgent, practical troubleshooting guide on whether a leaking water heater can be fixed, diagnosing common causes, safe steps, and when to replace. Learn with Leak Diagnosis for homeowners.

If your water heater is leaking, the most likely culprit is a loose drain valve or a corroded tank. In many homes, securing the drain valve or replacing a faulty pressure-relief valve stops the leak; however, a crack in the tank requires replacement. For safety, shut off power and water first.
Why fixing a leaking water heater matters (can leaking water heater be fixed)
A water heater leak is more than a wet floor or a damp basement. It can signal hidden damage that leads to higher utility bills, mold growth, and, in extreme cases, scalding hazards. The guiding question can leaking water heater be fixed is common among homeowners who notice damp areas near the unit or hear a slow drip. According to Leak Diagnosis, addressing leaks early reduces secondary damage and can extend the life of your appliance. Start with safety: shut off power at the breaker for electric models or the gas control for gas models, and close the cold-water supply to stop new water from entering the tank. With the water stopped, you’ll have a clear view of where the leak originates and what kind of fix is appropriate.
Quick safety check before you touch anything
- If you smell gas or hear a hissing sound, evacuate and call emergency services.
- Wear protective gloves and eye protection.
- Do not attempt repairs on a unit that’s submerged in standing water.
How to distinguish between valve leaks and tank leaks
Leaks from the drain valve, TPR valve, or pipe fittings are far easier to fix than a leak from the metal tank itself. Look for dripping near metal joints, valve threads, or where pipes enter the unit. A small, steady drip from a valve is common and often fixable with a simple tightening or replacement. Drips from the bottom of the tank usually indicate corrosion and a more serious condition that likely requires replacement.
What you’ll typically need for a safe DIY inspection
- Adjustable wrench, pliers, and a bucket; - Teflon tape or thread sealant for fittings; - new drain valve or TPR valve if needed; - safety goggles and gloves; - flashlight for tight spaces. Having these on hand reduces delays and keeps the process orderly.
How age and sediment affect leaks
Older units accumulate sediment at the bottom of the tank, which can cause corrosion and pinhole leaks. Sediment buildup also impedes heat transfer, making the unit work harder and increasing wear on internal components. Regular flushing helps reduce sediment and can prevent leaks from escalating. If your unit is approaching the end of its typical lifespan, a professional assessment can determine whether replacement is the most cost-effective choice.
Creating a simple action plan
- Stop water and power, 2) Identify the leak source, 3) Decide between tightening, replacing a valve, or replacing the unit, 4) If replacing, plan for a professional installation and leak-test after restoration. This approach minimizes risk and ensures you’re not guessing at the wrong component.
Steps
Estimated time: 30-60 minutes
- 1
Power off and shut water supply
Begin by turning off power to the heater (electric) at the breaker or the gas control valve for gas units. Then close the main cold-water supply valve to stop new water from entering the tank. This prevents further leaking while you inspect the unit.
Tip: If you’re unsure of the breaker location, label and test each switch before handling any wires. - 2
Locate the leak source
Carefully dry the exterior and monitor where water is dripping. Check the drain valve, any visible fittings, and the TPR valve. A flashlight can help you spot condensation versus a steady leak. Mark the source with a non-permanent marker for reference.
Tip: Use a cloth to wipe the valve threads; a dry interface helps you see the leak clearly. - 3
Address a drain valve leak
If the leak is at the drain valve, lightly tighten the valve shut. If it continues, replace the valve with a new one rated for your unit. After installation, test with a small amount of water and recheck for drips.
Tip: Don’t overtighten; valve threads can strip and cause more leaks. - 4
Test or replace the TPR valve
Lift the test lever on the TPR valve to ensure it operates smoothly. If water spurts out or the valve remains leaky after replacement, the valve is failing and should be replaced using proper fittings and sealant as per the manufacturer’s instructions.
Tip: Only test with a bucket underneath to catch any discharge. - 5
Inspect tank for bottom leaks
If water appears to come from the tank body, this usually means corrosion or a crack. A professional assessment is recommended because repair is rarely feasible and tank replacement is typically necessary.
Tip: If the tank is clearly rusted, plan for replacement rather than patching. - 6
Reassemble, refill, and test
Slowly reopen the cold-water supply and restore power or gas. Check all joints for leaks as the tank fills. Once full, run hot water and recheck the entire system for any remaining drips.
Tip: Keep a bucket handy for any residual discharge during the first cycle.
Diagnosis: Water heater leaking from the bottom, valve, or pipe connections
Possible Causes
- highLoose or faulty drain valve
- highWorn or leaky temperature-pressure relief (TPR) valve
- mediumCorrosion or micro-cracks in the tank wall
- lowLoose inlet/outlet connections or supply lines
Fixes
- easyTighten or reseat the drain valve; replace if threads or seal are damaged
- easyTest and replace the TPR valve if it’s leaking or sticking
- hardInspect for tank corrosion or cracks; consider professional assessment and tank replacement
- easyTighten or replace loose inlet/outlet fittings and supply lines
Questions & Answers
Can a leaking water heater be fixed without professional help?
Yes, for simple valve leaks and minor fittings, a careful homeowner can often fix the issue. If the tank shows signs of corrosion or if the leak persists after valve work, call a professional.
Yes, you can fix simple valve leaks yourself, but persistent tank leaks require a pro.
What is the most common cause of a water heater leak?
Most leaks originate from the drain valve or the temperature-pressure relief valve. Tank leaks due to corrosion are less common but indicate aging equipment.
Most leaks come from the drain valve or TPR valve, not the tank itself.
Is it safe to repair a gas water heater leak at home?
Gas heaters require caution. If you suspect a gas leak, shut off the gas supply and evacuate. Do not operate electrical switches or lights until you’re sure the area is safe; contact your gas utility or a licensed technician.
Gas leaks are dangerous. Shut off gas and call a pro if you suspect a leak.
How often should I drain and flush a water heater?
Drain and flush the tank at least once a year or per the manufacturer’s recommendations to reduce sediment buildup and prolong service life.
Drain your tank yearly to minimize sediment and keep it efficient.
When should I replace my water heater instead of repairing?
If the tank is severely rusted, leaks from the body, or the unit is beyond its expected lifespan, replacement is usually the most cost-effective option.
If the tank is badly corroded or old, replacement is best.
What maintenance helps prevent leaks in the future?
Regularly flush the tank, inspect and tighten fittings, replace aging valves, install a leak detector, and have a pro inspect the anode rod and overall system.
Regular maintenance and checks prevent many leaks from appearing.
What are the signs of a failing water heater beyond leaks?
Strange noises, fluctuating water temperature, reduced hot water supply, and rising energy bills can indicate aging components or sediment buildup.
Listen for banging noises and watch for temperature changes as warning signs.
Watch Video
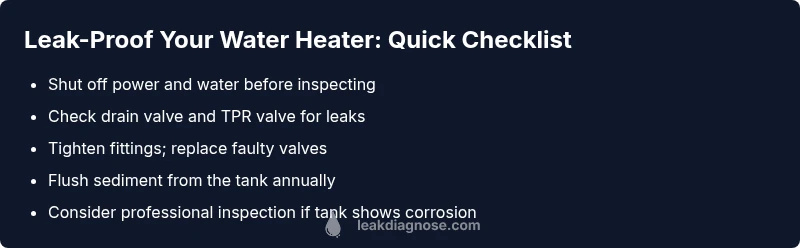
Main Points
- Identify the source before touching any components
- Many leaks come from valves, not the tank
- Shut off power and water before any work
- Sediment buildup can accelerate leaks and reduce efficiency
- Replace a tank with significant corrosion rather than patching