Water Leak Fridge Troubleshooting: Quick Guide for Home
Learn quick, safe checks to stop a water leak from your fridge and prevent costly water damage. This Leak Diagnosis guide covers common causes, practical DIY fixes, and when to call a pro for reliable, long-lasting results.

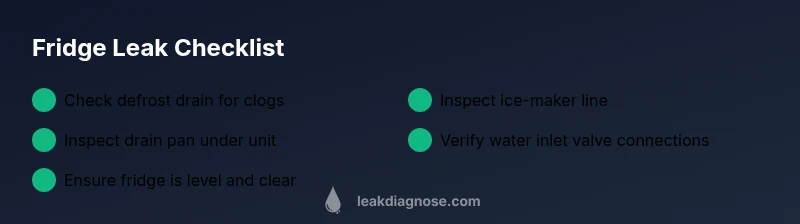
Most fridge leaks come from a clogged defrost drain or the ice-maker line. Unplug the fridge, empty the drain tray, then flush the defrost drain with hot water and a thin probe or wire. Inspect water lines and the drain pan; call a pro if leaks persist.
Understanding fridge leaks and why they happen
A fridge that leaks water into your kitchen floor is more than a nuisance—it's a sign the appliance's drainage or supply system is not performing as it should. In many homes, the phrase water leak fridge describes a burst of fluid that appears near the bottom or back of the unit. The good news: most leaks are manageable with safe, methodical steps. According to Leak Diagnosis, the root causes often start small: a clogged defrost drain, a loose or kinked water line, or a shallow drainage pan that can't catch condensate. By understanding how a modern refrigerator handles ice making, defrosting, and moisture control, homeowners can distinguish between quick fixes and problems that require professional service. This guide will walk you through common sources, safe checks, and practical fixes you can perform without specialized tools. We'll also cover prevention strategies to minimize future leaks and water damage.
Immediate safety and cleanup steps
Safety first: unplug the fridge and, if possible, shut off the water supply to the appliance. Water near electrical components is a shock risk, so wear rubber-soled shoes and avoid standing water around outlets. Start by drying up the visible spill with towels, then place a towel or shallow pan to catch any ongoing drips while you inspect. If you detect signs of wiring damage or sparking, move away and call a licensed electrician immediately. Once you confirm the area is safe, document the scene with a quick photo for service records, and proceed with non-electrical checks described later. Only continue if you can work dry and safe; do not attempt repairs if the unit is still leaking onto moisture-prone surfaces.
Common leak sources in most households
The most frequent culprits are: 1) a clogged defrost drain causing condensate to overflow into the fridge interior and onto the floor; 2) a loose, cracked, or frozen ice-maker supply line; 3) a damaged or mispositioned drain pan under the fridge; 4) a leaky water inlet valve at the back of the unit; 5) a kinked or blocked drain hose that prevents overflow; 6) improper leveling leading to pooling around the base. Understanding these sources helps prioritize checks and avoid unnecessary disassembly.
How to inspect the drain pan and drip trays
Many fridges have a shallow drain pan beneath the compressor that catches melted ice water. If the pan is cracked or full, leaks can occur. Look for cracks, rust, or algae growth indicating standing water. Remove the pan carefully, rinse with warm soapy water, and dry thoroughly before reinstalling. While the pan is removed, check the drip tray and any flexible hoses for cracks or loose fittings. If you notice condensation buildup on the bottom of the fridge shell, it can indicate a drain or seal issue rather than a pan problem.
Quick checks without tools
These checks require no tools and are often enough to stop a leak quickly. Inspect the door gaskets for cracks or gaps; a poor seal can cause frost and condensation that looks like a leak. Confirm the fridge is level using a simple bubble level or a straight edge; an out-of-level unit can cause water to pool at the base. Check the freezer and fridge for ice buildup around the evaporator area, which can indicate a clogged defrost drain. Finally, examine the ice-maker line and water inlet valve connections for loose fittings or kinks. Tighten or reseat as needed, but power off first to avoid shocks.
Diagnostic flow: symptom → diagnosis → solution
Symptom: Water pooling at the bottom of the fridge or on the kitchen floor after a cycle. Diagnosis: Most likely a clogged defrost drain or a leaking ice-maker line. Solution: Clear the defrost drain with warm water and a thin probe, inspect the ice-maker supply line, and reseat fittings. If the leak persists, move to the next likely source (drain pan, valve, or hose) and perform targeted repairs. For persistent leaks, consult a professional to avoid electrical or refrigerant hazards.
Step-by-step fix for the most common cause: clogged defrost drain
- Safety first: unplug the fridge and remove any nearby standing water. 2) Locate the defrost drain—usually a small tube or channel at the back or bottom of the freezer compartment. 3) Flush the drain with hot water and a mild solution, letting it drain completely. 4) If a clog remains, use a flexible pipe cleaner or a thin flexible wire to dislodge debris. 5) Refill with a small amount of warm water and ensure the flow is continuous. 6) Reconnect any drain hoses and confirm the evaporator pan is in place. 7) Plug the unit back in and run a test cycle to ensure no leaks. 8) If water returns, skip to professional help. Tip: Do not use strong chemicals that could damage plastic parts.
Maintenance habits to prevent future leaks
Adopt a regular check routine to keep leaks at bay. Clean the defrost drain annually, inspect the water line connections monthly, and replace worn seals or gaskets as needed. Ensure the fridge is level and that there is proper clearance around the back to allow air flow and drainage. Replace or repair cracked drain pans promptly. Keep the area around the fridge dry and free of clutter to prevent mold and water damage from minor leaks.
When to call a professional and what to expect
If basic checks do not resolve the leak, or if you notice refrigerant smells or hissing sounds, a professional should be consulted. A qualified technician can test for defrost drain issues, inspect the ice-maker line, and verify the integrity of the water inlet valve and drain pan. Expect a diagnostic visit with a written estimate, possible part replacement, and a safe, clean repair protocol. The goal is to stop the leak promptly and minimize water damage while preserving cooling efficiency.
Steps
Estimated time: 45-60 minutes
- 1
Power down and prep
Unplug the fridge and, if possible, shut off the water supply. Remove nearby items and place towels to catch drips. This protects you from shocks and keeps the area dry for inspection.
Tip: Have a bucket handy for drips and a camera to document any panel placement. - 2
Move for access
Carefully pull the unit away from the wall to access the back and bottom. Remove any obstructing items and lay down a protective mat. This step makes panels accessible without bending awkwardly.
Tip: Ask a helper to steady the fridge while you work behind it. - 3
Find the defrost drain
Locate the defrost drain tube, typically at the back of the freezer compartment or bottom of the unit. The goal is to follow the tube to the drain pan.
Tip: A flashlight helps; avoid bending or forcing tubes. - 4
Flush the drain
Pour hot (not boiling) water through the drain. Use a bulb syringe or a thin pipe cleaner to coax any blockage through. Let gravity do the work and watch for a clear flow.
Tip: Test with a few drops of water to confirm steady drainage. - 5
Remove and inspect the drain pan
Take out the drain pan, inspect for cracks or buildup, and clean it with warm, soapy water. Dry completely before reinstalling to prevent corrosion or mold.
Tip: If you see cracks, replace the pan rather than patching. - 6
Check hoses and valves
Inspect the ice-maker supply line and water inlet valve connections for leaks or loose clamps. Tighten fittings or replace damaged segments as needed.
Tip: Do not overtighten plastic fittings; hand-tight plus a quarter-turn is usually enough. - 7
Reassemble and test
Reinstall the drain pan, reconnect any hoses, and push the fridge back into place. Plug in and run a test cycle to verify the leak is resolved.
Tip: Place towels around the base to catch any residual drips during testing. - 8
Observe and confirm
Monitor the area for 24–48 hours. If dampness recurs, proceed with more extensive checks or call a professional to avoid further damage.
Tip: Document dates and symptoms for service visits.
Diagnosis: Water pooling at the bottom of the fridge or on the kitchen floor after a cycle
Possible Causes
- highClogged defrost drain causing condensate overflow
- highLeaking ice-maker supply line or water inlet valve
- mediumDamaged drain pan or evaporator tray
- lowKinked or loose drain hose
Fixes
- easyClear defrost drain with warm water and a thin probe; reseat or clean drain pan as needed
- easyInspect and tighten/replace water inlet valve connections and ice-maker line
- easyInspect drain pan for cracks; replace if damaged and ensure proper placement
- easyCheck drain hose routing for kinks; straighten and secure
Questions & Answers
What is the most common cause of a fridge leak?
The most frequent causes are a clogged defrost drain or a leaking ice-maker line. These issues can often be addressed with basic checks and cleaning. If leaks persist after clearing these components, further investigation is needed.
The common culprits are a clogged defrost drain or leaky ice-maker line. Clear those first, and if the leak continues, get a professional check.
Can I fix a fridge leak myself?
You can handle simple issues like clearing a clogged drain or tightening loose connections. More complex problems, such as refrigerant leaks or internal component faults, require a licensed technician for safety and proper repair.
You can fix simple leaks yourself, but for refrigerant or complex problems, call a professional.
Is it safe to use the fridge if it's leaking water?
If the leak is just surface water from condensation or a cleared drain, the fridge can be used with caution. If you notice ongoing moisture near electrical components, power it down and call a pro.
If water is still pooling, unplug and call a pro. If it’s just surface moisture after repairs, you can monitor carefully.
What tools do I need to diagnose a leak?
You’ll typically need a flashlight, towels, a bucket, a pipe cleaner or flexible wire, and basic hand tools for tightening fittings. In some cases, you may need more specialized equipment for refrigerant-related issues.
A flashlight, towels, and a pipe cleaner usually do the job for common leaks.
How long does it take to fix a defrost drain?
Clearing a defrost drain and testing typically takes about 30–60 minutes, depending on access and the layout of the drain. More complex issues may require more time or professional service.
Most drain fixes take about half an hour to an hour.
When should I replace the fridge instead of repairing?
If the fridge is old, leaks recur after multiple repairs, or the compressor and refrigerant system show wear, replacement may be more cost-effective than ongoing repairs. A professional can help evaluate total repair vs replace.
If repairs keep failing or the unit is old, replacement is often the better option.
Watch Video
Main Points
- Identify the defrost drain and ice-maker as common leak sources.
- Always prioritize safety—unplug and dry the area first.
- Drain pans and hoses are frequent culprits; inspect for cracks or leaks.
- DIY fixes work for simple issues; persistent leaks require a pro.
- Regular maintenance reduces future leak risk and damage.