Do Ice Makers Leak? A Practical Troubleshooting Guide
Learn how to diagnose and fix ice maker leaks safely. This guide covers common causes, a diagnostic flow, step-by-step repairs, maintenance tips, and when to call a pro.

A leaky ice maker is most often caused by a faulty water inlet valve or a loose supply line. Begin by powering down the unit, shutting off the water supply, and unplugging the fridge. Then inspect the ice-maker connection and drain line; tighten fittings or replace the valve if the leak continues.
What Causes Ice Maker Leaks?
If you're wondering, do ice makers leak, you're not alone. According to Leak Diagnosis, leaks usually start at water inlet connections or the ice-maker valve. The team found that loose fittings, cracked hoses, or worn seals are frequent culprits. Condensation can also masquerade as a leak when the freezer is too warm or humidity is high, making water droplets appear on the floor or around the ice tray. Understanding the exact source helps you target fixes quickly and safely, reducing the risk of water damage to cabinets and floors. In many homes, a small drip becomes a larger puddle if left unchecked. Start with the simplest checks first: ensure the water supply line is snug, inspect the inlet valve for cracks, and verify that the ice maker is properly seated in its mounting bracket. If you’re still uncertain, examine the drain line for clogs and make sure the tray isn’t overflowing due to a stuck float switch.
The Leak Diagnosis team also notes that sudden changes in temperature or humidity can exaggerate condensation around the ice maker. Keeping the freezer at a steady temperature (usually 0°F to -2°C) helps reduce this effect and makes leaks easier to spot when they occur.
Common Leak Points in Ice Makers
Ice maker leaks can originate from several spots. The most frequent is the water supply line and its fittings; even a small twist or misalignment can drip continuously. The water inlet valve is another common source; cracks or wear allow water to seep in between cycles. The ice maker housing seals and gaskets can fail, allowing water to escape during fill. The drain line or tray can become blocked or frozen, causing backflow into the cabinet base. Lastly, condensation around the ice maker can mimic a leak when humidity is high or when the appliance is undersized for the space. Regular inspection of each area helps you catch issues early and prevent bigger water damage down the line.
Safety First: Immediate Steps to Take
If you notice water pooling near the ice maker, act quickly to reduce damage. First, unplug the refrigerator and shut off the main water supply valve to stop more water from entering. Dry up visible moisture to prevent slips and electrical hazards. Move any rugs or electronics away from the area. After you’ve cut power and water, inspect for obvious drips from connections before testing again. If you see a drip from the valve or line, do not operate the ice maker until the component is replaced or resealed. Keep a towel handy to manage any residual moisture and avoid widening the spill.
For safety, never operate the unit with exposed electrical components or on a wet surface. If you must move the fridge, do so carefully to avoid damaging the flooring or the water line. If you cannot identify the source after basic checks, proceed to a more controlled diagnostic flow before attempting deeper disassembly.
Tools and Materials You Might Need
- Adjustable wrench and needle-nose pliers
- Flashlight for better visibility in cramped under-sink areas
- Towels, bucket, and a absorbent pad for spills
- Replacement water inlet valve assembly (if the valve shows signs of leakage)
- Teflon tape or pipe sealant to ensure tight, watertight connections
- A camera or smartphone to document the setup before you remove parts
- Manufacturer service manual or wiring diagram (if available)
Having these on hand helps you troubleshoot without multiple trips to the hardware store. It also reduces the risk of cross-threading fittings or stripping delicate valve components, which can worsen the leak.
When selecting replacement parts, verify model and serial numbers to ensure compatibility. If you’re unsure about valve compatibility, bring the old valve to the store for a direct comparison.
Diagnostic Flow: From Symptom to Diagnosis
A systematic approach helps pinpoint the leak without unnecessary disassembly. Start with the symptom: is water pooling on the floor, condensation on the ice tray, or water dripping from a crack in the line? Then consider the most likely causes first: loose fittings, a worn valve, or a misaligned ice maker. Confirm by a controlled test: turn off water at the valve and observe whether the leak stops; if it does, the supply line or valve is at fault. If moisture remains, inspect the ice maker assembly and seals. Finally, check the drain line and confirm proper drainage to avoid backflow. This flow reduces risk and gives you concrete steps to verify each component before replacement.
Step-by-Step Repair Guide (Overview)
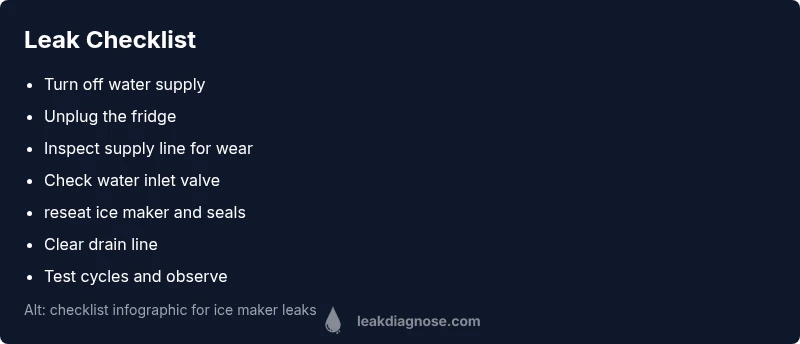
This section provides a high-level roadmap that corresponds to the detailed steps in the full guide. It covers safety checks, valve inspection, line tightening, ice maker reseating, drain clearance, and re-testing. Each step includes a clear action, what to look for, and how to verify the fix. For best results, follow the next block for executable steps.
Prevention and Maintenance to Stop Future Leaks
Regular maintenance reduces the chance of leaks. Inspect the water line for wear every 6–12 months, replace cracked hoses promptly, and reseat the ice maker per manufacturer instructions. Keep the drain clear and ensure the tray isn’t overfilled. Maintain proper freezer humidity and temperature settings to minimize condensation around the ice maker. Consider installing a simple drip tray liner or moisture-absorbing desiccant in the base cabinet to catch minor drips before they become puddles. Routine checks after defrost cycles help you catch slow leaks early.
When to Call a Professional
If you try the steps above and still see moisture, or you’re uncomfortable working near electrical components, it’s time to call a professional. A licensed technician can safely replace the inlet valve, reseal connections, or replace the ice maker assembly. They can also check for hidden damage behind panels and ensure electrical integrity. Have model and valve information ready to speed up service, and note any warranty implications. A pro can often diagnose issues you might not notice, especially with integrated ice makers in high-end refrigerators.
Steps
Estimated time: 60-90 minutes
- 1
Power down and isolate water supply
Unplug the fridge and shut off the main water valve. Confirm there is no power to the unit and that the water supply is fully closed before touching any plumbing or electrical components. This prevents shocks and accidental sprays.
Tip: Take a quick photo of the valve position before you disconnect anything. - 2
Inspect the supply line and fittings
Look for visible signs of wear, cracks, or moisture along the hose and fittings. Gently tighten any loose connections with the appropriate wrench, being careful not to over-torque and strip threads.
Tip: If fittings are corroded or cracked, replace the entire line rather than just tightening. - 3
Check the water inlet valve
Access the valve behind the fridge and inspect for cracks or seepage. If you see moisture around the valve, replace it. Confirm that the valve seals properly when the circuit is re-energized.
Tip: Use teflon tape on male threads only if required by the valve kit; do not over-wrap. - 4
Reseat or replace the ice maker and seals
Remove the ice maker module carefully, reseat it according to the manufacturer’s instructions, and replace any worn gaskets or seals. Ensure the unit sits flush and snug in its mounting bracket.
Tip: Keep track of small screws and gaskets so you don’t lose parts during reassembly. - 5
Clear the drain line and test drainage
Inspect the drain tube for clogs or kinks. Clear any debris and ensure the line slopes toward the drain. Reconnect and run a test cycle to verify drainage.
Tip: Flush the line with a small amount of warm water to clear blockages. - 6
Reassemble, power on, and run cycles
Restore power and water to the unit. Run a few fill cycles with the ice maker empty to observe for leaks. Confirm no water drips from the valve, line, or ice maker housing.
Tip: Monitor closely for 10–15 minutes after the first test cycle. - 7
Inspect area again and clean up
Wipe down any residual moisture. Move the fridge back into place if you had to reposition it, and recheck the area over the next 24 hours for any new signs of leakage.
Tip: Keep a small towel in reach during the first 24 hours after testing. - 8
Escalate if leak persists
If moisture remains after all steps, the issue may be internal or entirely due to a component failure that requires factory parts or professional service.
Tip: Document symptoms and any noises; provide model info to the technician.
Diagnosis: Water pooling near the ice maker or a visible drip during or after the fill cycle
Possible Causes
- highLoose or cracked water supply line fittings
- highFaulty or worn water inlet valve
- mediumMis-seated ice maker or damaged seals/gaskets
- lowBlocked or frozen drain line causing backflow
Fixes
- easyTighten or replace supply line fittings; replace any cracked hoses
- easyReplace the water inlet valve if leaking or not shutting properly
- mediumRe-seat ice maker and replace damaged seals/gaskets
- mediumClear and thaw drain line; ensure proper drainage away from cabinet
Questions & Answers
What is the most common cause of ice maker leaks?
The most common causes are a loose water supply line or a faulty inlet valve. Inspect these first before exploring other components.
Most leaks come from a loose supply line or a faulty inlet valve.
Can a clogged drain cause ice maker leaks?
Yes. A blocked drain can back up water into the tray or cabinet, which may appear as a leak.
A clogged drain can back up water and look like a leak.
Is it safe to repair an ice maker leak myself?
You can handle many fixes if you follow proper safety steps: shut off power and water, and replace only components you’re comfortable with.
It can be safe if you shut off power and water and replace only what you’re comfortable with.
How long do repairs typically take?
Most fixes take under an hour, longer if valve replacement or special parts are needed.
Most repairs take under an hour unless a valve needs replacing.
When should I replace the ice maker entirely?
If leaks persist after valve and seal replacements, or the unit is older and inefficient, replacement may be best.
If leaks persist after replacements, consider replacing the ice maker.
Do leaks indicate water damage in the cabinet?
Prolonged leaks can cause water damage; monitor for staining or mold in surrounding cabinetry and vent areas.
Ongoing leaks can cause water damage, so watch the cabinet and walls.
What maintenance reduces future leaks?
Regularly inspect lines and seals, thaw frozen lines, and clean the drainage path to prevent backups.
Regular inspection and cleaning helps prevent leaks from developing.
Watch Video
Main Points
- Identify the leak source before disassembling.
- Shut off water and power before work.
- Replace faulty valve or seals to stop the leak.
- Prevent future leaks with regular maintenance.