Fridge Water Line Leak: Practical Troubleshooting Guide
Learn fast, practical steps to diagnose and fix a fridge water line leak. Safety tips, diagnostic flow, step-by-step fixes, and prevention to protect your kitchen from water damage.

Most fridge water line leaks stem from a loose connection or a cracked supply tube. Quick fix: 1) shut off the home water valve and unplug the fridge, 2) inspect the inlet valve and tubing for cracks, kinks, or loose fittings, and 3) tighten connections or replace damaged parts before testing.
What causes a fridge water line leak
A fridge water line leak typically happens where a supply line, inlet valve, or connector fails. The most common culprits are loose fittings, cracked plastic tubing, or worn-out O-rings. Over time, vibrations from the compressor or freezing cycles can loosen joints and create drips. The Leak Diagnosis team emphasizes that many leaks originate at simple joints rather than hidden appliance parts, so a careful inspection of the line, fittings, and valve is often enough to stop the water damage fast. This section helps you distinguish between a true line leak and incidental moisture from recent maintenance or a spill that needs cleanup rather than repair.
Key takeaway: focus on connections first, then tubing condition before replacing major components.
Safety first: immediate actions
Before you touch any fridge components, prioritize safety. Power down the fridge by unplugging it, and if you can, shut off the main water supply to stop new water flow. Place towels or a shallow container to catch existing drips, especially if the leak is near the valve or behind the unit. Avoid using hot water or chemical cleaners that could damage plastic tubing or corrode fittings. If you notice exposed copper tubing, handle with care to avoid kinks or cuts. According to Leak Diagnosis, keeping the work area dry and safe reduces the risk of slips and electrical hazards during diagnosis and repair.
What you’ll do next: identify the exact leak origin, then choose a repair path that fits your skill level.
Inspect the ice maker and water valve connections
Many fridge leaks originate at the ice maker supply line or the inlet valve. Start by locating the shutoff valve (usually under the sink or behind a front kick panel) and the flexible supply tube running to the fridge. Look for loose clamps, cracked tubing, or dark staining around the fittings. If the valve feels stiff or the tubing shows signs of wear, plan to replace the affected parts. Take photos before disassembly to aid reassembly and to ensure you reconnect in the correct orientation. A careful, documented approach helps you avoid repeating the fix.
Tip: wear eye protection when tightening metal fittings, and hand-tighten only to avoid stripping threads.
Common leak points inside a fridge
Inside a refrigerator, leaks can come from several sources. The water inlet valve at the back is a frequent culprit, especially if it shows corrosion or mineral buildup. The supply tubing itself can crack or kink where it bends behind the unit. Connection clamps can loosen over time due to vibrations. Finally, a poorly sealed defrost drain or a misrouted drain line can cause water to pool near the base or drip onto electrical components. Understanding these spots helps you perform a targeted inspection rather than a blind search.
To identify precise origin, observe where water pools during operation, compare with your ice maker status, and gently wiggle the tubing and valve area to see if water appears at specific joints.
Diagnostic flow: symptom → diagnosis → solution
- Symptom: damp area or pooling water near the fridge. 2) Likely cause: loose or cracked supply line, worn valve seals, or a misaligned tubing. 3) Action: tighten fittings, replace worn parts, ensure proper routing. 4) Verify: turn on water slowly, observe for drips, and wipe area dry to confirm no further leaks. This flow helps you avoid over-replacing parts and focuses on the most common failure points.
Real-world tip: if you see mineral buildup on a metal valve, consider replacing that valve rather than just cleaning it. Minor deposits can hide bigger leaks over time.
Step-by-step fixes for the most common cause
- Gather tools: adjustable wrench, replacing tubing, clamp pliers, towels, and a bucket. 2) Shut off water at the main valve and unplug the fridge. 3) Inspect the inlet valve and the supply line for cracks or corrosion; replace if damaged. 4) Reconnect tubing with new clamps, ensuring a snug, leak-free fit. 5) Slowly re-open the water supply and check for leaks at every joint. 6) If leaks persist, recheck valve alignment, consider replacing both valve and tubing. 7) Clean up leaks and run the ice maker to verify proper function. 8) Document replacement dates for future maintenance.
Tip: replace any brittle plastic tubing with more robust supply lines designed for high humidity and cold environments.
Post-fix checks and leak verification
With the system reassembled, perform a controlled pressure test. Start by slowly opening the main water supply while watching each joint for drips. Place a dry towel under the valve and along the tubing for 10–15 minutes to catch any slow drips. If no water appears, run the ice maker for a cycle to confirm there’s no hidden leak. If you observe moisture after testing, re-tighten fittings or replace suspect sections again. The goal is to achieve a clean, dry base and no active moisture around joints.
Reminder: water plus electricity is dangerous—don’t rush the test. If in doubt, stop and consult a professional.
Prevention tips to avoid future leaks
Preventing leaks starts with proper installation and routine inspection. Use the correct size tubing and fittings, avoid over-tightening plastic connectors, and replace aging supply lines every 5–7 years as part of regular maintenance. Keep the area behind the fridge clear to allow visual inspection for early moisture signs. For copper lines, apply a pipe thread sealant rated for cold environments and ensure corrosion protection. A quick monthly check of hose connections can catch leaks before they become emergencies.
When to call a professional and warranty considerations
If you’re uncomfortable handling plumbing connections, or if the leak persists after tightening and replacing obvious parts, it’s time to call a licensed technician. Leaks near electrical components or inside the appliance can risk shock or fire if mishandled. Check your warranty; some manufacturers require professional service for leak-related damages to remain valid. Leak Diagnosis recommends seeking help when you identify deep corrosion, damaged copper lines, or persistent dampness despite repairs.
Steps
Estimated time: 45-75 minutes
- 1
Power down and secure water supply
Unplug the fridge and shut off the main water valve to stop flow. Place towels to catch leaks and protect the floor. This step prevents accidents while you inspect the system.
Tip: Have a bucket handy for any sudden drips. - 2
Locate the inlet valve and supply tube
Follow the tube from the back of the fridge to the shutoff valve. Check for visible damage and looseness at joints.
Tip: Take a photo before removing any fittings for reference. - 3
Inspect for damage and replace if needed
Look for cracks, kinks, or corrosion on tubing and valve. Replace damaged components with compatible parts.
Tip: Use manufacturer-approved parts to ensure proper fit. - 4
Reassemble and secure tubing
Reconnect tubing with fresh clamps, ensuring no twists or kinks. Hand-tighten, then give a quarter-turn with a wrench.
Tip: Avoid overtightening to prevent leaks and damage. - 5
Test the system gradually
Turn the water supply back on slowly and inspect each joint for drips. Keep towels ready to catch any moisture.
Tip: Check both cold and hot lines if present. - 6
Run a cycle and re-check
Activate the ice maker cycle and watch for leaks for 10–15 minutes. Dry the area to confirm there’s no hidden moisture.
Tip: If you see a drip, stop and re-tighten the connection.
Diagnosis: Visible water puddle near fridge, damp base, or ice maker failing
Possible Causes
- highLoose or cracked water supply line or fittings
- mediumKinked or blocked tubing causing slow leaks
- lowInlet valve failure allowing drip water
Fixes
- easyTighten and reseal all connections at the inlet valve and tubing; replace damaged sections
- easyReplace cracked/damaged tubing or worn O-rings; re-seat compression fittings
- mediumIf leaks persist after tightening, inspect valve for internal failure and replace valve
Questions & Answers
Is a fridge water line leak dangerous?
Yes. Water near electrical components can pose shock hazards. Turn off power and water, dry the area, and avoid using the fridge until the leak is fixed.
Water near electrical parts can be dangerous. Turn off power and water, dry the area, and don't use the fridge until it's repaired.
Can I fix this myself or do I need a professional?
Many leaks can be addressed by a confident DIYer by tightening fittings or replacing damaged tubing. If leakage persists after tightening or tubing is corroded, call a professional.
You can usually fix it yourself, but call a professional if leaks persist or lines look corroded.
How long does a fridge water line leak repair take?
Most fixes take about 30–60 minutes, depending on access and part availability.
Most repairs take around 30 to 60 minutes, depending on access and parts.
What parts usually fail in fridge water lines?
Common failures are the supply line, compression fittings, and the inlet valve. Replacing worn parts typically stops leaks.
Most leaks happen at the supply line, fittings, or inlet valve.
Should I disconnect power when working near water?
Yes. Disconnect power before handling water lines and keep the area dry to prevent shock hazards.
Always disconnect power and keep the area dry when working with water lines.
Watch Video
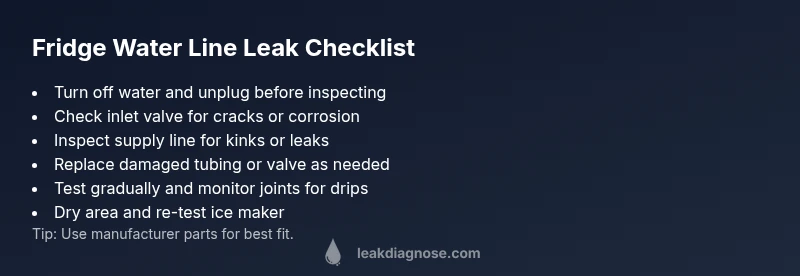
Main Points
- Shut off power and water first.
- Inspect connections before replacing parts.
- Replace damaged tubing and valve as needed.
- Test gradually and monitor for leaks