How to Stop Leak in a Refrigerator: Safe, At-Home Fixes
Step-by-step guide to safely stop a refrigerator leak. Learn when DIY fixes are appropriate, why don't rely on stop-leak products for refrigerant systems, and how to identify parts to replace or service.

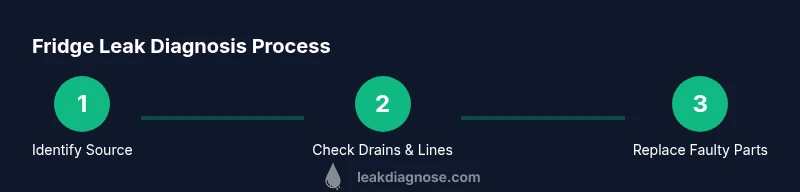
To stop a refrigerator leak, start by identifying the source, cutting power, and collecting water. This guide explains why most commercial stop-leak products are not suitable for refrigerant systems, and provides practical, home-safe fixes or when to call a professional. Follow the steps to determine if the leak is from a water line, drain, or pan, and apply proper fixes.
What Causes Leaks in a Refrigerator?
Leaks in a refrigerator are most often water-related rather than refrigerant-related. Common sources include an overflowing or blocked defrost drain, a loose or damaged water inlet valve feeding the ice maker, a pinhole leak in the clear water line, a disconnected drain pan at the bottom, or a faulty door gasket that allows condensation to escape and drip to the floor. Leaks stemming from the refrigerant circuit are rare and require licensed service due to the hazards of refrigerant exposure and the need for specialized recovery equipment. When assessing a leak, start with the area where you see water first, then trace it to its source using a flashlight and a towel to observe drip patterns. A systematic check prevents unnecessary replacement parts and helps you plan the right fix.
Important note: Do not assume the leak is a refrigerant issue. Refrigerant leaks are hazardous and require trained professionals. The Leak Diagnosis team emphasizes safety and accuracy when diagnosing appliance leaks, as improper repairs can cause additional damage and void warranties.
Tools & Materials
- Utility gloves(Protect hands from sharp edges and dirty water)
- Bucket or tray(Place under leak to catch water)
- Absorbent towels or rags(Mop up spills as you work)
- Adjustable wrench(Loosen/tighten water line fittings)
- Screwdrivers (Phillips & flathead)(Remove panels or clamps as needed)
- Flashlight(Inspect hidden areas and connections)
- Silicone sealant (kitchen-safe, non-expanding)(Temporary seal around joints not involved with refrigerant)
- Rubbing alcohol & clean cloths(Decontaminate surfaces before resealing)
- Replacement water inlet valve or gaskets(Only if diagnosed as faulty)
- Plastic tubing repair kit(For damaged water lines (non-refrigerant))
Steps
Estimated time: 60-90 minutes
- 1
Power down and secure the area
Unplug the refrigerator and move items away from the base to ensure a safe working space. This prevents electrical shock and allows you to work with a dry area. Wait until the surface is dry before you begin any inspection.
Tip: Always start with safety: unplug, then dry the area before touching parts. - 2
Locate the drip and trace the leak
Use a flashlight to follow water trails from the freezer or back panel toward the bottom; identify whether the water comes from the defrost drain, water line, or a pan overflow. Mark the source with a piece of tape for reference.
Tip: Document the path with photos for reference when ordering parts. - 3
Inspect the defrost drain for clogs
A blocked defrost drain is a very common cause of interior leaks. Remove any ice crystals around the drain and flush with warm water or a mild cleaning solution. Ensure the drain tube is clear and the drain pan has space to collect water.
Tip: Do not use sharp objects that could puncture the tube. - 4
Check the water inlet valve and lines
If the leak appears around the ice maker or water dispenser line, inspect the inlet valve and connections for cracks, loose fittings, or worn seals. Tighten fittings if secure, and replace any cracked hoses with manufacturer-approved parts.
Tip: Turn off the water supply before touching hoses. - 5
Assess the drain pan and its support
Look for cracks or slipping of the drain pan under the fridge. If the pan is discolored, cracked, or out of place, reposition or replace it. Clean the pan and surrounding area to prevent mold and odors.
Tip: Ensure the pan is correctly seated to avoid future spills. - 6
Avoid using stop-leak products inside the fridge
Stop-leak products for plumbing systems can damage seals, clog passageways, and harm the refrigerant system. They are not designed for sealed refrigeration units and can create costly failures. If a leak persists, discontinue any sealant attempts and consider professional service.
Tip: Rely on manufacturer-approved parts rather than sealants to maintain warranty and safety. - 7
Replace faulty components as needed
If you identify a faulty inlet valve, damaged hose, or torn gasket, replace the component with an OEM or manufacturer-approved part. Reconnect fittings securely and test by turning the water supply back on (if applicable) and plugging the unit back in.
Tip: Always verify part compatibility with your model number. - 8
Test for leaks and monitor
With power restored, observe the area for any remaining drips for several hours. Use towels to manage residual moisture and ensure proper drainage works as intended. If drips persist, avoid running the unit for extended periods and arrange professional assessment.
Tip: Keep a log of the observed drip pattern to aid diagnosis.
Questions & Answers
Is it safe to use stop-leak products in a refrigerator?
No. Stop-leak products are designed for plumbing and heating systems, not sealed refrigeration circuits. They can clog lines, damage the compressor, and void warranties. Safer alternatives include inspecting and replacing faulty components and consulting a professional when needed.
Stop-leak products aren’t safe for refrigerators and can cause bigger problems. Inspect and replace faulty parts or call a pro for persistent leaks.
How can I tell if the leak is from a water line or the drain?
Trace the water path from the source of the spill. If water comes from the back or bottom and travels along a line, it’s often a water inlet valve or hose issue. If the water appears near the defrost drain or interior bottom, it’s typically a drain or pan problem.
Follow the water trail to see if it’s from a line or the drain. It usually points to the part that needs replacement.
Can I fix a fridge water line myself?
If you’re comfortable with basic appliance repairs and can safely access the back of the fridge, you can tighten fittings or replace a damaged hose using manufacturer-approved parts. If you see cracking, persistent leaks, or you’re unsure about model compatibility, hire a professional.
You can handle simple hose fixes if you know your model and turn off the water first. If in doubt, call a pro.
What should I do if a leak returns after a temporary fix?
Cease DIY fixes that involve sealants and inspect the components thoroughly. A recurring leak usually signals a failing part or incorrect installation. Schedule professional service to avoid further damage.
If leaks come back after a temporary fix, it’s time to call a professional to diagnose the root cause.
Are refrigerant leaks dangerous to handle myself?
Yes. Refrigerant leaks involve pressurized gas and require specialized training and tools. Do not attempt to repair refrigerant lines yourself; this should be handled by a licensed technician.
Refrigerant leaks are dangerous and need a trained technician.
How long should I wait after a fix to test for leaks?
Allow time for the system to stabilize after a fix. Monitor the area for several hours, and again after a full daily cycle to ensure no new leaks appear.
Give it a few hours and then check again after a full cycle to be sure.
Watch Video
Main Points
- Identify the leak source before any repair work.
- Avoid sealants inside refrigeration systems due to toxicity and damage risk.
- Replace faulty water lines, valves, or gaskets only with OEM parts.
- If unsure about refrigerant components, call a licensed technician.