What Is Leaking From My Fridge: Quick Troubleshooting Guide
Urgent fridge leak troubleshooting from Leak Diagnosis. Learn common causes, safe checks, and step-by-step fixes to prevent water damage and food spoilage. Identify source fast and know when to call a pro.

Most fridge leaks come from a blocked defrost drain or a failing water inlet connection. Start with simple checks: inspect the door gasket for a sealing issue, verify the drain tube isn’t clogging, and ensure the drip pan sits correctly. If water pools inside, unplug the fridge and clear the defrost drain with warm water and a flexible wire.
What is leaking from my fridge and why it matters
According to Leak Diagnosis, a refrigerator leak usually signals a drainage or seal problem that can lead to water damage, mold growth, and wasted energy. In many homes, the issue starts as a slow drip from the defrost drain or a misaligned drip pan. Left unaddressed, water can pool behind the kickplate or leak onto the floor, risking electrical components and food spoilage. This section explains how to identify the source, why it happens, and what you should do first to prevent avoidable damage. We’ll cover safe checks you can perform without expensive tools, and when a professional assessment is wise, especially if you notice persistent ice buildup, unusual smells, or signs of refrigerant exposure.
Common fridge leak sources explained
Leaks can originate from several components, and recognizing the pattern helps narrow down the culprit. A blocked defrost drain often causes water to back up and overflow into the fridge or onto the floor. A damaged or misaligned door gasket lets warm air in, creating condensation that pools around the bottom of the unit. The drip pan beneath the fridge should be dry; if it’s full or mispositioned, water may spill out when the compressor runs. Ice maker lines and the water inlet valve can leak if fittings loosen or become clogged. These issues are more common in older models, high-humidity environments, or after a power outage that freezes then melts ice inside the freezer compartment.
First fixes you can try safely
Safety first: unplug the fridge before attempting any inspection that involves water or openings. Start with the simplest checks: inspect the door gasket for visible cracks or gaps and wipe away any condensation around the seals. Look under the unit for a dripping drip pan and ensure it sits flat and is properly seated in its tray. Check the defrost drain tube for kinks or blockages; a small amount of warm water poured into the drain can clear minor clogs. If you find ice buildup near the evaporator, allow the freezer to thaw and recheck the drain. These steps address the most common leak sources without tools.
How to isolate the leak with a diagnostic flow
A systematic approach reduces guesswork. Start by observing where water accumulates when the unit is running: inside the crisper, at the bottom of the fridge, or around the door. Note whether the moisture appears only during the defrost cycle, which points to a blocked defrost drain, or if it’s ongoing, suggesting a leak from the water inlet line. A visible puddle on the floor near the front usually indicates a drain or drip pan issue. Eliminate the extreme possibilities first (door seal, drip pan seating) before inspecting internal components. If the leak continues after these checks, proceed to the more involved steps listed in the Step-by-Step section.
Step-by-step overview for common leak causes
This guide outlines practical repair paths for frequent leaks, with emphasis on safety and feasibility. Follow the steps in order and stop if you encounter a hard-to-handle component or suspect a refrigerant leak—this requires professional service. The most common fixes include cleaning the defrost drain, reseating the drip pan, replacing a faulty water inlet valve, and securing or replacing a damaged door gasket. Each path has a clear progression from quick checks to more involved repairs. Remember to restore power only after completing the checks and testing for leaks.
Prevention tips to stop leaks recurring
After resolving a leak, establish a routine to minimize recurrence. Regularly inspect door seals for wear and cleanliness; clean coils and vents to maintain efficient cooling and reduce ice buildup. Keep the fridge level to prevent drainage issues and ensure the defrost system operates normally. Use the appliance in a typical environment—extremely humid spaces can accelerate condensation. If you have an ice maker, inspect lines and fittings biannually and replace worn components before they fail. Finally, maintain a nearby drip tray and ensure the area beneath the fridge is dry to catch any future drips before they spread.
Steps
Estimated time: 45-90 minutes
- 1
Power down and safety check
Unplug the fridge and move it away from walls to access the back and bottom. Wear protective gloves and ensure the area is dry. This prevents shocks and makes it safe to handle components. Inspect the power cord for damage.
Tip: Always unplug before touching electrical components. - 2
Inspect door seals and drip pan
Close the door and run your hand along the gasket to feel for gaps. Clean any residue that reduces sealing, and verify the drip pan is properly seated and dry. A misaligned pan can leak onto the floor.
Tip: A simple visual pass can save a lot of wear and tear. - 3
Flush the defrost drain
Locate the defrost drain line usually at the back of the freezer or near the bottom of the unit. Use warm water to flush the drain, and gently remove any debris with a thin wire or pipe cleaner. Ensure water flows freely through the line.
Tip: Be patient; a slow trickle can become a full drain when cleared. - 4
Check ice maker and water line
If you have an ice maker, inspect the supply line for kinks and secure fittings. Tighten loose clamps and replace cracked hoses. A minor leak here can flood the area under the fridge.
Tip: Look for dampness around the valve and hoses. - 5
Level the fridge and inspect interior
Ensure the appliance is level to prevent improper drainage. Check for cracks in the interior or around shelves where water could escape and puddle.
Tip: A small adjustment with shims can fix drainage issues. - 6
Test after repairs
Plug the unit back in and wait for it to run a defrost cycle. Observe for several hours to confirm no new leaks appear and that drainage is working.
Tip: Take photos of the setup for future reference. - 7
Monitor and plan maintenance
Set a reminder to inspect seals, drain, and lines every 3–6 months. Regular checks reduce emergency calls and protect food safety.
Tip: Keep a small toolkit handy for quick fixes. - 8
Know when to call a pro
If you detect refrigerant smells, frost buildup that won’t clear, or water pooling persists despite repairs, contact a licensed technician.
Tip: Safety first—refrigerants require professional handling.
Diagnosis: Water pooling inside the fridge or on the floor near the unit
Possible Causes
- highBlocked defrost drain causing backup
- highDamaged or misaligned door gasket allowing warm air and condensation
- mediumDrip pan full or mispositioned beneath fridge
- mediumLeaking water line or valve for ice maker
- lowCracked freezer or fridge interior causing leaks
Fixes
- easyClear the defrost drain with warm water and a flexible wire; check for ice blockages and clear with a soft brush
- easyInspect and reseat or replace the door gasket to ensure a tight seal
- easyEmpty, clean, and properly position the drip pan; ensure there is no obstruction below the unit
- mediumTighten or replace the water inlet valve or ice maker line if a leak is detected
- hardIf you suspect a refrigerant leak or structural crack, call a professional for safety and proper repair
Questions & Answers
What is the most common cause of fridge leaks?
The most common cause is a blocked defrost drain that backs up and leaks water inside the fridge or onto the floor. A worn door gasket can also lead to condensation and drips.
The top culprit is a clogged defrost drain, often paired with a worn door seal. If you see moisture, start there.
Can I repair a leaking fridge myself?
Many fridge leaks can be fixed with simple steps like clearing the defrost drain, reseating the drip pan, or tightening ice maker connections. More complex issues, especially refrigerant leaks, require a licensed technician.
Some leaks you can fix at home, but refrigerant problems need a pro.
Should I unplug the fridge if it’s leaking?
Yes. Unplug the unit before inspecting electrical components or drains to avoid shocks. Reconnect after you’ve completed the checks and have verified there’s no active leak.
Unplug first, then inspect safely.
When should I call a professional?
Call if the leak persists after basic checks, if you suspect refrigerant leaks, or if you encounter frost buildup that won’t clear. A professional assessment protects safety and prevents further damage.
Call a pro if leaks continue or you suspect refrigerant issues.
Can a fridge leak cause mold?
Yes. Persistent moisture can promote mold growth behind panels or under appliances. Addressing leaks quickly helps prevent mold and health risks.
Moisture invites mold; fix the leak fast to stay safe.
Is it costly to repair fridge leaks?
Costs vary by cause and parts. Simple fixes like resealing a door or clearing a drain are inexpensive; more complex issues can require replacements and professional labor.
Costs depend on the problem; simple fixes are usually affordable.
Watch Video
Main Points
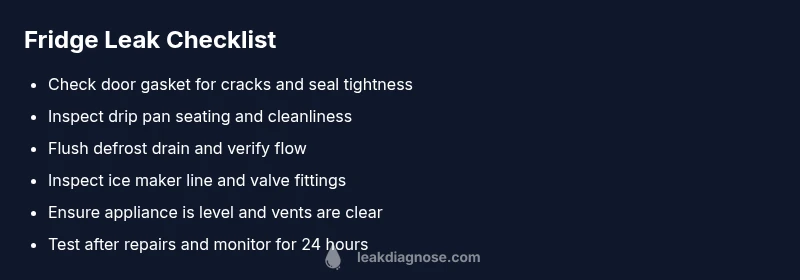
- Identify the source quickly (drain, gasket, pan).
- Unplug before inspections and start with easy fixes.
- Flush defrost drain and reseat drip pan for common leaks.
- Inspect ice maker supply lines for leaks and loosened fittings.
- Call a pro for refrigerant issues or persistent leaks.