Swimming Pool Pump Leak Troubleshooting: Quick Fixes and Long-Term Solutions
An urgent, step-by-step guide to locate and fix a swimming pool pump leak, with safety tips and practical prevention strategies for homeowners.

The most likely cause of a swimming pool pump leak is a worn or mis-seated seal, O-ring, or gasket at the lid, drain plug, or pipe connections. Start with the simplest fixes: tighten loose fittings, clean or replace the O-ring, and inspect gaskets for damage. If the leak persists, follow the diagnostic flow and call a professional if needed.
Why a swimming pool pump leak matters
A pool pump leak is more than a wet patio. It signals that seals, gaskets, or fittings are failing and that energy and water are being wasted. A leaking pump can erode pressure, lower flow, and disrupt circulation, which in turn affects chlorine distribution and water clarity. If the issue goes unchecked, you may experience mineral buildup, increased pump wear, and higher electricity bills. According to Leak Diagnosis, addressing leaks promptly helps homeowners avoid bigger headaches and expensive repairs down the line. The Leak Diagnosis team found that the most common leaks occur at the lid seal, the drain plug, and where hoses connect to the pump. These spots are also the easiest to inspect with minimal disassembly. Start by confirming power is cut at the breaker and that the area around the pump is dry before you touch anything. This first safety step protects you from electric shock and makes later inspection easier. A careful, methodical approach pays off, and you’ll often pinpoint the root cause without costly diagnostic tools.
Safety first: basic precautions before you start
Before you touch any pool equipment, ensure your safety and the safety of others in the area. Turn off the pool pump at the breaker and unplug the unit if possible. Do not work around water with a live electrical source. Wear non-slip footwear and safety glasses if splashing or spray is expected. Keep pets and children away from the work area. If you notice a strong electrical odor, buzzing, or signs of arcing, stop immediately and call a licensed electrician. Leak Diagnosis emphasizes that safety saves more than time; it prevents serious injuries. Once power is isolated, gather the tools you’ll need: flashlight, a clean rag, bucket, replacement O-rings or gaskets, silicone-based lubricant, and a few towels to control water. A dry working area helps you see leaks clearly and reduces the risk of contaminating pool water with debris.
Common causes of pool pump leaks
Leaks around a pool pump usually stem from a handful of reliable trouble spots. The lid seal or O-ring often wears out from regular use, improper seating can leave gaps, and dirt or chemical buildup can prevent a proper seal. Loose hose clamps or threaded fittings on suction and discharge lines can also slowly drip water. A cracked or warped pump housing, especially where the volute meets the motor, is less common but possible in older units. Finally, an overlooked drain plug or pressure gauge fitting can leak if not tightened or replaced after service. Each of these causes has a typical failure path, and many are solvable with minimal tools and a careful reassembly. If you notice any wet spots around the base, damp cabinets, or dripping from the lid, start with the easiest-to-access fittings first and proceed to more involved checks as needed.
Diagnostic flow: symptom → diagnosis → solutions
Symptoms guide your diagnosis. Common signals include water pooling around the pump base, damp electrical components, or a continuous drip from seams and fittings. From there, you can assess likely causes in order of probability. Start with simple steps: inspect the lid O-ring for cracks or deformation, tighten the drain plug or unions, and wipe away residue to observe fresh leaks. If the water continues to escape after basic tightening, inspect the suction and discharge hose connections for wear, tighten clamps, and check for hairline cracks in hoses. For persistent leaks, the culprit is often a worn seal kit or a cracked volute. In many cases, replacing the O-ring and a gasket kit resolves the issue without heavy disassembly. If you still observe leakage after all these steps, consult a professional to inspect electrical components and pump housing integrity. Through this methodical approach, you’ll maximize your chances of pinpointing the root cause while maintaining safety and minimizing downtime.
Step-by-step: fix for the most common cause
- Inspect the lid seal and O-ring for wear or misalignment; remove debris and reseat the groove. 2) Clean the O-ring groove, coat the O-ring with silicone lubricant, and reinsert the seal so it sits evenly. 3) Tighten all accessible unions and the drain plug; use a torque-friendly approach without over-tightening. 4) Check suction and discharge hose clamps; replace damaged hoses or cracked fittings if needed. 5) Run the pump and observe the leak area from a dry vantage point, using a flashlight if necessary. 6) If water still leaks, replace the seal kit or consider replacing the pump housing if damage is evident. Pro tip: keep spare O-rings in a few standard sizes to speed future fixes.
Prevention and maintenance tips to avoid future leaks
Regular maintenance is your best defense. Schedule seasonal inspections of the lid seal and O-rings, replace worn gaskets promptly, and keep fittings clean from chemical residue that can degrade rubber. When tightening connections, do so evenly to prevent threads from cross-threading. Use silicone-based lubricant on O-rings—never petroleum-based products, which can degrade rubber over time. Consider installing a cover or shield for outdoor pumps to protect against direct sun and weather exposure. Document your maintenance dates and check for any pooling under the pump after heavy-use days. A proactive approach saves more time and money than reactive repairs.
When to call a professional and how to choose help
If you cannot locate the source of the leak after the basic inspections, or if you observe electrical signs like overheating, buzzing, or a burning smell near the panel, stop and call a licensed professional. A pool pump leak affecting electrical safety requires a professional diagnosis and repair. When selecting a technician, verify their license, ask about experience with pool equipment, and request a written estimate. Look for a contractor who can provide a seal-kit replacement and pump housing assessment if needed. The Leak Diagnosis team recommends prioritizing safety and relying on certified technicians for large repairs or parts replacement to ensure long-term reliability.
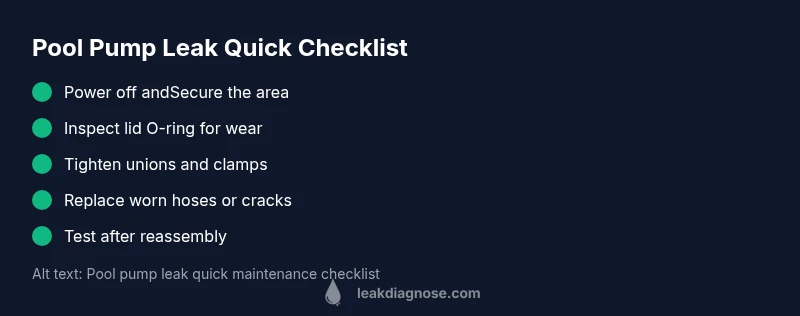
Steps
Estimated time: 60-90 minutes
- 1
Power down and secure the area
Shut off the pump at the breaker and unplug if possible. Ensure the area is dry and free of running water before touching any components. This reduces the risk of electric shock and makes inspection safer.
Tip: Tag the circuit so others don’t re-energize the system while you work. - 2
Inspect the lid and O-ring
Remove the lid and inspect the O-ring for cracks, flattening, or distortion. Clean the groove and O-ring with a damp rag to remove debris that could prevent a proper seal.
Tip: Lubricate the O-ring with a silicone-based lubricant before reseating. - 3
Check suction and discharge connections
Follow the piping to confirm clamps are tight and hoses are not cracked or puss out of their fittings. Replace any worn clamps, and cut back damaged hose ends if necessary.
Tip: Use hose clamps that are the same size as the original for a proper seal. - 4
Tighten or replace the drain plug
If your pump has a drain plug, ensure it’s snug and threads are undamaged. Replace the plug if threads show wear or cross-threading.
Tip: Never over-tighten; apply a steady, even pressure. - 5
Test the system and observe
Restore power and run the pump for several minutes while watching the leak area closely. Look for fresh moisture and confirm the leak source.
Tip: Keep a towel handy to identify the exact drip source as it appears. - 6
Replace gaskets and reseal if needed
If leakage continues, replace the O-ring and seal kit according to the manufacturer’s instructions. Reassemble, test again, and monitor for a day or two.
Tip: Keep spare O-rings in the correct sizes for quick future fixes.
Diagnosis: Visible water around the pump area or damp equipment cabinet
Possible Causes
- highWorn or damaged pump seal or O-ring
- mediumLoose or cracked hose fittings
- lowCracked pump housing (volute) or lid
- lowDrain plug not tightened or damaged threads
Fixes
- easyShut off power and inspect the lid/O-ring, then tighten or replace as needed
- easyTighten all unions and clamps; replace worn hoses or damaged fittings
- hardReplace cracked volute or seal kit, then reseal and test
Questions & Answers
What is the most common cause of a pool pump leak?
Worn or mis-seated seals, O-rings, or gaskets around the lid and fittings are the most frequent culprits. Start with simple inspections before disassembly. Early fixes are often enough to stop the leak.
Most leaks come from worn seals or mis-seated O-rings; check those first before moving to more invasive steps.
How can I tell which component is leaking?
Dry the area, observe for fresh moisture after tightening each connection, and use a clean sheet to detect dripping paths. You can also run dye near suspected joints to visualize the source.
Look for fresh moisture after tightening, and use dye near joints to spot the leak.
Can a cracked pump housing be repaired?
Cracked housings are typically not repairable; replacing the seal kit or the pump is usually necessary. Have a pro assess severe damage. Do not continue to operate a cracked unit.
Cracked housings usually need replacement rather than repair.
Is it safe to run the pump if I see a leak?
No. Stop the pump, shut off power, and inspect. Water near electrical components is dangerous and increases the risk of shock or fire.
Don't run the pump if there's a leak; power down first.
When should I hire a professional?
If leaks persist after basic fixes, if you notice electrical signs or if you’re uncomfortable with electrical components, hire a licensed technician. They can safely diagnose and repair more complex issues.
Call a pro if leaks continue or electrical signs appear.
How can I prevent leaks in the future?
Perform regular inspections of O-rings and seals, replace worn parts on schedule, and keep fittings clean and dry. A short maintenance routine saves time and money.
Regular maintenance helps prevent leaks from happening.
Watch Video
Main Points
- Identify the leak source safely before disassembly
- Tighten and replace worn seals first
- Do not work on energized equipment—safety first
- Regular maintenance prevents costly leaks
- Call a professional if electrical signs appear