How to Diagnose and Fix a Refrigerator Leak: A Homeowner’s Guide
Learn how to diagnose and fix a refrigerator leak quickly and safely. From defrost drains to water lines, follow our step-by-step guide to prevent water damage and mold.

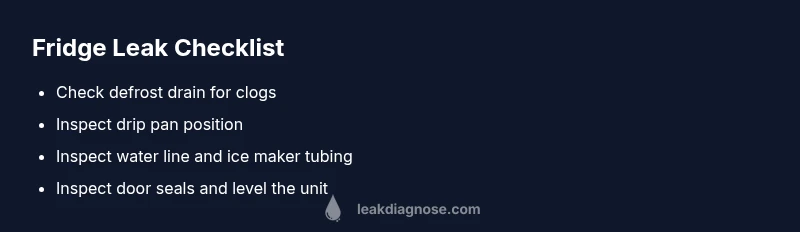
Most refrigerator leaks originate from a blocked defrost drain, a cracked water line, or a loose supply connection. Begin by unplugging the unit, moving it for access, and inspecting the defrost drain tube for clogs. Check the drip pan and water lines for cracks or leaks, reseat fittings, and re-test.
Why refrigerator leaks happen
Water leaks around refrigerators are usually caused by a handful of common issues. A blocked defrost drain is the frequent offender: when the defrost cycle dumps melt water down the drain, a clog can force water to back up and overflow, eventually dripping onto the floor or pooling under the unit. Another widespread cause is a damaged or loose water supply line feeding the ice maker or water dispenser; even a small crack can leak steadily. Also inspect door gaskets and seals—if a door doesn’t seal properly, warm room air condenses inside, creating excess condensation and potential leaks. Misaligned or damaged drip pans, overflowing pans, or a shifted appliance can add to water on the floor. In many homes, a combination of these issues gradually leads to a leak, so start by locating where the water appears to narrow the investigation to the most likely subsystem.
Key signs to note include water pooling on the floor near the front or back of the fridge, frost buildup inside, water trickling from the back panel, or dampness around the ice maker. Identifying the location helps you prioritize checks: floor leaks point to drainage or pan issues; interior leaks suggest condensation or seals; back-panel leaks implicate lines and fittings.
In practice, begin with the simplest possibility: a clogged defrost drain is easy to fix and often resolves the problem without major repairs. If the leak persists after addressing the drain, broaden the search to water lines and seals. This systematic approach reduces guesswork and minimizes the risk of electrical hazards.
Steps
Estimated time: 60-90 minutes
- 1
Power down and gain access
Unplug the refrigerator and pull it away from the wall to give you room to work. If you have a water line, shut off the supply valve behind or under the unit. This prevents any additional water from leaking while you inspect.
Tip: Use towels to protect the floor and a flashlight to spot any hidden damp spots. - 2
Locate the defrost drain and drip pan
Open the freezer panel or rear access panel to find the defrost drain tube and the drain pan underneath the fridge. Look for ice buildup around the drain and signs of a clog or overflow that would push water toward the floor.
Tip: Take photos before you touch anything so you can reassemble correctly. - 3
Clear a clogged defrost drain
If you see a clog, flush the drain with warm (not boiling) water. Use a flexible pipe cleaner or a thin bottle brush to loosen any buildup. Re-flush until water drains freely into the pan. Avoid using harsh chemicals that could corrode the tube.
Tip: Pour slowly to prevent splashing and keep a bucket ready for overflow. - 4
Check the drain pan and door seals
Inspect the drain pan for cracks or misalignment; ensure it sits correctly on the base. Examine door gaskets for gaps or tears and test the seal by closing the door with a dollar bill test (paper should resist slipping out).
Tip: If the pan is cracked, replace it with the correct model for your unit. - 5
Inspect water line and ice maker
Trace the water supply line from the wall valve to the fridge. Look for kinks, cracks, or loose fittings; tighten or replace as needed. If you have an ice maker, inspect tubing and fittings at the rear of the freezer for moisture or stagnation.
Tip: Check the valve behind the fridge for leaks and ensure it’s fully open. - 6
Test the appliance and monitor
Plug the unit back in, wait for it to reach normal operating temperatures, and observe for any leaks. Listen for dripping sounds and check the floor after 24 hours. If you still see water, move to the more complex checks or call a pro.
Tip: Keep a log of findings to share with a technician if needed.
Diagnosis: Water leaks on the floor, interior condensation, or frost buildup suggesting drainage, line, or seal problems.
Possible Causes
- highBlocked defrost drain causing overflow into the drain pan
- mediumLoose, cracked, or disconnected water supply line to ice maker or dispenser
- mediumDamaged door gasket or misaligned door allows warm air and condensation
- lowOverfilled drip pan or improperly positioned components leading to overflow
Fixes
- easyClear the defrost drain by flushing with warm water and a flexible pipe cleaner; recheck the drain pan and back panel for proper placement
- mediumTighten, reseat, or replace the water supply line and fittings; test ice maker tubing for cracks
- easyReplace damaged door gaskets and ensure the fridge is level; adjust feet and door alignment to restore a proper seal
Questions & Answers
What is the most common cause of a refrigerator leak?
The defrost drain is often the culprit when a fridge leaks. A clog can cause water to back up and overflow, usually into the drain pan or onto the floor. Inspect and clear the drain first.
Most fridge leaks come from a clogged defrost drain; clearing it often stops the leak.
Can a leak come from the water line to the ice maker?
Yes. A loose or cracked water supply line or ice maker tubing can leak. Inspect the fittings and replace any damaged sections.
Water lines to the ice maker can leak if loose or cracked; check fittings and replace as needed.
Should I defrost the freezer to fix a leak?
If frost buildup is blocking the defrost drain, a manual defrost can help. Defrosting clears ice that blocks drainage, then you can flush the drain.
Defrosting helps clear ice that blocks drainage and can stop the leak.
When should I call a professional?
If leaks persist after checking the drain, water lines, and gaskets, or if you notice electrical issues or major water damage, contact a professional.
If leaks continue after basic checks, it’s time to call a pro.
Can leaks cause mold or water damage?
Yes. Standing water increases mold risk and can damage cabinetry. Dry promptly and fix leaks to prevent mold growth.
Leaks can lead to mold if water isn’t dried quickly; fix the leak and dry the area.
How can I prevent refrigerator leaks in the future?
Regularly clean the defrost drain, inspect door seals, keep the unit level, and avoid overfilling shelves. Schedule routine checks annually.
Keep drains clean, seals tight, and level to prevent future leaks.
Watch Video
Main Points
- Identify leaks by location (floor vs interior) and tackle defrost drain first.
- Unplug and shut off water supply before inspecting.
- Address water lines, ice maker fittings, and door seals if the drain isn’t the issue.
- Call a professional if leaks persist after basic fixes or you detect electrical hazards.