Air Conditioner Leak Fix: DIY Guide for Homeowners
Learn how to locate, diagnose, and fix an air conditioner leak safely with a practical, DIY-friendly guide from Leak Diagnosis. Includes steps, tools, and maintenance tips to prevent future leaks.

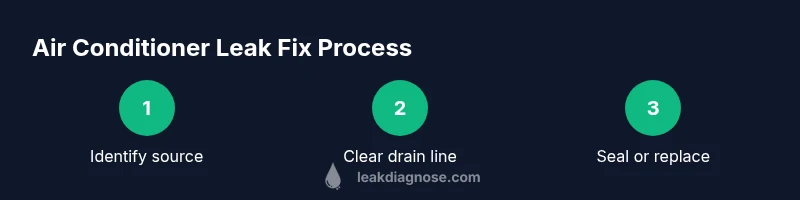
To fix an air conditioner leak, you will locate the leak source, assess whether it’s a condensate or refrigerant issue, and apply a safe, DIY repair. Start by powering off the unit and inspecting the drain line, pan, and seals; document findings, then follow these steps to halt the leak and prevent recurrence. This guide from Leak Diagnosis provides practical, safety-first instructions.
What Causes an Air Conditioner Leak and Why It Matters
An air conditioner leak can stem from several sources, ranging from condensate line blockages to cracked drain pans or loose fittings. In many homes, the most common culprit is a clogged condensate drain line that causes water to back up into the unit or leak onto surrounding surfaces. Less common but serious are refrigerant leaks, which require professional handling due to safety and environmental concerns. Understanding these sources helps you perform an effective air conditioner leak fix, prioritize safety, and minimize visible water damage or mold growth. Regular maintenance reduces the odds of repeated leaks by keeping pathways clear and components sealed properly. For homeowners, recognizing the difference between a condensate leak and a refrigerant issue guides your next steps and helps you communicate clearly with technicians if you need expert help.
By routinely inspecting the drain pan, drip pan connections, and the line from the evaporator coil to the condensate drain, you’ll catch clogs early. If you notice crusty residue or mineral buildup near the drain or noticeable hissing sounds from refrigerant lines, treat these as warning signs. Always approach potential refrigerant issues with caution and contact a licensed technician. An air conditioner leak fix done early can prevent water damage, high humidity, and more expensive repairs down the line.
Safety First: Power Down and Protect Yourself
Before touching any part of your air conditioner, disable power to the unit at the breaker panel or disconnect the outdoor condenser if accessible. Wear safety glasses and gloves to protect your eyes and hands from sharp metal edges and any standing water. Use a flashlight to inspect poorly lit areas and avoid stepping into standing water on electrical components. Never attempt refrigerant handling yourself; these materials require licensed technicians due to health and environmental risks. Safety should always be your first priority when diagnosing an air conditioner leak fix, especially for units that are mounted on rooftops or in tight indoor spaces.
With power off, test the area for moisture using a dry towel or paper towel to identify the exact point of origin. If you find an obvious crack in the drain pan or a loose connection in the condensate line, document it with a photo to reference during repairs or when seeking help. Safety and preparedness reduce the chance of electrical shock or damage to other components during the leak fix.
How to Locate the Leak Source: Step-by-Step Inspection
Systematically check the most common leak points: the condensate drain line and trap, the drain pan, the evaporator coil area, and any seals around access panels. Look for damp spots, algae growth, mineral deposits, or a visible water trail. If the condensate line is clogged, you’ll often see water backing up into the pan or onto the surrounding area. When you see oily residue near refrigerant lines or a hissing sound, treat this as a refrigerant leak indicator and disengage further DIY attempts to avoid hazardous exposure. Document findings and assess whether a temporary fix is feasible or a professional service is required. Properly identifying the origin guides both immediate remedies and future preventative steps.
Keep a notebook or digital record of locations and symptoms to help you plan repairs or communicate with a technician.
Temporary Fixes You Can Try (Safe Before Permanent Repair)
If the leak is due to a clogged condensate line, a temporary fix is to flush the line with a mild cleaning solution or compressed air (if you’re comfortable) to clear blockages. For a crimped or loose line, reseal connections with appropriate sealant or replace small sections with compatible fittings, ensuring there are no kinks that could impede flow. Use a drip tray or towels to manage any leaking water while you work. Do not apply permanent sealants to refrigerant lines or attempt to patch metal components with improvised materials. These temporary measures are meant to control the leak momentarily while arranging proper repairs. Remember, persistent or recurring leaks require professional assessment to avoid hidden damage and safety risks.
During testing, monitor the area for renewed leaks and check that the condensate is draining normally into the line.
Permanent Repair Options and Practical Considerations
Permanent fixes depend on the leak’s source. Replacing a cracked drain pan or repairing a damaged condensate line often resolves condensate-related leaks. If the evaporator coil is corroded or the seal around it is compromised, a more extensive service may be required, potentially including coil replacement or system component resealing. Refrigerant leaks must be handled by licensed technicians due to safety and environmental regulations; attempting to recharge or repair refrigerant lines without certification can be dangerous and illegal. For homeowners, a phased approach—address immediate drainage issues first, then schedule a professional assessment if the leak recurs—protects your investment and keeps indoor air quality high.
Cost considerations vary by system type, accessibility, and the required parts. Expect that some fixes are straightforward and affordable, while others may involve more complex repairs or a complete unit replacement.
Maintenance and Prevention: Keeping Leaks at Bay
Prevention starts with regular maintenance, clean drains, and proper airflow. Schedule seasonal inspections, clean or replace filters as needed, and ensure the condensate drain is clear. Keep the outdoor unit free from debris, ensure the refrigerant lines are insulated properly, and check seals around panels for any signs of wear. If you notice unusual humidity, frequent icing on the evaporator coil, or water pooling around the indoor unit, schedule a check-up promptly. Routine upkeep reduces the likelihood of leaks and helps your cooling system run efficiently. A proactive approach also extends the life of your AC and minimizes expensive emergency repairs.
Record maintenance dates and observations so future technicians can quickly identify recurring issues and address root causes.
When to Call a Professional: Signs It’s Time to Escalate
Some leaks require professional assessment beyond DIY, especially if you suspect refrigerant issues, persistent water damage, or electrical concerns. If you see refrigerant oil around copper lines, hear hissing sounds, or notice a persistent water leak after attempting a drainage fix, contact a licensed HVAC technician. They can perform a leak test, recover refrigerant safely, repair or replace damaged components, and ensure the system complies with current environmental and safety regulations. Coordinate with the technician and provide all documented observations to speed up the diagnosis. Approaching professional help early can prevent more extensive damage and protect your indoor air quality.
A professional service also provides warranty- and code-compliant repair options that DIY methods cannot guarantee.
Authoritative Sources and Further Reading
To deepen your understanding of air conditioning maintenance and safety, consult authoritative sources such as the U.S. Department of Energy and EPA guidance on home cooling systems, as well as professional HVAC standards.
- Energy.gov: Air Conditioners and Energy Saver resources
- EPA Indoor Air Quality: Home Air Conditioning Systems
- ASHRAE: Standards and guidelines for heating, ventilation, and air-conditioning systems
These resources offer validated information on best practices, safety, and sustainable operation for your air conditioning system.
The Bottom Line: A Practical Air Conditioner Leak Fix Plan
A thoughtful approach to an air conditioner leak fix combines safe initial steps, accurate diagnosis, and a plan for permanent repair or professional intervention as needed. By prioritizing safety, properly addressing condensate drainage, and only engaging refrigerant work with licensed technicians, you protect your home and ensure reliable cooling. Use the above steps as a practical framework, adapt to your system type, and schedule professional help when the leak persists or refrigerant involvement is suspected.
Authoritative sources (references):
- https://www.energy.gov/energysaver/air-conditioners
- https://www.epa.gov/indoor-air-quality-iaq/home-air-conditioning-systems
- https://www.ashrae.org/resources--educational
Tools & Materials
- Power off tools (breaker or disconnect switch)(Ensure the unit is fully de-energized before inspection)
- Flashlight(Inspect hard-to-see corners and lines)
- Gloves and safety glasses(Protect hands and eyes during inspection)
- Drain line cleaning tool or flexible brush(Clear clogs in condensate line (where safe to do so))
- Mop, towels, or a shallow tray(Manage and contain any runoff water)
- Sealant or HVAC-rated tape(Temporary fix for small line connections only)
- Replacement condensate line or section(On-hand spare part for easy replacement if needed)
- PVC primer and cement (if using PVC drain components)(Only if you are replacing PVC sections)
- Multimeter or voltage tester(For measuring electrical connections and ensuring safety)
Steps
Estimated time: 60-90 minutes
- 1
Power down and prepare
Turn off the AC unit at the breaker and unplug if accessible. Remove nearby obstacles, and set up containment to catch any drips. This initial step protects you and sets a safe baseline for inspection.
Tip: Triple-check that power is off at both the indoor and outdoor units before touching wires or panels. - 2
Inspect the condensate drain line
Follow the drain line from the indoor unit to the access point. Look for clogs, kinks, or mineral buildup that could cause backflow. Clear blockages carefully using a flexible brush or appropriate cleaning tool.
Tip: If the line is severely blocked, consider temporarily rerouting water to a safe collection container rather than forcing a fix on a stubborn clog. - 3
Check the drain pan and evaporator area
Examine the drain pan for cracks or corrosion and inspect seals around the evaporator coil. Look for damp spots or mineral residues that indicate ongoing leaks. Replace or seal damaged components as needed.
Tip: A small crack can worsen quickly if not replaced; don’t attempt to seal large cracks with tape. - 4
Test for leaks at connections
Inspect all connections along the condensate line and any ductwork for moisture, leaks, or loose fittings. Tighten connections using standard hand tools, ensuring not to over-tighten plastic components.
Tip: Use a damp rag to wipe connections first so you can clearly see any fresh moisture after tightening. - 5
Apply temporary sealing if appropriate
If you identify a small crack or connector issue, apply HVAC-rated sealant or tape as a temporary measure to slow the leak while you arrange a permanent fix or parts replacement.
Tip: Temporary fixes should be tested within a few hours and not used as a long-term solution. - 6
Evaluate the refrigerant path
Do not attempt to repair refrigerant lines yourself. If you suspect a refrigerant leak (oil residue, hissing sounds), shut down the system and call a licensed HVAC technician. Refrigerant work requires certification and proper handling.
Tip: Document any visual indicators for the technician to review. - 7
Decide between repair and replacement
If the system is old, or the leaks persist after a professional inspection, consider replacement. Compare the anticipated repair costs with potential replacement and energy efficiency gains.
Tip: Ask about warranties on parts and labor when discussing replacement options. - 8
Schedule follow-up maintenance
After addressing the leak, schedule regular maintenance to prevent future issues. Clean the condensate line, replace filters, and check seals seasonally to maintain optimal performance.
Tip: Set reminders to check the system twice a year—before summer and before winter.
Questions & Answers
What causes an air conditioner to leak?
Leaks usually come from condensate line blockages, pan cracks, or loose fittings around the indoor unit. Refrigerant leaks are less common and require licensed professionals.
Most AC leaks come from condensate line blockages or pan cracks. Refrigerant leaks require a licensed technician.
Is it safe to fix an air conditioner leak myself?
You can safely address condensate line clogs and minor seal issues, but avoid refrigerant work. When in doubt, stop and call a licensed HVAC technician.
DIY fixes are okay for condensate lines, but refrigerant work should be left to professionals.
How long does a DIY leak fix take?
A simple condensate line clearance and minor seal fix can take under an hour. More extensive repairs or line replacements may require a few hours plus scheduling with a pro.
Most basic leaks take under an hour, but more involved repairs take longer and may need a pro.
Will fixing the leak affect refrigerant levels?
If the leak is condensate-related, refrigerant levels are unaffected. If a refrigerant leak is involved, only a licensed technician should handle repairs and recharge.
Condensate fixes don’t affect refrigerant. Refrigerant issues require a licensed technician.
When should I replace the unit instead of fixing it?
Consider replacement if the unit is old, leaks recur after professional service, or repair costs approach the price of a new efficient model.
Consider replacement if the unit is old or repairs keep recurring.
How can I prevent future leaks?
Schedule regular maintenance, keep the condensate line clear, and replace filters. Proper drainage and sealing around panels help minimize leaks.
Keep up with maintenance and drainage to prevent future leaks.
Watch Video
Main Points
- Identify leak sources early to prevent water damage.
- Prioritize condensate issues before pursuing refrigerant work.
- Do not attempt refrigerant repairs without a licensed tech.
- Maintain a routine maintenance schedule to reduce future leaks.