Air Conditioner Water Leak Outside: Troubleshooting Guide
A practical, urgent guide to diagnosing and fixing an air conditioner water leak outside, with a clear diagnostic flow, step-by-step repairs, safety tips, and prevention strategies for homeowners.

An outside air conditioner water leak is usually caused by condensate drainage issues or an outdoor drainage path problem. Inspect the outdoor condensate line and the area beneath the unit for clogs or pooling, and ensure the line slopes away from the equipment. Clean debris and recheck; if water persists, follow the diagnostic flow.
Why the keyword matters for air conditioner water leak outside
If you notice water pooling around your outdoor air conditioner after running the unit, you’re likely dealing with a condensate drainage issue or an exterior drainage path problem. The phenomenon is commonly described as an air conditioner water leak outside. Homeowners who act quickly can prevent water damage, mold growth, and higher energy bills. The most effective approach blends basic checks with a clear understanding of how condensate drains from an AC system. By focusing on the outside drainage route and the indoor-to-outdoor condensate path, you can often resolve the leak without major repairs. Throughout this guide, you’ll see practical steps and plain-language explanations, so you can troubleshoot confidently and safely.
According to Leak Diagnosis, most outside leaks stem from simple causes that are easy to verify with minimal tools. This article keeps the focus on safety, common-sense fixes, and prevention. If you’re a homeowner or DIY enthusiast, you’ll learn how to tell whether a leak is a harmless condensate flow or a symptom of a larger problem requiring professional help.
-paragraphs_linked_to_action
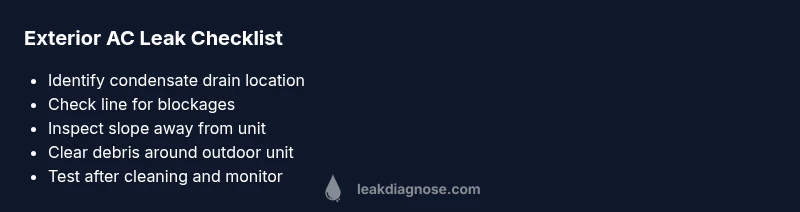
Steps
Estimated time: 30-60 minutes
- 1
Power off and secure the area
Turn off the outdoor unit at the disconnect switch and, if safe, at the indoor blower switch as well. Remove any nearby debris to create a clear working space. This protects you from moving parts and reduces the risk of short circuits while you inspect the drainage path.
Tip: Double-check that the unit isn’t plugged into any power source—safety first. - 2
Locate condensate lines and drainage paths
Identify the indoor condensate drain and the outdoor discharge point. Trace the line from the indoor unit to where it exits outside. Look for visible clogs, kinks, or cracks, and check for standing water around the outdoor drain elbow.
Tip: Keep notes or photos of where you see blockages for reference. - 3
Clear blockages and flush the line
Use a wet/dry vacuum to suction out any debris from the condensate line. If you can access the outdoor drain, gently flush it with tap water to verify flow. Recheck for any signs of continued pooling after flushing.
Tip: Do not use harsh chemicals that could damage the line or indoor components. - 4
Check line slope and outdoor drainage
Ensure the condensate line slopes away from the unit and toward the drain reach. A poor slope can cause water to back up and spill near the outdoor unit. If the slope is wrong, adjust clamps or supports to achieve a steady downward angle.
Tip: A simple level check can confirm a proper slope. - 5
Inspect the drain pan and connections
Look for cracks or rust in any condensate pans, both indoors and at the outdoor connection. Tighten loose fittings and replace damaged components as needed. A leaking pan can cause water to exit the system even when the line is clear.
Tip: Replace any worn gaskets to prevent future leaks. - 6
Test the system and monitor for leaks
Power the unit back on and run a cool cycle for 10–15 minutes. Observe the discharge area and nearby surfaces for new water. If the leak stops after clearing the line, you’ve likely resolved the issue.
Tip: Keep a diary of when leaks occur to spot recurring patterns.
Diagnosis: Water leaking outside from the outdoor AC unit after operation
Possible Causes
- highClogged condensate drain line or blocked outdoor drain path
- mediumImproper line slope or damaged drain pan
- lowHeavy rain overwhelming drainage or poor rain gutters around the unit
Fixes
- easyClear the condensate line and outdoor drain trough; use a wet/dry vacuum to remove debris and flush the line with water
- mediumRepair or replace a damaged drain line or pan; ensure the line has a proper slope away from the unit
- easyRe-route drainage, add a splash guard, and confirm the outdoor unit is level to prevent splash-back
Questions & Answers
Water pooling outside my outdoor AC unit, is this normal?
Some condensate water dripping outside is normal during operation. However, persistent or large pools around the unit indicate drainage issues, blockages, or poor installation. Inspect lines and slope first before assuming a malfunction.
Water pooling can be normal briefly, but persistent leaks mean you should check drainage and slope before calling a pro.
What causes water leaking outside but not inside the house?
Most often the issue is the condensate drain line or outdoor drainage path. Blockages or improper slope can cause water to pool around the outdoor unit while indoor drainage remains unaffected.
Outside leaks usually point to condensate drainage rather than an indoor problem.
Should I turn off the AC if I see water around the outdoor unit?
If you notice water pooling, turn off the unit to avoid electrical hazards while you inspect. Do not operate the system until you’ve cleared blockages and verified safe drainage.
Turn it off to stay safe as you inspect the drainage paths.
Can heavy rain cause outside leaks around an AC unit?
Yes, heavy rain can overwhelm drainage or flood the outdoor area, making water appear to leak from the unit. It’s important to differentiate rainwater from condensate leakage.
Rain can flood the area; check condensate lines after rain to ensure proper drainage.
When should I call a professional for an air conditioner water leak outside?
Call a professional if you cannot locate or fix the blockage, if there’s visible damage to lines or pans, or if water leaks resume after basic fixes. A professional can test refrigerant lines and ensure proper drainage.
If leaks persist after basic checks, it’s time to bring in a pro.
How can I prevent future outside leaks?
Perform routine outside coil and drain maintenance, keep surrounding area clean, and schedule annual HVAC inspections to catch drainage issues before they become leaks.
Regular maintenance helps prevent future leaks.
Watch Video
Main Points
- Check condensate drainage first
- Ensure proper line slope away from unit
- Clean debris and recheck before calling a pro
- Maintain seasonal maintenance to prevent leaks