Can You Use Leaking Aircon? Troubleshooting & Safety Guide
Urgent guide to diagnose and address leaking air conditioning safely. Learn common causes, step-by-step checks, and when to call a pro to prevent water damage and refrigerant hazards.

A leaking air conditioner is usually caused by a clogged condensate drain, a damaged drain pan, or a frozen evaporator coil. For a quick fix, shut off the unit, unplug it if safe, and try to clear the condensate line if accessible. If the leak persists or you smell refrigerant, contact a licensed HVAC technician immediately.
Understanding the Risk of Leaks in Home AC Units
If you’re staring at a damp air handler or a puddle under the outdoor unit, you’ll want answers fast. Can you use leaking aircon? The short answer is no. Leaks signal a system problem that can involve standing water, refrigerant vapor, electrical components, and potential mold growth. These issues pose safety hazards and can shorten the life of your AC. According to Leak Diagnosis, the most common residential leaks surface from condensate drainage problems or a damaged drain pan, especially when the unit runs frequently during hot, humid days. The Leak Diagnosis team found that timely maintenance and early moisture control reduce the risk of costly water damage and energy waste. In the sections that follow, you’ll learn the typical causes, how to perform safe checks, and when to call a professional.
Common causes of leaks in air conditioners
-
Clogged condensate drain: When the condensate line is blocked, water can back up and spill into the cabinet or onto the floor.
-
Damaged or rusted drain pan: Cracks or rust allow water to escape from the drain system.
-
Frozen evaporator coil and thaw: Ice buildup can melt and produce a noticeable leak once the ice melts; this often stems from restricted airflow or low refrigerant charge.
-
Refrigerant line issues: A small refrigerant leak can cause sweating and moisture around joints, and in some cases refrigerant exposure is hazardous. Note: refrigerant handling requires licensed technicians.
-
Poor installation or aging components: Gaps, misalignments, or worn seals can create leak pathways.
Each of these has different implications for repair complexity, cost, and safety. The good news is many issues are manageable with basic maintenance, but some require a licensed technician due to refrigerant handling and electrical safety.
Immediate safety steps you can take right now
-
Power down safely: Turn off the air conditioner at the thermostat and switch off the unit’s circuit breaker to prevent electrical hazards.
-
Contain moisture: Place towels or a shallow pan under the leak to protect floors and avoid slip hazards.
-
Avoid DIY refrigerant work: Do not attempt to repair refrigerant lines or seals yourself. Refrigerant handling requires certification and equipment.
-
Check for smells or symptoms: If you notice a chemical odor, call for service immediately and ventilate the area.
-
Keep kids and pets away: Leaks can worsen quickly; secure the area and schedule a professional inspection.
If you cannot determine the source or the leak keeps returning after a basic check, stop using the unit and contact a licensed HVAC technician.
Diagnostic-flow overview
This homeowner-friendly flow helps you narrow down the source of a leak without specialized tools. Start with visible signs such as water pooling, damp cabinets, or musty odors. Next, check for a blocked condensate drain and inspect the drain pan for cracks or corrosion. If the area is damp only after running the unit, review airflow: clean or replace the filter, ensure vents are open, and verify the blower isn’t blocked. If you detect a refrigerant odor, oily residue around connections, or hissing sounds, stop and call a professional immediately. The goal is to distinguish a condensate-related leak (high likelihood) from a refrigerant-related issue (needs licensed service).
Preventive maintenance to avoid leaks
Regular maintenance is the best defense against leaks. Schedule semi-annual checks for the condensate system, drain lines, and pan condition. Clean or replace air filters to maintain proper airflow, reducing the risk of coil freezing and condensate buildup. Inspect insulation on refrigerant lines and seal any gaps around the cabinet. Address any signs of rust, corrosion, or water staining in the surrounding area promptly to prevent larger problems.
What to do if the leak persists
If the leak continues after you’ve performed basic checks, or you notice refrigerant odor, do not attempt further DIY work. Schedule a professional HVAC inspection as soon as possible. A licensed technician can test for refrigerant leaks with appropriate equipment, repair or replace damaged components, and verify the system’s refrigerant charge and electrical safety. In the meantime, keep the area dry, avoid using the unit, and consider temporary cooling options if needed.
Final notes and quick checks
Before calling a pro, note any smells, sounds, or color of the liquid; take photos for the technician visit. Gather your system model and maintenance history to share with the professional for faster service. Keeping a simple, dated leak log can help the technician identify patterns and prevent future issues.
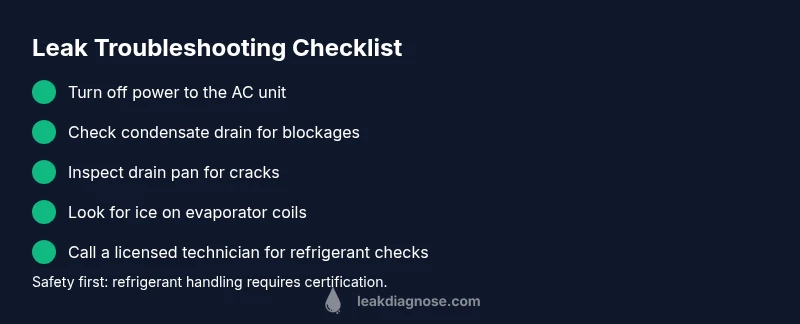
Steps
Estimated time: 45-60 minutes
- 1
Power down the system
Turn off the thermostat and flip the circuit breaker for the outdoor and indoor units. Verify there is no residual power before touching any wiring or panels. Tip: Use a non-contact voltage tester if you must confirm power is off.
Tip: Always prioritize electrical safety and disconnect power before inspection. - 2
Check condensate drain for clogs
Locate the condensate drain line and inspect for visible blockages. If safe, use a wet/dry vacuum to pull out debris from the line and trap. Test by pouring a small amount of water into the drain to see if it flows freely.
Tip: Do not use harsh chemicals that could damage the line; mechanical clearing is preferred. - 3
Inspect drain pan and connections
Look for cracks, corrosion, or loose fittings in the drain pan and at all drain connections. If you find damage, plan for repair or replacement and avoid running the unit until addressed.
Tip: Take photos of the pan and fittings to show the technician later. - 4
Check evaporator coil and airflow
Inspect for ice on the evaporator coil or restricted airflow from dirty filters. A clogged filter can cause condensation issues and leaks after thawing. Replace the filter if dirty and ensure the blower is unobstructed.
Tip: If you see ice, turn off the system and allow it to thaw naturally before checking further. - 5
Assess refrigerant signs
Look for oily residue around connections or a distinct refrigerant odor. Do not attempt to repair refrigerant lines yourself; leaks require certification and equipment.
Tip: Document signs with photos and notes for the tech visit. - 6
Call a licensed technician
If you notice refrigerant signs or if the leak persists after basic checks, schedule a professional inspection promptly. A tech will test for leaks, repair components, and verify refrigerant charge and safety.
Tip: Ask for a written assessment and a clear estimate before work begins.
Diagnosis: Visible leak or pooling around the air conditioner
Possible Causes
- highClogged condensate drain
- highDamaged drain pan
- mediumRefrigerant leak
- lowImproper installation or aging seals
Fixes
- easyUnclog condensate drain with a wet/dry vacuum or safe mechanical tool
- mediumRepair or replace damaged drain pan and reseal seams
- hardSchedule refrigerant testing and sealing by a licensed tech
- easyInspect and correct installation gaps and duct seals
Questions & Answers
What does a leaking aircon usually indicate?
Leaks usually point to condensate drainage problems or damaged components. Ice buildup, poor airflow, or aging seals can also contribute. Identifying the source helps determine safe next steps.
Leaks usually point to drainage problems or damaged parts. Identifying the source helps us decide on the right next steps.
Is it safe to run the AC if it’s leaking water?
No. Running a leaking unit can cause water damage, mold growth, and possible electrical hazards. Shut it off and arrange service as soon as possible.
No—turn it off and call a professional to inspect the leak.
Can I fix a condensate drain myself?
You can perform basic drain clearing if you’re comfortable with household tasks, but avoid refrigerant work. If the drain remains clogged or you’re unsure, contact a pro.
You can try clears for the drain, but don’t touch refrigerant or sealed coils—call a pro if unsure.
What should I do if I smell refrigerant?
Leave the area, ventilate, and call emergency services or your local gas utility. Refrigerant leaks require immediate professional attention.
If you smell refrigerant, leave the area and contact professionals right away.
How long does a leak repair typically take?
Time varies with the problem. Simple drain work may be quick, but refrigerant leaks or component replacements can take longer depending on parts and access.
Repair time depends on the issue; some fixes are quick, others take longer depending on parts and access.
Watch Video
Main Points
- Stop using the unit if a leak appears.
- Most leaks stem from condensate or drain pan issues.
- Safety checks come before any repair work.
- Only licensed professionals should handle refrigerant leaks.
- Regular maintenance reduces future leak risks.