Leaking Washing Machine: Urgent Troubleshooting Guide
Urgent, step-by-step troubleshooting for a leaking washing machine. Learn common causes, safety precautions, diagnostic flow, home fixes, and prevention tips to stop water damage and protect your home.

The most likely cause of a leaking washing machine is a worn door seal or loose inlet hoses. Start by inspecting the door boot and tightening water-inlet connections. If you see pooling behind the unit, check the tub or pump for leaks.
Understanding the Warning Signs of a Leaking Washing Machine
If your washer leaves a damp spot, pools water around the base, or you notice a musty smell after cycles, you may be dealing with a leak. The first clue is obvious pooling near the machine or along the floor. Pay attention to the area behind and beneath the unit, as many leaks travel downward before becoming visible. For homeowners, the keyword to recognize is that even small drips can grow into larger problems if ignored. In this guide, we focus on the common scenario of a leaking wash machine and provide a practical, safety-first approach to diagnose and fix the issue quickly.
Excerpted findings from Leak Diagnosis analysis emphasize the importance of early detection and systematic checks to limit water damage and extend appliance life.
Common Culprits Behind Leaks
There are several frequent sources of leaks in a washing machine. The door seal (boot) can wear or crack over time, especially with frequent opening and closing or heavy loads. Inlet hoses, both hot and cold, may become loose, cracked, or develop small leaks at the fittings. The drain hose and its clamps can fail if not secured properly, allowing water to escape during draining. Less common but possible: a cracked pump housing, a damaged tub or sump, or detergent drawer overflow due to excessive detergent or improper use.
For a leaking wash machine, start with the simplest checks—hoses and door boot—before moving to internal components. Early intervention reduces water damage and repair costs. According to Leak Diagnosis, most residential leaks originate from hoses and seals rather than major pump failures.
Safety First: What Not To Do
Never run the washer when you see active leakage or standing water that could reach electrical outlets. Unplug the unit from power, and shut off the laundry area’s water supply at the valve. Do not use a heat gun or caulk to fix leaks; you may trap moisture or mask a larger problem. If you smell burning plastic or hear strange noises, evacuate and seek professional help. Mild leaks can sometimes be contained with quick physical adjustments, but water near electrical sources is a serious safety hazard.
Diagnostic Checks You Can Do At Home
Follow a logical flow to identify the leak source:
- Check inlet hoses: ensure tight connections and inspect for cracks; replace if bulged or frayed.
- Inspect the door boot: look for cracks, tears, or gaps where water escapes during cycles.
- Examine the drain hose and clamps: ensure it is securely attached and not kinked or crushed.
- Look at the pump and sump area: search for dampness on seams or seals.
- Test with a controlled run: run a short cycle with the access panel open (if safe to do so) and observe where moisture appears.
If you cannot locate the source after these checks, the leak may originate from internal components requiring professional service. Leak Diagnosis emphasizes documenting observations (hose connections, spots, and smell) to expedite repair.
When to Call a Professional
If there is continuing water escape after basic checks, or if you notice pooling behind or beneath the appliance, contact an appliance repair technician. Leaks from the tub seal, pump, or internal hoses often require professional replacement. If you see signs of mold growth or water damage on walls or floors, consider a specialist for water mitigation in addition to the appliance repair.
Prevention Tips To Minimize Future Leaks
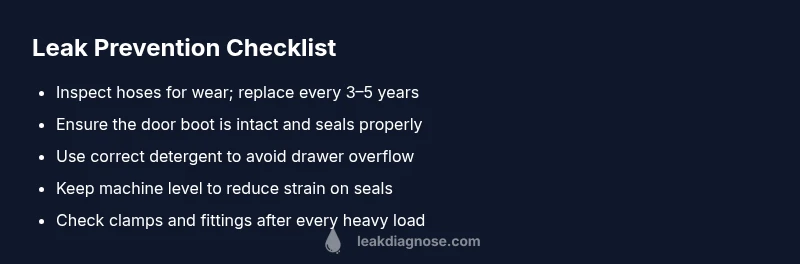
Proactive maintenance reduces the chance of future leaks. Regularly inspect hoses for bulges, cracks, or corrosion; replace hoses every 3–5 years with reinforced stainless steel braided lines. Use the correct detergent amount to prevent overflow into the detergent tray. Ensure the unit is level to avoid splash and stress on seals. Clean the filter and pump access area to prevent clogs that could cause overflow. Finally, keep the laundry area dry and promptly address any dampness to protect floors and cabinets.
Steps
Estimated time: 60-90 minutes
- 1
Power down and secure the area
Unplug the washer and turn off the water supply valves. Move the unit gently away from the wall to access hoses and seals. Keep a container and towels handy to catch drips during inspection.
Tip: Safety first: never work behind the machine while it’s plugged in. - 2
Check inlet hoses for tension and damage
Visually inspect both the hot and cold inlet hoses where they connect to the wall and the washer. Look for cracking, bulging, or rust on fittings. Tighten fittings by hand and then snug with a wrench if needed, but do not overtighten.
Tip: If hoses look worn, replace with stainless-steel braided hoses for durability. - 3
Inspect the door boot and tub seal
Examine the rubber door seal for cracks, tears, or debris that can keep a proper seal. Run a cycle with a towel at the door seam to observe where water escapes, which helps pinpoint the leak path.
Tip: Use a flashlight to spot hairline cracks that may be easily missed. - 4
Evaluate the drain hose and clamps
Check that the drain hose is firmly attached to the pump and not kinked. Ensure clamps are secure and the hose sits properly in the drain standpipe.
Tip: A loose drain hose is a common source of leaks during draining. - 5
Look for evidence around the pump and sump
Inspect the pump housing and surrounding seals for wetness or corrosion. If dampness is present on seams, water may be escaping from a cracked seal or gasket.
Tip: If you see visible damage, replace the affected part or contact a pro. - 6
Run a controlled test cycle
With the machine reassembled, run a short wash cycle and watch carefully for leaks. Check the floor and the back panel area during and after the cycle.
Tip: Document the exact location of any moisture to speed diagnosis. - 7
Decide on next steps
If the leak persists after these checks, plan a professional repair or replacement of the damaged component. If the unit is older, weigh the cost of repair against a replacement.
Tip: Leak Diagnosis recommends professional assessment for complex internal leaks.
Diagnosis: Visible water pooling around a washing machine after use
Possible Causes
- highLoose or damaged inlet hose connections
- highWorn door boot (gasket) or damaged tub seal
- mediumDrain hose kink or loose clamp
- lowCracked sump or pump housing
- lowOverflow from detergent drawer due to overuse or improper detergent
Fixes
- easyTighten and inspect all inlet hose connections; replace damaged hoses with reinforced hoses
- mediumInspect door boot for wear; replace boot if cracked; reseal or replace the tub seal as needed
- easySecure drain hose with clamp and ensure it drains properly into the household drain
- hardCheck sump and pump for cracks; replace faulty parts by a trained technician
- easyEnsure detergent drawer is used correctly and not overflowing; switch to appropriate detergent type
Questions & Answers
What are the most common causes of a leaking washing machine?
Most leaks come from worn door seals or loose inlet hoses. Drain hose clamps, and detergent drawer overflow are also frequent culprits. Inspect these areas first, then check internal components if the leak persists.
Most leaks come from door seals or hoses. Check hoses and door seals first, then look at the drain hose if the leak continues.
How can I tell where the leak is coming from?
Look for water trails, damp spots, or puddles, then trace them to their source. Start at hoses, then inspect the door boot and pump area. A flashlight helps reveal hidden drips.
Trace water trails from the floor to the source, usually hoses, then doors or the pump.
Is a leaking door seal a major issue?
A worn door seal is common and repairable. Replacing the boot is usually enough to stop leaks. Ongoing leaks may indicate additional seal or tub problems.
Door seals can usually be replaced; persistent leaks may require more parts checked by a tech.
Can I fix a leak myself or should I hire a pro?
Many hose and seal issues are DIY-friendly with basic tools. Internal pump or tub seal leaks usually require a professional. If you’re unsure, err on the side of safety and call a technician.
DIY fixes are possible for hoses and seals; for internals, seek a pro.
What safety precautions should I take?
Unplug the machine, shut off water, and avoid contact with electrical components. Wear gloves to protect hands from sharp edges and avoid stepping on water on slippery floors.
Power off, water off, and wear gloves when checking for leaks.
How can I prevent future leaks?
Replace hoses every few years, keep the machine level, use the correct detergent, and inspect components regularly. Immediately address dampness to prevent mold and wood damage.
Prevent leaks by routine hose checks and proper detergent use.
Watch Video
Main Points
- Identify leaks quickly with hose and door-seal checks
- Prioritize safety: power and water off before inspection
- Securely fasten hoses to prevent future leaks
- Use the right detergent to stop overflow
- Call a pro when leaks persist after basic checks