Washing Machine Leaks: Urgent Troubleshooting Guide
This urgent troubleshooting guide helps homeowners stop a wash machine leaking water quickly and safely. Learn common causes, step-by-step fixes, safety tips, and when to call a professional.

If you notice a wash machine leaking water, the most likely causes are loose inlet hoses, a damaged door boot, or a clogged pump. Start with quick checks: tighten connections, inspect the door seal for cracks, and look for a kinked drain hose. If the leak persists after these basics, move to the diagnostic flow and step-by-step fixes below.
What causes a wash machine leaking water?
A wash machine leaking water typically points to one of several failures that involve moving parts or connections. In most homes, the primary sources are hoses, gaskets, door seals, and the pump. Loose inlet hoses allow water to drip from the back panel, while worn or damaged door boots let water escape around the door opening. A clogged or kinked drain pump or drain hose can spill water onto the floor during draining. Finally, a cracked tub seal or transmission leak may manifest as water pooling under the unit after a wash finishes. To distinguish between these, observe when the leak happens: during fill, during wash, during spin, or after the cycle ends. Each timing hint points to a different component that likely needs attention.
Tip: Before you touch any internal parts, unplug the machine and shut off the water supply. Always dry the area as you work to avoid slips and electrical hazards.
Quick checks you can do right away
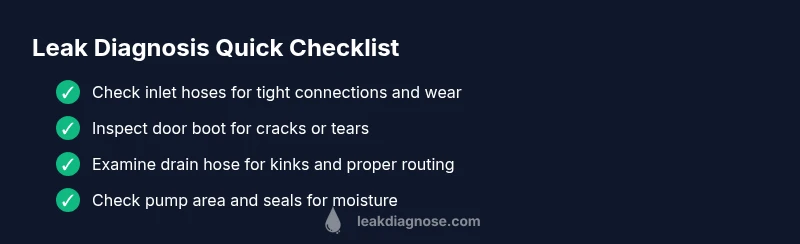
Start with the simplest possibilities. Check that all inlet hoses are tight and free of cracks. Inspect the door boot around the opening for signs of wear or tiny cuts. Look at the drain hose for kinks or improper routing. If you see moisture on the floor near the back of the unit after a cycle, wipe it up and re-run a short test with a shallow load. These quick checks often stop leaks without tools.
Pro tip: Have a towel and a container ready to catch drips while you inspect connections.
Diagnostic flow: symptom to diagnosis to solutions
Symptom: Water leaks during or after a cycle. Causes typically progress from simple to complex: 1) Loose or damaged inlet hoses, 2) Worn door boot or tub seal, 3) Clogged or kinked drain hose or pump, 4) Cracked tub or transmission. For each, the corresponding fix becomes easier as you work outward from the machine.
Flow: If water leaks from the back panel only when filling, focus on inlet hoses. If leaks occur during spinning, inspect the door boot and tub seal. If water appears after the cycle ends, check the drain hose/pump and the drain connections. Document timing and any visible wear for reference when you test.
Solutions: Tighten or replace hoses, replace door boot, clear clogs, or perform a seal/pump replacement as needed.
Common fixes for leaks from hoses and connections
Hoses and clamps are the most frequent culprits. Tighten every hose connection at the back, then inspect hoses for cracks, bulges, or softness; replace as needed. Use stainless-steel braided hoses if available for durability. Re-seat the drain hose at the wall standpipe to ensure a proper seal and route the hose to avoid kinks. If the pump housing shows moisture around the seals, gently remove buildup and reseal or replace the pump if necessary.
For door boot leaks, clean the gasket area and replace any torn sections. When in doubt, replace with a manufacturer-approved boot of the correct model. After each fix, run a short test cycle with no or light loads to confirm the leak is resolved.
Leaks from the door boot, tub, and pump
Door boot leaks usually indicate a tear or compression wear. Inspect for cracks and replace the boot if needed. Tub seal leaks may manifest as water at the base after a cycle; this requires more involved work and replacement of the seal or even the tub shell in extreme cases. If you suspect a pump leak, examine the pump housing and clamps for corrosion or loose fasteners. Leaks here often come from o-rings or impeller seals.
When performing these checks, keep a bucket handy to catch drips and avoid water damage. If you notice a stubborn leak that doesn’t stop after boot or hose replacement, it’s time to consider professional service to diagnose the seal or tub components accurately.
Safety, water damage prevention, and maintenance
Always unplug the washer before inspecting any internal parts and shut off both hot and cold water supply valves. Use a flashlight to inspect tight spaces and look for mineral buildup that can cause small leaks to worsen. Install a drip tray or towels under the machine to catch residual water during testing. Regular maintenance—like cleaning filters, inspecting hoses annually, and replacing aging rubber components—prevents many leaks before they start.
How to test after repair and monitor
After completing any fix, run a very short cycle with water only, then a full wash with a light load to ensure the leak is gone. Check the floor, hoses, boot, and pump area for signs of moisture during and after the cycle. If no leak is detected after two full cycles, reset any alarms and monitor for a week. Document any recurring patterns to guide future maintenance or professional assessment.
Steps
Estimated time: 60-90 minutes
- 1
Power down and secure water supply
Unplug the washer, shut off the main water valves, and pull the unit slightly away from the wall to access hoses. This minimizes the risk of electric shock and makes inspection easier. Prepare towels to catch any residual water.
Tip: Keep a bucket handy to collect drips and prevent spills on the floor. - 2
Inspect inlet hoses and clamps
Look for cracks, bulges, or corrosion in the inlet hoses. Ensure clamps are tight but not overtightened. If hoses feel soft or appear worn, replace them with sturdy braided hoses designed for appliances.
Tip: Run a quick check after tightening to verify the leak source isn’t from a loose connection. - 3
Examine the door boot and tub seal
Inspect the rubber door boot for tears, cracks, or pinch points. If you see wear, replace the boot. Also inspect the tub seal around the drum for signs of wear or damage and plan to replace if needed.
Tip: Take photos of any damage to assist future parts ordering. - 4
Check the drain hose and pump area
Remove any blockages from the drain hose and examine the pump area for moisture or loose clamps. Re-route the hose to avoid sharp bends and ensure a proper fit at the standpipe.
Tip: Clear debris from the filter or pump housing to prevent future clogs. - 5
Run a quick test wash
With the machine reconnected, run a test cycle with a small load to observe whether water leaks. Start with cold water and a shorter cycle to minimize risk and time.
Tip: Stand back during the test to monitor for fresh leaks without being in the splash zone. - 6
Evaluate for persistent leaks
If water appears again, document the timing and location, and consider more extensive parts replacement like a door boot or tub seal.
Tip: If unsure, stop the test and consult a professional rather than forcing components. - 7
Reinstall and clean up
If the leak is resolved, reinstall the washer in place and clean the area. Wipe up any water and dry the surrounding floor to prevent mold growth.
Tip: Keep a maintenance log noting part replacements and next inspection date. - 8
Schedule maintenance or professional help
If you’re dealing with a tub seal, pump, or transmission issue, arrange a repair with a qualified technician. Regular maintenance can prevent future leaks.
Tip: Set reminders for annual hose and seal inspections.
Diagnosis: Water leaking from the washer during or after a cycle
Possible Causes
- highLoose or damaged inlet hoses
- highWorn door boot (gasket) or tub seal
- mediumClogged or kinked drain hose/pump
- lowCracked tub or transmission leak
Fixes
- easyTighten all connections on inlet hoses; replace hoses if cracked.
- easyInspect door boot for cracks; replace boot if torn.
- easyClear drain hose or pump filter; straighten hose routing to proper height.
- hardIf tub seal or transmission is leaking, replace the seal or call a professional.
Questions & Answers
What is the most common cause of a washing machine leaking water?
Most leaks originate from hoses or the door boot gasket. Start by inspecting inlet hoses, then the door seal for signs of wear.
Most leaks are caused by hoses or the door seal. Start by checking the hoses and door seal to locate the problem.
Can I fix a leak myself without professional help?
Many small leaks can be fixed by tightening hoses, replacing a torn door boot, or clearing a clogged drain hose. If the leak continues or involves the tub seal or pump, call a professional.
You can fix simple issues like hoses or door seals yourself, but avoid tub seals or pumps without a pro.
How do I tell which part is leaking?
Note when the leak occurs (fill, wash, spin, or end). Inspect hoses for moisture, then check the door boot and pump area for moisture patterns to pinpoint the source.
Watch when it leaks during the cycle, then inspect hoses, boot, and pump to find the source.
What safety steps should I take before inspecting?
Unplug the machine, shut off water valves, and dry the area. Wear rubber-soled shoes and use a flashlight to inspect tight spaces.
Unplug the machine and shut off water first. Use a flashlight and dry area for safety.
How long does a typical hose replacement take?
Hose replacements are usually straightforward and can take 15-30 minutes once you have the right hose. Expect longer if you’re replacing door boots or seals.
A hose change is often 15-30 minutes with the right part; more time if you’re replacing seals.
Watch Video
Main Points
- Inspect hoses and door seals first.
- Identify leak timing to target the source.
- Always unplug and shut off water before inspection.
- Call a professional for tub seals or pumps if leaks persist.