Air Conditioner Condensation Leak: Troubleshooting Guide
Urgent guide to diagnose and fix an air conditioner condensation leak safely. Learn quick fixes, diagnostic flow, and prevention to protect your home from water damage.

Steps to address an air conditioner condensation leak quickly: 1) shut off power to the unit at the breaker. 2) locate and clear the condensate drain line. 3) inspect the drain pan for cracks and dry the area. If leaks persist, turn off the unit and call a licensed HVAC technician.
Why an air conditioner condensation leak demands urgent attention
An apparent water leak around or under your air conditioner is more than a nuisance. Left unchecked, moisture can damage walls, ceilings, and insulation, leading to mold growth and costly repairs. The keyword here is air conditioner condensation leak, which points to moisture generated during normal cooling that isn’t draining properly. According to Leak Diagnosis, most homeowners notice a leak when the condensate line clogs or the drain pan deteriorates. Quick action reduces risk and often preserves the life of the unit. In addition to property damage, standing water can create slip hazards and attract pests. If you see water pooling near the indoor air handler or around the outdoor unit, treat it as an urgent maintenance issue and start a safe, methodical inspection. Early detection is your best defense against expensive calls and bigger problems.
How humidity and coil behavior create leaks
Humidity drives condensate formation as warm, moist air passes over a cool evaporator coil. When the system runs correctly, condensate travels through a drain line to a safe outlet. A condensation leak happens when any part of this path fails: a blocked drain line, a damaged drain pan, a clogged filter that causes icing, or improper tilting during installation. Ice on the coil can melt and overflow the pan, giving the appearance of a leak. If you live in a humid climate, addressing drainage and airflow becomes even more critical. The air conditioner condensation leak is often the symptom of a drainage bottleneck rather than a catastrophic failure of the cooling system.
Common causes of condensation leaks in air conditioners
- Clogged condensate drain line or condensate pump failure
- Cracked or rusted drain pan
- Improper installation or poor slipage slope of the drain line
- Dirty air filters causing coil freezing and subsequent overflow
- Overflow due to high humidity and continuous operation
These factors are commonly found in residential setups and are typically fixable with basic tools and safe procedures. The goal is to restore proper drainage and prevent future buildup, thereby stopping the air conditioner condensation leak at its source.
Diagnostic flow: home-check steps
Follow this simple at-home diagnostic flow to determine likely causes without specialized equipment:
- Check the condensate drain line and outlet for visible blockages or kinks.
- Inspect the drain pan for cracks or corrosion.
- Look at the air filter and evaporator coil; a dirty filter can cause icing and overflow.
- Check the unit’s level and slope relative to the drain outlet. An improper tilt can lead to pooling.
- If you see frost or ice on the coil, turn off the unit and allow it to thaw before continuing.
- If the leak continues after these checks, plan a professional inspection to examine refrigerant lines and pan integrity. This flow helps you narrow down the cause and prepare for a repair plan.
Step-by-step fix for the most common cause: clogged condensate line
The most frequent air conditioner condensation leak is a blocked condensate drain line. Here’s a clear, safe approach to fix it:
- Power off the unit at the breaker before touching any components.
- Locate the condensate drain line near the indoor unit; you may need to access the drip pan area.
- Gently remove any visible debris from the line with a long wire or pipe cleaner; avoid puncturing the line.
- Flush the line with warm water or a non-corrosive cleaning solution to clear mineral buildup.
- Reconnect and verify that water flows freely through the line to the exterior outlet.
- Reinstall any panels and run the system for 10–15 minutes to confirm the leak stops.
- If you have a condensate pump, ensure it engages and drains correctly and that its float switch is not obstructed.
- Pro tip: Consider adding a yearly condensate line clean to prevent recurrence.
Secondary fixes if the primary fix doesn't stop the leak
If clearing the condensate line doesn’t resolve the air conditioner condensation leak, inspect the drain pan for cracks and replace if damaged. Ensure the drain line slope remains adequate toward the outlet. A clogged or sticking float switch in a condensate pump will also cause overflow; test the switch manually. Dirty coils or a failing AC pan alarm can mimic leaks; addressing these components helps prevent repeat issues. For persistent leaks, a professional may need to check refrigerant lines, pan seals, and the overall drainage design to ensure proper operation.
Safety, risks, and when to call a pro
Electrical components and refrigerant lines pose real safety risks. If you notice buzzing sounds, burning odor, refrigerant scent, or hissing from the unit, stop immediately and call a licensed HVAC technician. Do not attempt to weld, patch, or seal refrigerant lines yourself. Water leakage near electrical panels or outlets can cause shocks and fire hazards; keep the area dry and avoid using extension cords. Regular maintenance reduces safety risks and prolongs the life of your system.
Prevention tips to stop condensate leaks in the future
Prevention is your best defense against future air conditioner condensation leaks. Regularly replace or clean filters, ensure proper unit tilt (slight downward slope toward the drain), and clear the condensate drain line at least twice a year. Use a professional to inspect the condensate pan and verify pump operation if you have a condensate pump. Consider installing a condensate overflow alarm that sounds when the line begins to back up, and keep an eye on humidity levels in the space. A well-maintained system drains efficiently, reducing the chance of leaks.
What to monitor after repair
After addressing an air conditioner condensation leak, monitor for several cues that indicate continued issues or successful repair. Look for new water pooling near the indoor unit, damp patches on walls, or a musty smell indicating hidden moisture. Note any changes in cooling performance or persistent ice on coils. Schedule a follow-up check after the first hot spell to confirm that the condensate line remains clear and that the drain pan is intact. A proactive approach saves time and reduces the risk of future damage.
Steps
Estimated time: 30-60 minutes
- 1
Power down the system
Turn off the AC at the breaker to prevent electric shock while inspecting components. This is a safety-critical first step before touching any lines or pans.
Tip: Always verify power is off with a non-contact tester before proceeding. - 2
Access the condensate drainage
Locate the condensate drain line and drip pan area inside the unit. Remove any panels as needed to reach the drain line without forcing components.
Tip: Keep track of screws and fasteners so you don’t misplace them. - 3
Clear the drain line
Gently remove debris with a long, flexible tool. Flush with warm water or a mild cleaning solution to dissolve mineral buildup. Recheck for flow.
Tip: Avoid using sharp tools that could puncture the line. - 4
Inspect the drain pan
Look for cracks, warping, or corrosion. If damage is present, replace the pan to restore proper drainage.
Tip: Take a photo of the pan for reference when purchasing a replacement. - 5
Test the system
Close panels and power the unit back on. Run the system for 10–15 minutes and observe whether the condensate drains correctly.
Tip: Watch for any signs of continued drips after the initial test. - 6
Check the condensate pump (if installed)
If your setup uses a condensate pump, ensure it engages and the float switch can rise freely. Unblock or replace as needed.
Tip: Test pump by pouring water near the intake to simulate overflow. - 7
Schedule maintenance
Set a reminder for seasonal maintenance and a yearly check of pans, lines, and seals.
Tip: Keep a maintenance log to track recurring issues.
Diagnosis: Visible water pooling near the indoor air handler or outdoor unit, damp ceiling, or musty smell; ice on the coil can precede a leak.
Possible Causes
- highClogged condensate drain line causing overflow
- mediumCracked or rusted drain pan
- lowImproper slope or installation of drain line
Fixes
- easyClear the condensate drain line and verify proper drainage
- mediumInspect/replace the drain pan if cracked or corroded
- mediumCorrect drain line slope and check condensate pump operation if present
Questions & Answers
What is the most common cause of an air conditioner condensation leak?
The most common cause is a clogged condensate drain line, often with mineral buildup or algae. Clearing the line and ensuring proper drainage usually stops the leak.
The most common cause is a clogged condensate drain line; clearing the line and ensuring proper drainage stops the leak.
Can a condensation leak damage my home?
Yes. Water from leaks can damage ceilings, walls, and insulation and may lead to mold growth if not addressed promptly.
Yes, leaks can cause water damage and mold growth if not addressed quickly.
Is it safe to DIY fix a condensate leak?
DIY fixes are possible for simple blockages and pan inspection, but avoid electrical components or refrigerant lines. When in doubt, consult a licensed HVAC professional.
DIY fixes can help if you’re careful, but avoid electrical and refrigerant parts; call a pro if unsure.
When should I replace rather than repair the unit?
If the coil is damaged, the pan is severely corroded, or leaks recur after repairs, replacement is often more cost-effective in the long run.
If the coil or pan is too damaged or leaks keep returning, replacement is often the best option.
How long does a typical condensate-leak repair take?
Most repairs take 1–2 hours, depending on access to the drain line and the need to replace the pan or parts.
Most repairs take about 1–2 hours, depending on what needs replacement.
Watch Video
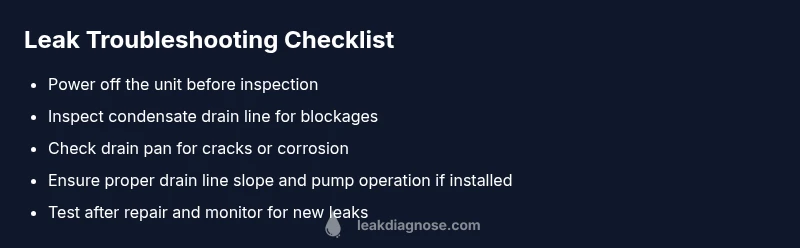
Main Points
- Identify the drain path and clear blockages first
- Inspect the drain pan for damage and replace if needed
- A dirty filter can cause icing; fix it to prevent future leaks
- Safety first: cut power before any inspection
- Regular maintenance reduces future leaks