What to Do If Leak in Roof: A Homeowner’s Guide to Safe Repair
Learn safe, practical steps to handle roof leaks—from quick containment to permanent repairs. This guide covers inspection, temporary fixes, and when to call a professional to protect your home.

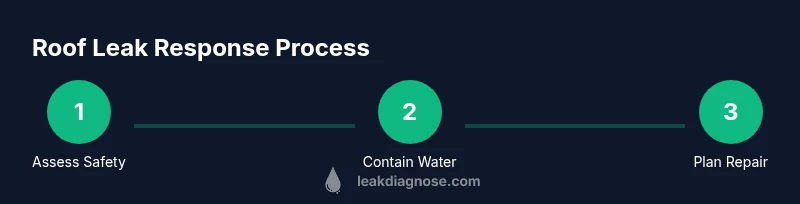
Goal: know what to do if leak in roof. This quick guide walks you through safe, practical steps to locate the source, contain moisture, and plan a proper repair. You’ll learn essential safety checks, how to gather the right tools, when to tarp or divert water, and how to decide if a professional roofer is required.
Why Roof Leaks Demand Calm, Immediate Action
Roof leaks create hidden damage quickly. Even a small drip can soak insulation, promote mold growth, and compromise structural wood. In many homes, leaks originate from worn flashing, aging shingles, or storm damage. The key is to act calmly and methodically: safety first, protect valuables, and start a quick assessment to minimize interior damage. According to Leak Diagnosis, early containment reduces water damage and makes future repairs easier. When you respond within the first hours after noticing a leak, you not only protect your possessions but also set up a clearer path for the repair work. Real-world experiences show that taking a proactive approach shortens repair time and reduces insurance hassles. A calm, organized response helps you document damage and communicate clearly with contractors.
Sources to Check: Common Roof Leak Spots
Most roof leaks originate at a few predictable failure points. Inspect the following areas from inside and, if safe, from the outside: roof flashing around chimneys and vents, roof valleys where two slopes meet, skylights and vent boots, and the edges where shingles meet gutters. Clogged gutters can cause water to back up and seep under shingles during storms. Ice damming in winter can also force water under shingles. From the attic, look for staining, damp insulation, or musty odors that travel along rafter bays. Even if you see a small stain, the actual hole could be hidden higher up. Leak Diagnosis notes that tracing moisture to its source often requires patience and repeated checks after rain.
Containment Tactics: Prevent Water Damage Right Now
If you discover a leak during rain, your first job is containment. Move furniture and valuables away from the affected area and lay down plastic sheeting or a heavy-duty tarp to direct water to a corner or outside the home. Place a bucket or basin under drips and use a layer of towels to capture minor seepage nearby. If you can safely access the attic, throw down a temporary barrier to slow cross-flow while you arrange a longer-term fix. Avoid putting yourself at risk on a ladder or on a wet roof. The goal is to minimize interior damage until permanent repairs can be completed.
Safe Inspection Tactics: Inside and Outside the House
Approach systematically, starting with inside the attic. With the lights off, move slowly and use a bright flashlight to trace light or moisture along the underside of roof deck. Note any damaged insulation or warped decking. From the outside, inspect shingles, flashing, and vent areas for cracks, lifting, or missing sealant. Wear non-slip shoes and use a sturdy ladder with a spotter. If you’re uncertain about roof strength, stop inspecting and rely on professional help. Documentation—photos of stains, cracked flashing, and gutter gaps—helps with insurance claims and contractor quotes. Leak Diagnosis recommends staying conservative with DIY attempts on steep or high roofs.
When to Call a Professional: Criteria and How to Choose
Call a professional roofer if you can’t confidently locate the source, if the leak persists after temporary containment, or if the roof is steep, damaged, or aging. A licensed roofer can perform a safe inspection, diagnose flashing failures, and replace damaged shingles or decking. Ask for license numbers, proof of insurance, a written estimate, and warranties for labor and materials. Get multiple quotes and request references. A good contractor will provide a clear scope of work, timeline, and a detailed breakdown of materials. Leak Diagnosis suggests prioritizing contractors who offer preventive maintenance plans to reduce future leaks.
Long-Term Fixes and Maintenance: Stop Recurrence
Permanent fixes depend on the leak source. Common solutions include resealing flashing with compatible sealant, replacing damaged shingles or vent boots, and repairing rotten decking. After repairs, ensure proper ventilation in the attic to reduce condensation. Regularly inspect your roof after major storms and clean gutters to prevent water backing up near the fascia. Consider installing a drip edge or improved flashing at lower hip lines to redirect water more effectively. A proactive maintenance schedule reduces the odds of repeated leaks.
Insurance, Documentation, and Preventive Measures
Keep a dated file of all damage, photos before and after repairs, and copies of any estimates or invoices. If you file a claim, provide a timing log showing when water intrusion was first noticed and when containment began. Many insurers require prompt notification and documentation of damage, so organize your records early. Preventive measures like annual roof inspections, replacing worn flashing, and keeping trees trimmed away from the roof edge can drastically cut the risk of leaks. Leak Diagnosis emphasizes building a simple maintenance calendar to catch issues before they become expensive repairs.
Quick DIY Patching: Safe Steps for Minor Leaks
For very small leaks in a non-steep section of the roof, you may apply a temporary patch using a roofing tape or adhesive sealant designed for outdoor use. Clean and dry the surface, press the patch firmly, and seal the edges. Do not attempt major structural repairs from a ladder or on damaged decking. If you see widespread damage or suspect compromised structural integrity, stop and contact a pro. This quick patch is intended as a stopgap, not a permanent fix.
Tools & Materials
- Ladder (rated for roof work)(Stable, non-slip feet; have a spotter if possible.)
- Tarp or heavy-duty plastic sheeting(6 mil or thicker; used for temporary containment.)
- Roofing tape or sealant (temporary fix)(Choose a product compatible with your roofing material.)
- Utility knife(Trim tarps and cut through sheathing if needed (careful).)
- Gloves(Grip and protect hands during inspection.)
- Safety goggles(Eye protection when cutting or handling debris.)
- Flashlight/spotlight(Better visibility in attic or under shingles.)
- Camera or smartphone(Document damage for insurance and contractor quotes.)
Steps
Estimated time: 3-8 hours
- 1
Assess safety and stop active water intrusion
First, ensure you and others are safe. If water is actively dripping, use a bucket to catch drips and move valuables away. Do not work on the roof during active rain or if the roof is slippery. If you must go into an attic, turn off any electrical circuits in the affected area to reduce shock risk.
Tip: Safety first: never step on unstable areas and keep kids/pets away from the area. - 2
Access the attic and locate the moisture source
From the attic, trace the water trail to the probable entry point. Look for stains on rafters, damp insulation, or darkened wood. Use a bright flashlight to inspect around flashing and penetrations. Take clear photos before disturbing anything.
Tip: Document every finding with photos to help with quotes and insurance claims. - 3
Set up temporary containment
Install a tarp or plastic sheeting to direct water toward a drain or outside. Secure edges with weights or fasteners, ensuring it won’t blow loose in wind. Place a secondary container under persistent drips to minimize interior damage.
Tip: Check the tarp frequently to prevent water from pooling on ceilings or furniture. - 4
Perform a minimal, safe temporary seal if you can access the area
If you can safely reach a small gap or loose shingle, apply roofing tape or a compatible sealant to slow leaks. Avoid large structural repairs unless you are trained or have the proper equipment. Do not seal over active electrical components or water near outlets.
Tip: A small patch now can buy you time until a professional evaluates the damage. - 5
Decide on permanent repair options
Evaluate whether you can handle the repair yourself or need a licensed contractor. Consider flashing replacement, shingle repair, decking replacement, and vent boot fixes. Obtain written estimates and confirm warranties.
Tip: Look for contractors who offer a written maintenance plan to prevent future leaks. - 6
Document damage and plan communication with professionals
Compile evidence: dates, photos, measurements, and notes about weather conditions when leaks occurred. Create a timeline to share with contractors and your insurer. This information speeds up assessments and prevents miscommunication.
Tip: Ask contractors for detailed scope, material choices, and a project timeline. - 7
Schedule professional inspection and repairs
If the leak is significant or involves structural components, hire a roofer to perform a full inspection and implement permanent fixes. Ensure the roofer uses weather-appropriate products and provides a warranty.
Tip: Prefer contractors with local references and a clear service warranty. - 8
Monitor and maintain after repair
After repairs, monitor the roof through at least one full season. Check for new leaks after storms and keep gutters clean. Set up a reminder to schedule annual roof inspections as part of home maintenance.
Tip: Regular checks prevent small issues from becoming costly leaks.
Questions & Answers
What causes roof leaks?
Roof leaks typically come from damaged flashing, worn shingles, clogged gutters, or poor ventilation. Storm damage and age can also create vulnerabilities. Finding the exact entry point may require checking both interior signs and exterior roof components.
Roof leaks usually come from damaged flashing, worn shingles, or clogged gutters, often due to weather or age.
Can I fix a roof leak myself?
Small, non-structural leaks may be addressed temporarily with approved sealants or patches. Do not attempt major repairs on steep or damaged roofs without training. For most home roofs, a professional solution is safer and more durable.
Minor leaks can be patched temporarily, but major roof repairs are best left to a professional.
How do I know if I need a full roof replacement?
If multiple areas show wear, decking is compromised, or leaks recur after repairs, replacement may be the most cost-effective solution. A licensed roofer can assess remaining lifespan and advise on replacement versus repair.
Frequent leaks and damaged decking often point to replacement rather than patching.
What safety precautions should I take during inspection?
Work slowly, use proper fall protection on steep roofs, avoid walking on damaged areas, and never work alone. If you’re unsure, call a pro to assess the situation.
Safety first: use fall protection and don’t step on weak areas.
How long does a roof leak repair typically take?
A simple seal or patch can take a few hours, but full structural repairs or roof replacements may extend over days. Weather conditions can also affect scheduling.
Some fixes take only a few hours; others need several days depending on the damage and weather.
Should I file an insurance claim for roof leaks?
Most homeowners' policies cover sudden roof damage caused by weather. Document the damage with photos, obtain contractor estimates, and file promptly. Your insurer may require an inspection before approval.
Claims usually require documentation and a professional assessment.
Watch Video
Main Points
- Act quickly to minimize interior moisture.
- Contain water with tarps and plastic sheeting.
- Document damage for insurance and contractor quotes.
- Prioritize safety and know when to call a pro.