How to Stop a Roof Leak: A Practical DIY Guide
Learn a safe, step-by-step method to stop roof leaks. Identify the source, contain damage, and perform patches with practical tips for DIY homeowners.

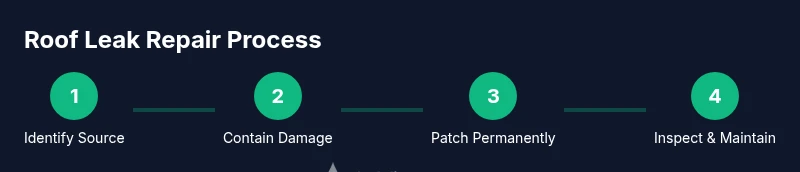
By following this guide, you’ll locate the leak source, contain water quickly, and perform a safe, temporary patch while planning a permanent fix. The goal is to stop water intrusion from a roof leak fast and minimize interior damage. Always prioritize safety and know when to call a licensed roofer.
Why roof leaks happen
Roof leaks are usually the result of a few common failure points: damaged or missing shingles, deteriorated flashing around chimneys or vents, clogged gutters that cause water to back up, and at times ice dams that force water under shingles. In many homes, leaks start small and only become noticeable after a rainstorm or after snow melts. According to Leak Diagnosis, roof leak problems often originate at the edge of the roof where flashing should seal joints, or at penetrations where vent pipes pass through the roof. The Leak Diagnosis team found that many interior leaks are the consequence of slow, unseen water intrusion rather than a dramatic, obvious hole. Understanding these failure points helps you answer the question of how to stop leak from roof with a proactive, educated approach. By inspecting the attic and the roof surface from the outside, you can pinpoint whether the leak is a surface issue such as a cracked shingle or a structural issue like a sagging deck. With this context, you can choose a patch that fits your roof type and climate, and plan a longer-term repair strategy.
Safety first when assessing a roof leak
Before you climb onto a Roof, ensure the ladder is stable on a flat surface and that you have a fall-arrest plan if the roof pitch is steep. Wear non-slip shoes, gloves, and eye protection. If you notice exposed electrical wiring or outlets in the attic are wet, stop work and switch off power at the main breaker; water and electricity are a deadly combination. Move people and pets away from the area and place a bucket or container to catch dripping water. If the interior is rapidly flooding, contain the water with plastic sheeting and towels and prioritize getting valuables to higher ground. As you work, monitor for hidden damage: sagging ceilings, rotten plywood, and mold growth.
Quick attic inspection to locate the source
Start with the attic to identify where water is entering the structure. Look for dark stains, damp insulation, or mold growth. Trace the water trail upward to where it appears to originate, often near flashing seams around vents, chimneys, or along joints in the roof deck. If the leak is running along a seam, it may travel before it drips inside, so follow the water line to its ultimate exit point. Keep in mind that stains inside the attic do not always line up with the point where the water first penetrated the roof; movement with gravity can make finding the exact source tricky, but visible damage around flashing and fasteners is a strong clue.
From roof surface to interior—mapping the leak
With a good light, inspect from the exterior at a lower elevation or from a safe ladder position. Check shingles for cracks, curling edges, or missing granules. Inspect flashing around chimneys, vents, dormers, and along roof valleys. Examine gutters and downspouts for blockages that could divert water toward the fascia. If you notice wet plywood or soft spots on the underside of the roof, you may be dealing with a larger problem on a flat or low-slope roof. Mapping the leak requires patience, especially in stormy weather; a well-documented map of the leak path will guide your temporary containment and eventual permanent repair.
Common repair paths for different roof types
Asphalt shingles typically leak at flashing seams or where shingles are damaged. Metal roofs may leak at seams, fasteners, or around flashings. Flat roofs often leak at penetrations or where the membrane has punctures. The best approach is to identify the leak path, then apply a patch that matches the roof type. For temporary control, non-permanent fixes are used to buy time until a proper repair can be performed.
Tools & Materials
- Stable, tall ladder(Extends two rungs above the roof edge; secure on level ground)
- Personal protective equipment (PPE)(Gloves, safety glasses, non-slip shoes)
- Tarps or heavy-duty plastic sheeting(Protect interior areas and create a temporary barrier)
- Roofing cement or sealant(Use compatible sealant for your roof type (asphalt, metal, or flat))
- Self-adhesive roof patches or flashing tape(For quick temporary repairs over small leaks)
- Sheet metal patch or metal flashing(Useful for larger gaps in metal roofs or flashing)
- Caulk gun and silicone or polyurethane sealant(Choose exterior-grade sealant with UV resistance)
- Putty knife and utility knife(Smoothing patches and trimming materials)
- Hammer, roofing nails, or screws appropriate for your roof(Secure patches or flashing firmly)
- Crowbar or flat pry bar(Gently lift damaged shingles or flashing without causing more damage)
- Buckets, towels, and plastic bags(Contain water and protect interior surfaces)
- Flashlight or headlamp(Detail work in the attic or dark roof area)
- Chalk or marker(Mark damaged areas for reference)
Steps
Estimated time: 2-4 hours
- 1
Prepare and assess safety
Set up a stable ladder on a flat surface and wear PPE. If the roof is wet or windy, postpone climbing. Consider using a harness for extra safety. This step reduces the risk of falls and injuries while you inspect.
Tip: Never stand on loose shingles; test footing before applying weight. - 2
Identify leak source from attic
Climb into the attic and locate water stains, damp insulation, or mold. Use a flashlight to trace the path up to the roof deck to identify whether the leak is near flashing, nails, or shingles.
Tip: Water can travel; the entry point may be above the stain. - 3
Contain the leak temporarily
Place tarps to cover the leak area inside and outside where feasible. Collect dripping water with buckets and protect valuables with plastic sheeting.
Tip: Do not delay containment; water damage spreads quickly. - 4
Dry and clean the area
Before patching, dry the affected area thoroughly. Remove loose debris and dust so sealants adhere properly.
Tip: Moisture reduces adhesion; ensure a dry surface. - 5
Apply a temporary patch
Apply roofing cement or sealant to the leak site. If small, press a self-adhesive patch or flashing tape over it for quick control.
Tip: Press firmly to seal edges and prevent air gaps. - 6
Secure a more durable patch
If practical, install a sheet metal patch or larger flashing over the area and seal the edges with exterior sealant.
Tip: Overlap edges to prevent water seepage at seams. - 7
Plan for a permanent repair
Schedule a professional assessment as soon as possible or prepare a full repair plan if you’re experienced. Major damage or a high slope roof may require pro intervention.
Tip: Document the leak location and patch for the contractor.
Questions & Answers
What is the most common cause of roof leaks?
Most leaks begin at flashing joints or damaged shingles. Ice dams and clogged gutters can also drive water under the roof edge. Inspect these areas first to locate the source.
Most leaks start at flashing or damaged shingles. Check those areas first if you’re inspecting a roof.
Can I fix a roof leak myself, or must I hire a pro?
Many minor leaks can be temporarily patched by a confident DIYer with the right materials. Complex leaks around multiple penetrations, structural damage, or steep hazards should be handled by a licensed roofer.
Small leaks can often be patched yourself, but complex damage should be done by a professional.
How long will a temporary patch last?
A temporary patch is meant to buy time until a permanent repair can be completed. Its durability depends on weather, roof type, and patch quality, but plan for a professional fix soon after a patch.
Temporary patches are to buy time; plan for a proper repair soon.
Is it safe to walk on a wet roof?
No. A wet roof becomes extremely slippery and increases fall risk. Avoid walking on it and use alternative inspection methods from the ground or attic when possible.
Avoid walking on a wet roof; it’s slippery and dangerous.
What sealant should I use around flashing?
Choose exterior-grade sealants compatible with your roof material (silicone or polyurethane). Apply in clean, dry conditions and allow proper curing time before next rainfall.
Use exterior-grade sealant compatible with your roof and let it cure fully.
What should I do if water reaches electrical outlets?
Turn off power at the main breaker and keep everyone away. Water and electricity is dangerous; call a licensed electrician after you’ve isolated the area.
Shut off power and avoid the area; call an electrician after securing the area.
Should I replace the entire roof to fix a leak?
Not always. If leaks are localized to flashing or patches, targeted repairs may suffice. A professional evaluation helps determine whether partial repairs or a full roof replacement is needed.
Full roof replacement isn’t always necessary; a pro can advise on patching versus replacement.
Watch Video
Main Points
- Identify common leak points (shingles, flashing, gutters).
- Contain the leak to minimize interior damage before patching.
- Choose a patch method compatible with your roof type.
- Know when to call a professional to avoid structural damage.