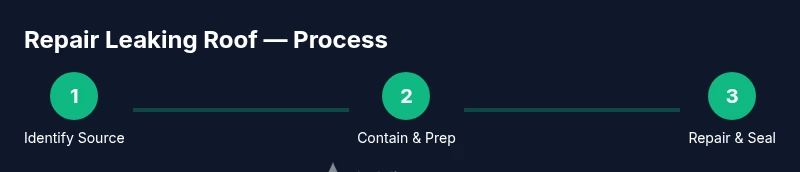
Repair Leaking Roof: A DIY Guide to Safe, Lasting Fixes
Learn how to repair leaking roof safely with a practical, step-by-step guide. Identify the source, contain the leak, and apply durable fixes with flashing, sealants, and replacement shingles.

Goal: stop water intrusion by locating the leak source, containing it, and applying a lasting repair. Start with safety checks and interior protection, then identify the source from attic or upstairs ceiling. Clean debris, replace damaged shingles or flashing, and seal joints with compatible roofing sealant. For large or structural damage, plan professional help; small leaks may be DIY with proper precautions.
Assessing Roof Material and Leak Behavior
Roof repairs depend on material type and the way water travels down the structure. Asphalt shingles, metal panels, clay tiles, or slate all respond differently to weather, age, and structural movement. In practice, the most common leaks originate at roof penetrations (vents, chimneys, skylights) or at the flashing that seals these penetrations to the deck. Worn or damaged flashing around vents is a frequent culprit because it channels water into seams rather than over them. Damaged shingles or missing granules also expose the underlayment to moisture, accelerating deterioration.
Understanding your roof's construction helps you choose a durable fix rather than a temporary patch. This is where Leak Diagnosis’s guidance is helpful: a precise diagnosis beats guessing. Start by noting visible signs from the exterior—curling edges, lifted shingles, or rusted flashing—then correlate them with interior signs like stains in the attic. Map the area around the leak to focus your repair and prevent unnecessary work. Finally, consider whether the cause is cosmetic or structural; large leaks near the apex may require professional attention. The goal is a clear diagnosis that informs a safe, lasting repair rather than a quick patch that fails after the next storm.
Locating the Leak Source: From Inside and Outside
Locating a roof leak requires looking both from inside the attic and from above on the roof. Inside, track stains or damp spots to their highest point on the roof slope; moisture often travels along studs and joists, so the actual leak may be offset from the visible stain. On the exterior, inspect shingles for curling, cracking, or loss of granules; check flashing around vents, chimneys, and skylights; and look for gaps where the deck meets the wall. A simple water test—gently spraying sections with a hose while a helper observes from the attic—can confirm moisture paths, but use caution to avoid over-wetting fragile areas. Document the location with notes or photos to guide your fix. Remember, the objective is to pinpoint the exact failure point, not just the general area of wetness.
Leak Diagnosis emphasizes correlation: interior stains with exterior defects create the most reliable map for a durable repair. If multiple roof planes or penetrations share water entry, plan a staged approach, starting at the most active area. Avoid chasing random drips; instead, follow water flow lines and check above each potential joint. A precise diagnosis reduces unnecessary work and supports a longer-lasting solution.
Safety First: Equipment, Weather, and Personal Protection
Before touching a roof, ensure you have stable footing, proper PPE, and a plan that avoids adverse weather. Wear a helmet if there is a risk of slipping or loose debris; use non-slip shoes with good traction. Set up a sturdy ladder, secure it on firm ground, and use a fall-arrest system if you’ll be working on a steep slope or higher sections. Check the forecast and avoid working during rain, high winds, or lightning—wet surfaces are extremely slippery and hidden hazards exist on every roof.
Plan for interior protection first: move furniture away from the leak area, lay down plastic sheeting or tarps, and place containers to catch drips. If you’re not comfortable with height or roof pitch, hire a professional rather than attempting the repair yourself. The safety of you and your family is the top priority, and a prudent approach today prevents costly injuries tomorrow.
Temporary Containment: Protecting Interiors While You Work
Containment is essential while you assess and repair a leak. Start by drying the affected area and laying down tarps to prevent further water damage. Place buckets or a heat- or battery-powered dehumidifier if you expect extended work time, and cover nearby outlets or electronics to avoid water exposure. Seal gaps temporarily with roofing cement or sealant along obvious openings to reduce active water entry during the repair. Keep a spare change of clothes, towels, and a cleanup kit handy; leaks can spread quickly, and quick containment reduces collateral damage. Remember, temporary patches are not substitutes for a durable fix, but they buy time to complete a thorough repair under safer conditions.
Pro tip: document the leak’s behavior after each rain event or test so you know whether the temporary measures are working and where to focus your long-term repair.
Permanent Repairs: When to Patch vs. Replace Flashing and Shingles
Permanent repairs depend on the severity and location of the damage. Small, well-sealed gaps around flashing or seams can be repaired with compatible sealants or roofing cement while replacing a handful of damaged shingles or re-sealing metal flashing may suffice on milder leaks. For larger areas, or when water has penetrated the decking or underlayment, you may need to replace sections of roofing or flashing and reinstall new shingles. If the underlayment is wet or compromised, the patch will fail quickly—prime candidates for a full replacement. In critical locations, like near a chimney or atticward peak, flashing flaws can drive leaks for years if not addressed properly. Plan the repair to restore a continuous, watertight path for water to shed off the roof.
A conservative approach often yields the most durable outcome: replace compromised components, reseal joints with compatible products, and reattach shingles with correct nailing patterns. In any case, ensure you have the correct materials matching your roof type and local climate. DIY fixes can work for minor issues; persistent leaks near structural elements or above living spaces typically require a professional assessment and potentially a roof replacement strategy.
Repair Techniques: Flashing, Sealants, and Replacement Shingles
There are several techniques depending on where the leak originates. For flashing, clean the area, remove old sealant and corrosion, and re-flash with compatible metal, then seal with high-quality roof sealant. For joints around vents or chimneys, apply self-adhesive flashing tape or a metal flashing strip, ensuring it sits under the shingles and over the counter flashing to create a water-shedding path. When replacing shingles, slide out damaged pieces and insert new ones, staggering joints like the original pattern. Seal all overlapping joints and edges with roof sealant and ensure proper nail placement to avoid future wind-driven lift. If the leak is located at a seam or around a penetration, install additional flashing to bridge the joint and prevent future moisture intrusion.
Keep extra shingles, flashing pieces, and sealants on hand for these adjustments. Take your time with each step to avoid creating new leak paths. A careful approach that restores the roof’s original water-shedding geometry yields the most durable result.
Decking, Roof Sheathing, and Structural Checks
Water that has penetrated the roof deck can cause hidden damage that undermines the repair’s effectiveness. Inspect visible attic rafters and decking once the area is dry. If you find soft spots, signs of rot, or mold, the sheathing may need replacement and the structure should be evaluated by a professional. Before replacing decking, confirm the underlying framing is sound and that there’s a stable support for new shingles and flashing. Correct any structural concerns first, because an unstable base will lead to rapid patch failure. If you discover widespread rot or delamination, budget for a more extensive repair or roof replacement rather than piecemeal fixes. It’s better to address base material integrity now than to experience repeated leaks after a quick fix.
Documentation and careful measurement help ensure the right size of new plywood or OSB, which minimizes waste and ensures the new roof layer aligns with existing shingles and flashing. Coordinate with local regulations and permit requirements if you’re undertaking larger structural work.
Finishing Touches: Replacing Shingles and Sealing Edges
After structural and flashing work is complete, reinstall or replace the final shingles with the correct orientation and nail pattern. Ensure that the new shingles overlap properly to create a continuous water-shedding surface. Reseal the edges, vents, and chimney flashing with compatible sealants, and verify there are no gaps where wind could lift the material. Clean up the work area, remove tarps, and inspect the surrounding fascia and gutters for damage. A thorough finish reduces future maintenance needs and improves the overall roof life. Finally, conduct a post-repair inspection during a rain event to confirm the fix is holding, checking both attic and exterior watermark areas for any signs of moisture.
Tip: recheck the repaired area after 24–48 hours of rain and again after the next major weather cycle to ensure lasting performance.
Maintenance to Prevent Future Leaks
Even well-installed roofs develop minor leaks over time. Establish a routine: inspect flashing, vents, and shingles after heavy storms; clean gutters and downspouts to prevent water backup near the roof edge; trim overhanging branches that rub against the surface and create damaged areas. Schedule regular inspections, especially after freezing cycles, which can cause shingles to crack and flashing to loosen. Maintain attic ventilation and moisture control to reduce condensation that can mimic leaks. Record weather events and any interior signs to track performance and plan timely maintenance. A proactive approach reduces the risk of major damage and extends roof life. The Leak Diagnosis team recommends routine checks and timely repairs to protect your home from costly water damage.
Tools & Materials
- Extension ladder rated for roof height(Stable ground; two-person setup if possible)
- Fall protection gear (harness, rope, anchors)(Use a roof anchor point; never rely on ladder alone)
- Safety helmet and non-slip footwear(Protect head from falling debris; footwear with good grip)
- Pry bar and pry tool(For removing damaged shingles and flashing)
- Replacement shingles matching roof type(Keep a small stock for quick replacements)
- Roofing nails (galvanized)(Appropriate length for shingle type)
- Roofing cement or sealant(Use product compatible with your roof material)
- Butyl tape or metal flashing for repairs(Ensure proper sealing around penetrations)
- Tin snips or metal shears(Useful for custom flashing shapes)
- Caulking gun and silicone/urethane sealant(Seal joints after flashing work)
- Hammer, utility knife, and chalk line(Prepare cut lines and align shingles)
- Tarps or plastic sheeting(Contain drips and protect interiors)
- Buckets and towels(Catch and clean up drips during work)
- Water-based cleaning solution and rags(Clean flashing and surfaces before sealing)
Steps
Estimated time: 2-6 hours
- 1
Identify the leak source
Carefully inspect the attic and roof exterior to locate the exact point where water enters. Compare interior stains with visible exterior damage and use a hose test if needed, but only under safe conditions. Document findings with notes or photos to guide the repair.
Tip: Start at the highest affected area and work downward along suspected water paths. - 2
Set up safety and containment
Position ladders securely, put on fall protection, and protect interior spaces with tarps or plastic. Remove loose debris and ensure the work area on the roof is clear before stepping onto it. Confirm weather is stable to avoid slip hazards.
Tip: Never work alone on a pitched roof; have someone assist or supervise from a safe position. - 3
Remove damaged components
Carefully lift loose shingles and remove damaged flashing around the leak. Keep your modifications organized so you can reuse intact materials where possible. If the underlying deck shows rot, plan for decking replacement before proceeding.
Tip: Label removed pieces to maintain the original pattern when reassembling. - 4
Dry and inspect the deck
Dry the roof surface; check for soft spots, mold, or delaminating underlayment. If the decking is compromised, replace sections before applying new shingles. A dry, solid base is essential for a lasting repair.
Tip: Use a moisture meter if available to assess plywood or OSB integrity. - 5
Repair flashing or replace shingles
Install new flashing or reinforce existing flashing with butyl tape or metal flashing. Re-nail shingles along the previous pattern and seal edges with roofing cement. Ensure flashing sits properly under shingles to shed water away from the seam.
Tip: Make sure all fasteners are sunk flush and not protruding above the shingle surface. - 6
Seal joints and gaps
Apply a high-quality sealant along edges where water could intrude; seal around vents, chimneys, and any penetrations. Overlap joints to improve waterproofing and resist wind uplift. Clean excess sealant for a neat finish.
Tip: Choose a sealant compatible with your roof material and climate. - 7
Reinstall or replace shingles
Place replacement shingles in the original pattern, ensuring proper alignment and nail placement. Seal the top edge with roofing cement for extra protection and protect against wind lift. Reattach ridge caps if applicable.
Tip: Stagger end joints for better wind resistance and water shedding. - 8
Test and inspect
Slowly run water along the repaired area to verify no leaks, then inspect the interior after a rain event. Look for any signs of moisture and re-check seals after the first major storm.
Tip: Document test results and set a reminder for a follow-up inspection.
Questions & Answers
What are the most common signs of a roof leak?
Common signs include water stains on ceilings or walls, dripping inside the attic, warped or curling shingles, and rusted flashing around vents or chimneys. Quick interior signs often appear after a rain event, even if the exterior looks intact.
Watch for ceiling stains and attic moisture, plus damaged flashing or shingles after rain.
Can I fix a roof leak myself, and when should I hire a pro?
Minor leaks around flashing or small damaged shingles can often be repaired by DIY with proper safety gear. If you see widespread damage, extensive rot, or water intrusion into the attic, hire a professional to evaluate structural integrity and perform a durable repair.
DIY can handle small fixes, but call a pro for big problems or structural concerns.
What tools are essential for a roof leak repair?
Key tools include a stable ladder, fall protection, pry bar, replacement shingles, roofing cement, sealant, flashing material, and a utility knife. Keep tarps on hand to contain water during work.
Important tools are ladder, safety gear, shingles, sealant, and flashing material.
How do I know if the decking is damaged?
Look for soft spots, spongy feel, or visible sagging in the attic. Hard to reach, it may require removing roof sections to inspect. If in doubt, a professional assessment is wise.
Soft spots or sagging in the attic often mean deck damage; professional assessment is recommended.
How long should a roof leak repair last?
Durability depends on the roof type, severity of damage, and quality of workmanship. A well-executed flashing and sealing repair can last several years, but ongoing maintenance is essential to extend life.
A good patch can last years, but ongoing maintenance is important.
What maintenance helps prevent future leaks?
Regular inspections after storms, cleaning gutters, trimming overhanging branches, and maintaining attic ventilation reduce moisture buildup and extend roof life.
Do regular inspections, keep gutters clean, and maintain ventilation.
Watch Video
Main Points
- Identify exact leak source before starting.
- Use proper safety gear and weather planning.
- Repair flashing and shingles with correct methods.
- Inspect decking for hidden damage and replace if needed.
- Test the fix after rain and maintain a maintenance schedule.