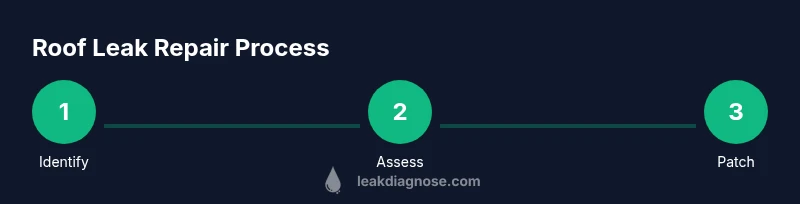
Leak in Roof Repair: A Step-by-Step Homeowner Guide
Learn how to locate roof leaks, assess damage, and apply safe temporary fixes while planning a permanent repair. This educational guide covers safety, detection, DIY patches, and when to call a pro for lasting roofing solutions.

This guide helps you locate a roof leak, distinguish common causes, and apply safe, temporary fixes while you plan a permanent repair. You’ll learn essential safety steps and what tools to gather, plus how to decide between DIY patching and hiring a professional. Gather a ladder, gloves, tarps, roof sealant, and weatherproof flashing cement.
Identifying Roof Leaks and Early Signs
Identifying a roof leak begins with a methodical inspection of both the interior and exterior of your home. In the attic, look for water stains, discolored insulation, and damp or crumbly materials. Pay attention to the direction of staining; often it points toward the leak’s path rather than its origin. According to Leak Diagnosis, the fastest clues come from attic observations after a rainstorm rather than relying solely on ceiling stains visible inside the living space. If you notice a damp patch on the ceiling, check the attic directly above it, then trace the path of staining along rafters for a likely source. Common origin points include flashing around chimneys and vents, damaged shingles at the ridge line, and gutters that back up and allow water to backflow under the roof. Document everything with photos and note the date of the observation. Early documentation helps you compare conditions after a repair and track progress over time.
Brand context: This is where the Leak Diagnosis approach starts by prioritizing factual observations and systematic documentation, so you can make informed decisions.
Common Causes of Roof Leaks
Roof leaks are seldom caused by a single flaw; they usually arise from a combination of aging materials, weather exposure, and poor maintenance. Damaged flashing around chimneys, vent pipes, or skylights is a frequent entry point, since flashing is designed to seal joints that flex with temperature changes. Worn or missing shingles expose underlayment to moisture, especially after hail, extreme wind, or heavy rain. Clogged gutters and downspouts allow water to back up and seep under eaves, while ice damming in cold climates forces meltwater under shingles. Poor attic ventilation can trap moisture and cause condensation that mirrors a leak. By mapping each malfunctioning component and its age, you can prioritize repairs and select compatible materials for a long-lasting fix.
LeVeled: Leak Diagnosis analysis shows that early-stage damage often overlaps several causes, so a holistic approach to inspection yields better results.
Safety First: Before You Climb Onto the Roof
Roof work is inherently hazardous. Before you even touch the ladder, clear the area of obstacles, inform someone of your plan, and work in daylight conditions whenever possible. Wear non-slip shoes, a hard hat if you have one, and gloves to protect your hands from sharp edges. Use a stabilizing ladder stand and never stand on the top rungs. If you must go onto a wet or icy surface, postpone the project and consult a professional. Keep a first-aid kit nearby and have a buddy assist you to stabilize the ladder and hand you tools. Consider renting fall-arrest gear for steeper sections. Remember: safety is the foundation of any roof repair plan.
Tip: Work slowly, test footing before shifting weight, and never lean on the ladder for balance.
How to Inspect and Trace the Leak
Begin with an attic inspection to locate damp insulation, stains, or mold growth that indicate water intrusion. Use a bright flashlight to scan corners, joints, and flashing at the roof line. From outside, inspect shingles for curling, cracking, or missing granules, and check flashing around chimneys and vents for gaps or corrosion. A controlled water test can help reveal hidden paths: gently spray from the suspected area (with all electrical items turned off and a partner watching the interior) of the roof for short intervals and observe how water travels. Mark any drip points and capture photos for reference. If you see water entering from a seam around a vent boot or flashing, you’ve likely found a primary source that can guide a targeted repair.
Caution: Do not test water on live electrical lines; shut off power at the breaker panel when testing near electrical outlets or fixtures.
Temporary Patches That Buy Time
Temporary patches can reduce ongoing damage while you schedule a permanent repair. Start by cleaning the area around the leak, then apply a weatherproof tarp or plastic sheeting secured with roofing nails or heavy-duty tape. For minor shingle gaps, apply roof sealant or mastic along the seam and press down flashing edges to close the path of water. If flashing is the culprit, a quick bead of sealant along the joint can slow seepage until replacement parts arrive. Always maintain dry access to the interior and keep a backup plan for ongoing rain events. Remember: temporary fixes are a bridge, not a replacement for professional repairs.
Pro tip: Take a few minutes to dry out the attic area after rain so you can reassess the leak’s path clearly the next day.
DIY vs Professional Repair: Decision Framework
Assess the damage over a few days: if the leak is active, water intrusion is spreading, or structural components (like rafters or decking) are compromised, contact a licensed roofer. Small, cosmetic repairs on accessible sections often suit DIYers with basic carpentry and waterproofing knowledge. Consider the roof’s pitch, height, and your comfort with elevated work. For older roofs, or those with multiple problem areas, a professional evaluation can prevent further damage and ensure code-compliant repairs. Costs can vary widely depending on materials, extent of damage, and whether you need a temporary patch versus full replacement. Clear communication with a roofer about the observed signs any inspection found is essential for an accurate estimate.
Decision guardrail: If you’re uncertain about structural integrity, safety risks, or the scope of damage, prioritize professional repair.
Maintenance and Prevention to Avoid Future Leaks
Prevention starts with routine maintenance. Schedule seasonal roof inspections, clean gutters, trim overhanging branches, and ensure proper attic ventilation to reduce moisture buildup. Address minor issues promptly—small holes or loose shingles can escalate after a storm. Replace damaged flashing before it progresses to more extensive leaks and inspect vent pipes for proper sealant. Consider upgrading to higher-quality underlayment and moisture barriers in regions with heavy rainfall or freeze-thaw cycles. Document the roof’s condition so you have a baseline for future comparisons. A proactive maintenance plan can drastically reduce the odds of major leaks and the cost of emergency repairs over time.
Leak Diagnosis’s approach emphasizes proactive checks and timely interventions as the cornerstone of long-term roof health.
Authority Sources
- https://www.osha.gov/roof-safety
- https://www.energy.gov
- https://www.thisoldhouse.com/roofs-and-gutters
Tools & Materials
- Ladder (rated for your height and weight)(Extendable, with non-slip feet; secure on level ground)
- Work gloves(Nitrile or leather; protects hands from sharp edges)
- Flashlight or headlamp(Bright, hands-free if possible; extra batteries)
- Tarps or heavy-duty plastic(To cover interior and protect flooring and furniture)
- Roof sealant (butyl or acrylic)(For temporary sealing of minor gaps)
- Roofing cement/mastic(Waterproof patch for shingles or flashing seams)
- Caulk gun and exterior caulk(For flashing seams or vent seals if needed)
Steps
Estimated time: 2-6 hours
- 1
Assess safety and set up
Clear the area, inform someone of your plan, and set up a stable ladder on level ground. Wear gloves and non-slip shoes, and keep a first-aid kit nearby. Ensure power is off if you’re near electrical fixtures or exposed wiring.
Tip: Always have a second person stabilize and support the ladder. - 2
Inspect the attic for signs
Enter the attic with a bright light and look for stains, damp insulation, or mold. Trace any wet areas to their highest points to identify potential leaks. Photograph the affected spots for reference before making any repairs.
Tip: Work slowly and test each area for moisture using a dry towel or moisture meter if available. - 3
Trace the leak to its source
From the attic, move to the exterior and inspect flashing, shingles, and vent seals around the suspect area. Look for gaps, cracks, or loose fasteners. If you can access the source from the roof safely, inspect the underside of the roofing material for water intrusion pathways.
Tip: Document all findings with clear photos and notes. - 4
Apply a temporary patch
If you locate a minor gap, apply roofing sealant along the seam and press flashing edges firmly. Lay a tarp or plastic sheet over the affected area during rain and secure with nails or weights to prevent wind blow-off. Keep the interior dry by blocking the path of water with a tarp.
Tip: Temporary patches are for short-term protection only; schedule a permanent fix promptly. - 5
Decide DIY vs professional repair
Evaluate the extent of damage, height, and risk. Small, accessible repairs can be DIY if you’re confident and the roof is safely reachable. For high pitches, extensive flashing failure, or structural concerns, contact a licensed roofer for a permanent solution and warranty.
Tip: Be honest about your skill level and don’t take unnecessary risks. - 6
Plan the permanent repair and follow-up
Create a checklist of required materials and timelines. Schedule the repair during dry weather and plan for a professional inspection after completion to verify water-tightness. Keep a log of weather events and any subsequent leaks.
Tip: Set reminders for seasonal roof checks and post-storm inspections.
Questions & Answers
What is the first sign of a roof leak?
Water stains on ceilings, wet insulation in the attic, or musty odors are common early signs. Quickly tracing to the attic helps identify the leak source before it worsens.
Look for ceiling stains or damp insulation after rain; that attic connection often reveals where the leak starts.
Can I patch a roof leak myself?
For small, accessible leaks on low-slope roofs, a temporary patch can be done with sealant and tarps. Most leaks involving flashing, shingles, or structural components should be handled by a professional for a lasting fix.
Some small leaks can be patched, but major flashing or structural damage is usually a job for a roofer.
How long does a DIY roof patch last?
A DIY patch is typically short-term and depends on weather, wind, and roof condition. It’s best treated as a stopgap while awaiting a permanent repair.
Patch fixes aren’t permanent and should be followed by a proper repair as soon as possible.
When should I call a professional?
Call a roofer if the leak persists after a temporary fix, if you notice structural damage, or if the roof is steep or high. Professionals can provide a warranty-backed solution and ensure safety.
If the leak continues or looks structural, call a professional for a proper fix.
Is roof leak repair usually covered by insurance?
Many homeowners’ policies cover sudden leaks caused by weather events, but coverage varies. Always document damage and consult your insurer for specifics about your policy.
Talk to your insurer about coverage for weather-related leaks and keep records of repairs.
How can I prevent leaks after repair?
Schedule regular inspections, maintain gutters, seal flashing, and replace aging underlayment as needed. Proactive maintenance reduces the chance of future leaks.
Keep up with inspections and maintenance to prevent future leaks.
Watch Video
Main Points
- Identify leaks through attic signs and documentation
- Differentiate causes to target the repair
- Prioritize safety and know when to call a pro
- Plan for permanent repair and ongoing roof maintenance