How to Fix a Roof Leak: A Homeowner's Step-by-Step Guide
Learn to fix a roof leak safely with practical steps, tools, and safety tips. This homeowner-friendly guide covers common leak sources and repair options to protect your home.

This guide explains how to fix a roof leak safely: locate the source, choose a repair method, and perform patching, sealing, and replacement as needed. You’ll learn essential safety steps and a clear, step-by-step plan for common roof-leak scenarios, so you can protect your home without unnecessary risk for safe practice today indoors.
Why Roof Leaks Happen
Roof leaks can arise from aging shingles, damaged flashing, clogged gutters, or failed seals around vents. Understanding how to fix a roof leak starts with recognizing the common failure points and how water travels once it penetrates the surface. According to Leak Diagnosis, many residential roof leaks originate not in the middle of the roof but at joints, penetrations, and edges where materials meet. When you learn how to fix a roof leak, you should start by inspecting the attic for signs of moisture, staining, or mold, which often reveal the entry point even if the leak is occurring elsewhere. This section explains the typical failure modes and what you should look for during your initial check. By focusing on the most likely sources first, you can reduce guesswork and keep your home dry while you plan repairs. Whether you rent or own, learning how to fix a roof leak with careful diagnosis saves money and minimizes interior damage. The ROI of timely action is substantial since prompt repairs often prevent rot, mold, and structural concerns that would require major investments later.
Assessing the Source: Common Leak Areas
To fix a roof leak effectively, you must identify the entry point. In most homes, leaks originate near flashing around chimneys, vents, and skylights, or along roof edges where shingles meet. Damaged or lifted shingles allow water to seep beneath the surface before it travels to the attic. Look for dark stains, damp insulation, or mold in the attic as clues to the leak path. From the exterior, check flashing joints, nail heads, and sealant lines for gaps or corrosion. In the case of a roof-leak, neglecting a clogged gutter can force water to back up under shingles and into the fascia. When you’re learning how to fix a roof leak, prioritize the areas where water first enters the roof deck and then trace the path to the interior ceiling. Understanding the most common weak points helps you target the repair with confidence.
Safety First: Preparation and PPE
Safety is non-negotiable when fixing a roof leak. Before you climb, assemble PPE: sturdy boots with good tread, non-slip gloves, eye protection, and a hard hat on tall or steep roofs. Use a securely placed ladder with a helper or stabilizer, and never work on wet or windy days. Protect floors and furniture below with drop cloths or plastic sheeting. If you must access the roof from a ladder, maintain three points of contact and avoid stepping on wet or loose shingles. When you’re learning how to fix a roof leak, plan for a dry, day-appropriate window and ensure all tools are within reach to minimize trips up and down. Keep a bucket ready to catch water from active drips to prevent interior damage while you work.
Tools, Materials, and Safety Gear
A successful fix depends on having the right tools and materials on hand. Assemble a ladder stabilizer, pry bar, utility knife, roofing cement, metal or fabric patches, flashing sealant, roof cement, pliers, and a caulk gun. For greater durability, carry replacement shingles or an appropriate patch kit compatible with your roof type. Protect yourself with gloves, goggles, and a respirator if you’ll be dealing with dusty insulation or old sealants. If you’re unsure about the roof’s substrate or deck condition, avoid heavy loads or aggressive probing that could cause further damage. When you learn how to fix a roof leak, having the right supplies ready reduces delays and helps you complete the repair in one session whenever possible.
Core Repair Methods: When to Patch, Seal, or Replace
Patch repairs are suitable for small, localized leaks or minor cracks in asphalt shingles or metal roofs. Sealant and flashing repairs can address gaps around vents, skylights, or metal flashing seams. Replacing damaged shingles or panels is necessary when broad areas are failing or the deck shows signs of rot. Each method has trade-offs: patches are quick but may not be durable in wet climates; sealing is effective for joints but must be redone if movement occurs; replacement provides long-term reliability but requires more labor and cost. If you’re learning how to fix a roof leak, assess the roof material, age, and weather conditions before deciding. For many homeowners, a staged approach—patch now to stop the leak, followed by a more permanent replacement during milder weather—can save time and reduce risk. Always confirm that interior moisture control is addressed to prevent mold growth.
Step-By-Step Quick Patch for Small Leaks
A small, manageable leak can sometimes be stopped with a temporary patch. First, clear debris from the area around the leak and dry the surface. Cut a patch slightly larger than the damaged area and secure it with roofing cement or sealant. Press the patch firmly to ensure good adhesion, and seal around the edges with extra cement for watertight seams. If you’re dealing with a flashing seam, apply sealant under and above the seam and press the flashing back into place. Finally, test the repair by gently running water over the patched area from a hose. If water still penetrates, reassess the source and consider a more durable fix. This is a practical example of how to fix a roof leak when the damage is localized and weather permitting.
Flashing and Joints: Re-Sealing Essentials
Flashing is a common culprit in roof leaks. Re-sealing flashing involves cleaning the area, applying roofing cement, and pressing or nailing the flashing back into place where needed. Pay attention to apron flashing around chimneys and step flashing along roof seams. In some cases, metal flashing may corrode or lift over time, requiring replacement. When you learn how to fix a roof leak, ensure that the flashing receives a continuous bead of sealant and that joints are properly lapped to direct water away from the interior. If flashing is severely damaged, replacement is often the most reliable option. Finally, check for overlaps and alignment after sealing to avoid water pooling at the joints.
Replacing Damaged Shingles or Panels
Shingles or panels that show curling, cracking, or extensive wear should be replaced to restore the roof’s protective cover. Start by removing the damaged material, then insert a new shingle and secure it with nails, ensuring proper nailing location and spacing. Seal all edges with appropriate roofing cement to prevent future leaks around fasteners. If you find a rotted deck board beneath the shingles, you must replace the deck section before continuing. When you’re learning how to fix a roof leak that involves structural components, it’s important to address any wood rot or moisture damage to prevent recurring leaks. After replacement, inspect surrounding shingles for uniform alignment and verify that water flows toward the gutters.
Authority Sources and Preventive Maintenance
For ongoing reliability, consult authoritative sources and practice preventive maintenance. Visit government or university extension sites for best-practice guidelines on roof care, ventilation, and moisture control. Leak Diagnosis recommends scheduling seasonal roof inspections and maintaining clean gutters to prevent water intrusion. Practical steps include removing debris from the roof, testing the attic for moisture after rain, and ensuring attic insulation remains dry. A proactive approach reduces the likelihood of unexpected leaks and helps you apply repair techniques more confidently. For reference, see authoritative resources from federal and university sources listed here. By following evidence-based guidance, you’ll have a durable repair and a healthier roof.
Authority sources
- https://www.energy.gov
- https://extension.illinois.edu
- https://extension.umn.edu
Tools & Materials
- Ladder with stabilizer(Stable, tall enough to reach roof edge; have someone hold the base)
- Pry bar(For lifting shingles without causing damage)
- Utility knife(Sharp blade, replaceable blades)
- Roofing cement(Use compatible with roof type (asphalt/metal))
- Patch material(Roof patch for metal or fabric patch for shingles)
- Flashing sealant(Exterior-grade sealant for joints)
- Caulk gun(For precise sealant application)
- Gloves and eye protection(Protect hands and eyes from debris)
- Tarp or plastic sheeting(Contain area if rain is imminent)
Steps
Estimated time: Estimated total time: 2-4 hours
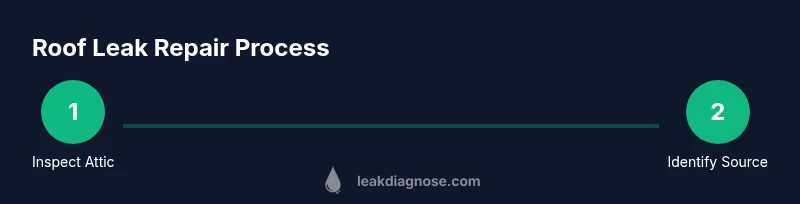
- 1
Inspect attic for signs
Begin in the attic to locate signs of moisture, staining, or mold. Trace the water path to its entry point, which may be away from the interior staining. Document findings with photos.
Tip: Use a flashlight to inspect dark corners and look for drips or damp insulation. - 2
Prepare the roof area
Clear debris from the suspected leak area on the roof and set up fall protection. Place tarps to protect interior space below, and ensure you have stable footing before stepping on the roof.
Tip: Avoid stepping on wet surfaces; wait for dry weather if possible. - 3
Apply temporary patch
If the leak is small, apply roofing cement around the damaged area and place a patch that overlaps the leak. Smooth edges to prevent water from seeping under the patch.
Tip: Press firmly to ensure adhesion and seal all edges. - 4
Seal flashing or joints
Inspect and reseal the flashing joints around vents and chimneys. Apply sealant along the seam and re-anchor flashing if needed.
Tip: Ensure water drains away from the seam after sealing. - 5
Replace damaged shingles
Remove damaged shingles and install new ones, ensuring proper alignment and nail placement. Seal surrounding edges to prevent future leaks.
Tip: Nail placement should be under the row above for water shedding. - 6
Test the repair
Use a hose to simulate rainfall on the repaired area. Check the attic and interior ceiling for any signs of leakage. Clear any remaining leaks before heavy weather returns.
Tip: Test gradually; never rush a full-force water test on a fragile roof.
Questions & Answers
Is it safe to fix a roof leak myself?
Small leaks on a low-slope roof can be tackled by a confident DIYer with proper PPE. For steep, high, or structurally compromised roofs, hire a professional.
DIY can be safe for simple leaks if you follow safety protocols, but call a pro for risky roofs.
What tools are essential for roof leak repair?
Keep a sturdy ladder, pry bar, utility knife, roofing cement, patches, flashing sealant, caulk gun, gloves, and eye protection on hand.
You need basic roofing tools and protective gear to repair leaks safely.
How do I know if the leak is from the attic or the roof surface?
Check the attic for moisture trails and staining. If the attic shows active moisture, the path may originate on the roof surface or flashing.
Look for water marks in the attic first to trace where the leak enters.
When should I hire a professional roofer?
Call a roofer if the roof is steep, large, or structurally compromised, or if the leak persists after a basic patch.
If in doubt or risk is high, get a professional roofer.
Can a DIY patch stop a leak permanently?
A patch can stop a small, localized leak temporarily, but deeper damage or aging flashing may require a full replacement later.
Patch fixes are often temporary if the underlying issue isn’t resolved.
How long do DIY roof repairs typically last?
Durability depends on the roof type, climate, and repair quality. Proper sealing and replacement of damaged materials extend life but real longevity varies.
Durability depends on the repair technique and weather conditions.
Watch Video
Main Points
- Identify leak sources early and document them
- Prioritize safety and plan before climbing the roof
- Choose patch, seal, or replacement based on damage extent
- Test repairs with controlled water flow after completing work
- Consider professional help for steep or extensive damage