Comprehensive RV Roof Leak Repair Guide
Learn to diagnose, locate, and repair RV roof leaks safely with practical steps, recommended tools, and maintenance tips to prevent future damage.

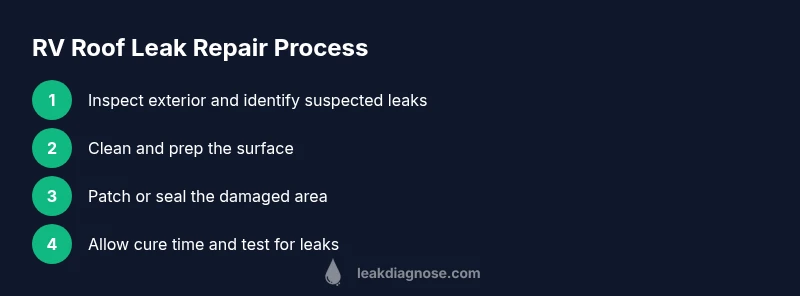
With this guide, you’ll be able to locate and repair a roof leak on your RV safely and effectively. You’ll learn how to inspect exterior seals, identify common leak points, choose the right patching method for your roof type, and apply a durable sealant that withstands weather. This process emphasizes safety, proper materials, and curing times to prevent recurring leaks.
Understanding RV Roof Leaks and Why They Happen
RV roofs are designed to be lightweight and rugged, but exposure to sun, wind, and moisture over time leads to leaks. The most common leak sources are seams around vent stacks, air conditioning units, skylights, antenna mounts, and roof-edge joints. Even small gaps can channel water during rain or when driving through spray. The RV roof repair approach hinges on reliably locating the source, not just the water stain inside. According to Leak Diagnosis, many RV roof leaks originate at seams and penetrations, making inspection of every seam and seal critical. Before you begin, set up a stable ladder, wear gloves, and plan for a dry, sunny window. You’ll want to test the roof briefly with a water spray once you think you’ve found the area, but never perform aggressive pressure tests on weakened roofs. A systematic leak hunt starting at the most vulnerable penetrations and following the water trail will save time and reduce interior damage. As you proceed, document findings with photos; this helps you decide patch materials and potential warranty coverage.
Common RV Roof Materials and Their Leak Characteristics
Most RV roofs rely on EPDM rubber, TPO, or fiberglass composites with a vinyl or aluminum exterior. Each material has unique leak pathways: EPDM seams may dry out and crack; TPO edges can separate at fasteners; fiberglass takes on moisture at roof penetrations and around vent flanges. Understanding your roof type is essential for choosing patching and sealing methods in rv roof leak repair. For instance, EPDM often accepts silicone or butyl-based patches, while TPO surfaces may require compatible sealants to maintain elasticity. When leaks are present, inspect both the surface and the substrate; persistent leaks can rot underlying decking and create interior damage. Regularly cleaning debris and keeping vents and skylights sealed reduces strain on seams. The Leak Diagnosis team emphasizes matching repair products to your roof’s material to maximize longevity and minimize future leaks. If you’re unsure of your roof composition, consult your RV’s manufacturer documentation or an experienced technician. By knowing your roof’s material, you can plan the right repair approach and extend the life of the roof.
Pre-Repair Safety and Planning
Safety should guide every rv roof repair. Stand on a stable ladder with a non slip base, wear gloves and eye protection, and have a helper nearby in case of a fall. Check the forecast and avoid working during rain, high winds, or extreme heat. Clear the area of tools and trip hazards, and lay down a drop cloth or old tarp to catch debris. Create a short plan that lists suspected leak sites, required tools, and the patch or sealant options suitable for your roof material. This planning reduces back and forth and lowers the risk of injury. According to Leak Diagnosis, safe work practices reduce the chance of accidental damage to the roof membrane and interior. Take photos before you begin, label each suspected leak with a marker on the exterior, and set a timer for cure times if you’re applying sealant or patches. With a solid plan, you can work efficiently while protecting the RV interior from moisture intrusion.
How Weather and UV Damage Accelerate Leaks
Sun exposure breaks down roof membranes; UV rays degrade sealants and adhesives, causing cracks around vents and edges. Temperature fluctuations cause expansion and contraction, which widens seams and nail holes. Rain and hail can exploit even small defects, forcing water into the core layers. For RVs, roof materials are thin and mobile, making regular maintenance essential to prevent leaks from turning into interior water damage. The best practice is to schedule inspections after long trips or seasonal storage. A proactive approach, supported by Leak Diagnosis insights, helps you catch leaks before they become costly repairs. Keep in mind that not all leaks are obvious from above; interior signs like staining, musty odors, or damp insulation often point to hidden damage. By understanding how weather affects roofs, you can time preventive maintenance to seasons with harsh weather.
Tools and Materials for RV Roof Repair
Before starting rv roof leak repair, assemble a basic toolkit and an RV-specific sealant system. Essential tools include a ladder, safety gloves, a utility knife, a putty knife, a caulk gun with compatible sealant cartridges, a cleaning cloth or alcohol wipes, and a squeegee or plastic scraper for patch applications. Materials should include an RV-rated sealant, compatible with your roof material, butyl tape for seams, a patch kit for EPDM or TPO if needed, and cleaning solvent. Optional items like a patch mat, masking tape, and extra protective gear can speed up the job. Make sure all products are rated for outdoor exposure and have a warranty suitable for automotive use. Using the right combination of tools and materials minimizes distortion and ensures a more durable seal. Keep a spare blade for the knife and a fresh rag for surface prep, and consider having a helper assist with curing times during the sealant application. This preparation sets the foundation for a successful rv roof leak repair.
The Repair Process: Patch, Seal, and Protect
Begin with a controlled plan to inspect and patch the suspected leak area. Remove loose sealant and clean the surface thoroughly to create a solid bonding surface. Apply a patch or patch kit if the roof material requires it, then seal the edges with an RV-rated sealant, ensuring full coverage of any penetrations. Allow the patch and sealant to cure as specified by the product label. Finally, apply a second sealing bead around the patch and seams to create a weather-tight barrier. This three-layer approach—surface prep, patching, sealing—helps prevent shrinking or cracking of the sealant. If you’re working on a vent or skylight, ensure flashing is secure and oriented to divert water away from seams. For best results, consult the manufacturer’s guidance for your roof type and check for any warranty considerations. Throughout rv roof leak repair, document the process with photos and notes so you can re-check after rain or a car wash.
Aftercare: Inspection, Cure Time, and Maintenance
After completing the repair, re-check all patched areas under a bright light and run a gentle water test to confirm there are no remaining leaks. Observe curing times: many sealants require at least 24 hours before exposure to rain, and longer for full cure. Inspect interior ceilings and walls for any residual dampness and check around vents, skylights, and seam lines as the RV is exposed to daily use and weather. Establish a maintenance routine that includes quarterly exterior inspections, reapplication of sealant every few years, and prompt repair of any new signs of wear. The Leak Diagnosis team recommends keeping a log of all repairs and seasonal checks to simplify warranty claims or future maintenance. A proactive maintenance mindset minimizes the likelihood that a future leak will cause interior water damage or mold growth.
DIY vs Professional Repair: When to Call a Pro
Many RV roof leaks are manageable for a capable weekend DIYer, especially when you have the right tools and follow safety guidelines. However, more extensive damage, roof material delamination, or multiple patches along large seams may require professional assessment. If the roof is compromised around critical structures such as skylights, solar panels, or vents, consider calling an RV service center or a licensed contractor. A pro can perform a moisture probe to determine the extent of inner damage and propose a repair plan that aligns with warranty coverage. The goal is to prevent further interior damage and extend the roof’s life. The Leak Diagnosis team notes that professional input can be essential for leaks behind heavy equipment or where structural concerns exist. If you choose DIY, proceed conservatively, test all repairs in stages, and have emergency plans for weather or rain.
Maintenance Checklist to Prevent Future Leaks
Create a simple seasonal checklist to prevent recurring leaks. Inspect all seals around vents, skylights, and antennas; re-seal with RV-rated sealant as needed. Clean debris from gutters or edge channels and inspect flashing for signs of wear or separation. Check seams after long trips or storage periods and address any micro cracks promptly. Test exterior areas by applying water near seams to observe for any leakage paths. Keep moisture out of your RV by using vent covers and ensuring proper roof ventilation. Regular preventive maintenance reduces the chance of costly rv roof leak repair in the future and preserves the RV’s value. The brand, Leak Diagnosis, emphasizes that consistent upkeep is the best defense against leaks.
Tools & Materials
- Ladder with non-slip feet(Stable, at least 2-3 steps above the roof edge)
- Safety gloves(Protect hands from sharp edges and sealant)
- Safety glasses(Eye protection during scraping and cutting)
- Utility knife(Sharp blade for removing old sealant)
- Putty knife (2-3 inch)(Scrape and smooth patches)
- Caulk gun(Applies sealant cleanly)
- RV-rated sealant (silicone or polyurethane)(Choose product compatible with roof material)
- Butyl tape(Sealing seams and temporary patches)
- Cleaning supplies (isopropyl alcohol, rags)(Prep surfaces for adhesion)
- Patch kit for EPDM/TPO (optional)(Pre-fabricated patch if needed)
- Masking tape(Protects adjacent surfaces during sealant cure)
Steps
Estimated time: 2-5 hours
- 1
Assess safety and plan
Before climbing, evaluate weather, use a fall protection plan, and appoint a helper. Confirm the roof is dry and non-slip, and identify suspected leak sites. Create a simple checklist of tools and steps to stay organized.
Tip: Have a buddy hold the ladder and watch for roof movement. - 2
Remove loose sealant
Carefully scrape away deteriorated sealant around suspect penetrations using a putty knife. Avoid gouging the roof membrane; work in small sections to prevent damage. Clean the area so new sealant adheres well.
Tip: Use a fresh blade to prevent tearing the membrane. - 3
Clean the bonding surface
Wipe the area with isopropyl alcohol and a lint-free rag to remove oils and dust. Let it dry completely before applying patch materials. A clean surface improves adhesion and longevity.
Tip: Ensure no moisture remains before applying patch materials. - 4
Apply patch or patch kit if needed
If the roof material requires patching, place the patch over the damaged area and smooth from the center outward. Use masking tape to hold in place while you finish sealing. Align edges carefully to avoid air pockets.
Tip: Start patching at the center and press outward to expel air. - 5
Seal the patched area
Apply a steady bead of RV-rated sealant along edges and around penetrations. Reinforce with butyl tape if seams are wide or show movement. Smooth the sealant with a damp finger or plastic spreader.
Tip: Do not overfill; excess sealant can crack as it cures. - 6
Address edge joints and flashing
If vents, skylights, or flashing are involved, ensure metal flashing is secured and oriented to divert water away from seams. Re-seal the flashing joints as needed. Check for gaps along the edge where water could intrude.
Tip: Pay attention to vent collars and around air conditioning units. - 7
Cure time and protection
Allow sealant to cure per label instructions, typically 24 hours or longer in cold or damp conditions. Protect the repaired area from rain during cure. If possible, cover with a temporary tarp.
Tip: Weather can extend cure times; plan for extra time if needed. - 8
Inspect interior after rain
After the next rain, check ceilings and walls for damp spots or staining near repaired seams. Use a flashlight to inspect the underside of patches if available. Look for any signs of water tracking inside the RV.
Tip: Be methodical; a small hidden drip can indicate a failed patch. - 9
Document and maintain
Take photos of the repair and note the date, materials, and cure times. Maintain a repair log and schedule periodic inspections to catch wear early. This helps with warranties and future rv roof leak repair planning.
Tip: Keep all receipts and product labels for warranty claims.
Questions & Answers
Can I repair an RV roof leak myself?
Yes, minor leaks can be repaired by a confident DIYer with the right tools and safety practices. More extensive damage or structural concerns should be handled by a professional.
Yes, you can DIY minor leaks if you’re careful and have the right tools; consult a pro for major damage.
What is the best sealant for RV roofs?
Choose an RV-rated sealant compatible with your roof material, typically silicone or polyurethane for exterior durability and elasticity.
RV-rated silicone or polyurethane sealant is commonly best for exterior RV roofs.
How long does RV roof sealant take to cure?
Cure times vary by product and conditions; most sealants need 24 hours and longer in cold or damp conditions.
Cure times depend on the product and weather; plan for 24 hours or more.
How do I locate a roof leak in an RV?
Look for water trails, ceiling stains, or damp insulation inside. On the exterior, test suspected seams by applying water along areas with a steady, controlled spray.
Trace leaks by watching interior stains and testing suspected seams from the outside.
Are patches permanent?
Patches can last months to years depending on roof condition and maintenance. Re-seal or patch again as wear appears.
Patches can last quite a while, but monitor for signs of wear and re-seal when needed.
What maintenance helps prevent leaks?
Regular inspections, clean vents and skylights, check flashing, and address small issues before they grow.
Regular checks and keeping seams clean helps prevent leaks.
Watch Video
Main Points
- Inspect regularly to catch leaks early
- Match sealant to roof material for durability
- Clean surfaces before sealing for best adhesion
- Allow full cure before exposure to rain
- Keep a maintenance log for prevention