Roof Leak Repair in New Jersey: Step-by-Step Guide
Learn how to detect, contain, and repair roof leaks in New Jersey with a practical, DIY-friendly approach. This guide covers safety, materials, timelines, and when to call a pro for lasting protection.

In New Jersey, the first goal is to stop water from spreading, then identify the leak source, and patch or repair as needed. Start with safety, containment, and a temporary fix if the weather keeps you from a full repair. Use this guide to decide DIY steps versus professional help based on damage and roof type.
Why roof leak repair in New Jersey matters
In New Jersey, climate variability and seasonal storms make roof leaks a common issue. The combination of Nor'easters, humid summers, and salt air along coastal areas accelerates wear on shingles, flashing, and underlayment. Left untreated, leaks can cause attic mold, wood rot, and interior damage to insulation and drywall. The Leak Diagnosis team emphasizes that timely attention reduces repair costs and prevents escalation. If you notice staining, bubbly paint, or a musty odor, start documenting damage and plan a safe fix. For homeowners, understanding local building practices and weather patterns helps you choose the right repair approach and when to call a licensed roofer. This guide uses real-world NJ scenarios to show practical fixes you can attempt safely, especially during dry spells between storms.
Understanding NJ roofing systems and common leak sources
New Jersey roofs come in various designs, from asphalt shingle to flat membrane systems. In coastal or river-adjacent areas, salt spray and heavy rainfall stress flashing around chimneys, vents, and skylights. Common leak sources include damaged shingles, worn flashing, compromised underlayment, and clogged gutters that overflow onto the fascia. The typical repair path in NJ starts with a careful inspection to identify whether the leak originates at the roof surface, in flashing, or from an interior penetration. Knowing your roof type and age helps you choose between a quick patch, a flashing reseal, or a full replacement plan that meets local codes and weather expectations. The emphasis remains on safety and keeping moisture out of living spaces.
Step-by-step diagnosis: locate the leak source
Begin at the exterior to locate obvious damage, then move to the attic during daylight to trace water trails. Look for damp insulation, stained wood, and crushed decking. Use a flashlight and a mirror to inspect flashing around vents, skylights, and chimneys. Mark suspected areas with chalk, then verify from above by gently pressing on shingles or flashing to observe movement of moisture. In NJ, drying winds and intermittent rain can mask leaks, so repeat checks after a rain or use a hose with a controlled test to reproduce the leak safely. Document findings with photos for reference if you plan a professional repair.
Containment and safety: stop water damage while you repair
Containment is your best ally when a leak is active. Lay down heavy-duty tarps or plastic sheeting to direct water away from living areas and protect electrical outlets. Use a sturdy ladder with a spotter, wear non-slip boots, and never lean or stand on compromised decking. If you must access the roof, work with a partner and keep three points of contact. In cloudy or stormy NJ weather, postpone any prolonged exposure on the roof and prioritize a temporary patch from the attic or from underneath with sealant to slow leaks until dry weather returns.
DIY patching vs. professional repair: decisions in NJ
Small, non-structural leaks from damaged shingles or flashing can sometimes be patched temporarily with roofing cement, patch sheets, or sealant. However, persistent leaks, widespread staining, soft decking, or leaks near skylights and chimneys often require a professional inspection and replacement. In New Jersey, local building codes can affect vent flashing and roof penetration work, so a licensed roofer may be necessary to ensure warranty coverage and code compliance. Use this guide to assess your comfort level, the leak severity, and whether the risk of falling or structural damage makes professional help the safer choice.
Materials, tools, and costs: what you’ll need
Prepare a basic toolkit for patching and minor repairs: ladder, safety gear (gloves, eye protection, fall protection if needed), roofing cement, asphalt patch or self-adhesive patch, utility knife, tin snips, pry bar, caulk gun with roof sealant, and matching shingles or flashing if replacement is necessary. Keep a tarpaulin and plastic sheeting for quick containment during bad weather. For more extensive work, you may need sealant around flashings, metal flashing, plywood decking, and a roof cement with cold-weather performance. In NJ, supply quality matters more than speed, so invest in durable patching materials that withstand freeze-thaw cycles and seasonal moisture.
Tools, safety, and temporary fixes: a practical checklist
Before climbing, inspect ladder stability and ensure a helper is on the ground. Wear non-slip shoes, safety glasses, and gloves. Have a bucket ready to catch drips in the attic, and keep a flashlight handy. For temporary fixes, apply roof sealant to seams and patches, cover with a patch or metal flashing if possible, and redirect water with tarps. Remember: a temporary patch is not a permanent solution; it buys time to arrange a proper repair when the weather improves or a professional can be scheduled.
Preventive maintenance to reduce future leaks in NJ
Annual roof inspections can catch vulnerable flashing, worn shingles, and clogged gutters before leaks start. Clean gutters and downspouts to prevent overflows, trim nearby trees to reduce branch damage, and ensure attic insulation remains dry and adequate. Inspect attic ventilation to prevent condensation, and check chimney and vent stacks for loose or cracked flashing after storms. In NJ, proactive maintenance saves money by reducing emergency repairs during winter storms and rainy seasons, and it helps preserve the home’s structural integrity.
Authoritative sources and further reading
For safety and best practices, consult official guidance:
- OSHA ladder safety: https://www.osha.gov/ladders
- DOE roofing materials durability: https://www.energy.gov/eere/buildings/articles/roofing-materials-durability
- FEMA guidance on maintaining water-damage resilience: https://www.fema.gov/meetings-and-training/training-materials
Summary: a practical NJ approach to roof leak repairs
By combining careful diagnosis, safe containment, appropriate patching, and a willingness to call in a pro when needed, NJ homeowners can manage most minor leaks without major disruption. Prioritize safety, protect indoor spaces, and plan for a durable fix that aligns with local codes and climate realities. The key is to act decisively, document damage, and choose repairs that address both the symptom and the root cause.
Tools & Materials
- Ladder rated for safe access(Extend beyond edge and use stabilizer feet; have a helper on the ground)
- Safety gear (gloves, safety glasses, fall protection)(Wear non-slip boots; consider a harness for steep roofs)
- Tarps or heavy-duty plastic sheeting(For containment and directing water away from living spaces)
- Roofing cement and patch materials(Choose cold-weather formula if repairing in late fall/winter)
- Self-adhesive flashing or metal flashing(Optional for flashing repairs; used for bridging gaps)
- Utility knife and tin snips(For trimming patches and shingles precisely)
- Caulk gun and roof sealant(Applies a flexible, weather-resistant seal)
- Extra shingles or flashing pieces(Match materials to existing roof for aesthetics and seal)
Steps
Estimated time: 2-6 hours
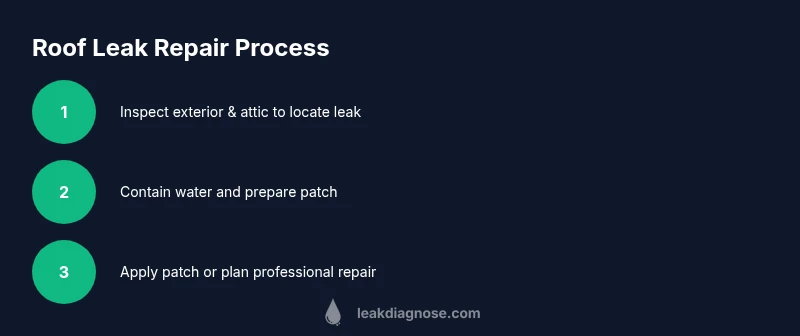
- 1
Inspect exterior and set up safety
Begin with a visual exterior inspection from a safe distance. Note obvious damage, location of flashing, and potential hazard zones. Set up your ladder with a helper nearby and don protective gear.
Tip: Always have a spotter on the ground and avoid working in high winds or wet conditions. - 2
Locate source from the attic
Climb into the attic during daylight to trace water stains up from the ceiling to the roof deck. Look for wet insulation or dark streaks that reveal the path of the leak.
Tip: Use a flashlight and mirror to inspect around vents, chimneys, and nail lines. - 3
Contain the water quickly
Place tarps or plastic to direct dripping water away from walls and electrical outlets. If possible, block the flow at the source with a temporary patch.
Tip: Do not seal over active electrical components; keep water away from outlets. - 4
Prepare the patch area
Trim loose shingles or broken flashing and clean the surface so patching material adheres properly. Cut any patch material to overlap the damaged area by at least 2 inches.
Tip: Ensure patches extend over intact surfaces for a tight seal. - 5
Apply a temporary fix
Spread roofing cement and press on a patch or flashing piece. Seal seams with roof sealant and smooth for a weather-tight edge.
Tip: A temporary patch buys time until permanent repair can be completed in dry weather. - 6
Assess damage and plan next steps
Review whether the patch will suffice seasonally or if a professional repair is needed for flashing replacement, decking damage, or shingle replacement.
Tip: Document damage with photos for insurance or contractor reference.
Questions & Answers
What are common signs of a roof leak in New Jersey?
Common signs include water stains on ceilings, damp insulation in the attic, drips inside rooms after rain, and near flashing around chimneys or vents. In NJ, seasonal moisture can exacerbate these indicators.
Look for ceiling staining, damp attic insulation, and drips after rain, especially around flashing and vents.
Can I fix a roof leak myself in NJ?
For small, accessible leaks on a stable roof, temporary patches may be possible. If the leak involves flashing, decking damage, or multiple areas, it’s safer to call a licensed roofer to ensure a durable fix and code compliance.
DIY fixes are possible for simple leaks, but professional help is safer for flashing or structural damage.
How long does a DIY patch typically last?
A temporary patch can last from days to a few weeks depending on weather and roof type. It is not a substitute for a full repair when damage persists.
Temporary patches can hold for a short period, but expect to schedule a full repair soon.
When should I replace flashing rather than patch it?
If flashing is cracked, loose, or corroded, replacement is recommended to prevent recurring leaks. Patch repairs are often only temporary in such cases.
Flashing that’s damaged should be replaced to stop ongoing leaks.
Do I need a permit for roof repairs in New Jersey?
Permit requirements vary by township. Check with your local building department before major repairs or roof replacement to ensure compliance and insurance coverage.
Local permits vary; contact your city or county building department before major work.
How can I prevent leaks after repair?
Schedule regular inspections, keep gutters clear, maintain proper attic ventilation, and address any shingle or flashing issues promptly to reduce future leaks.
Regular maintenance and prompt fixes help prevent future leaks.
Watch Video
Main Points
- Identify and stop water flow safely before repair.
- Choose patches for minor leaks; call a pro for flashing or decking damage.
- Document damage for insurance and future repairs.
- Prioritize safety and local code compliance in NJ.