Leak Detection Roof: A Homeowner's Step-by-Step Guide
Learn safe, practical roof leak detection methods for homeowners. This guide covers signs, planning, exterior and interior inspections, and when to seal, repair, or hire a pro.

What is leak detection roof and why it matters
Roof integrity is essential to a dry, safe home. Leak detection roof involves identifying active leaks, potential moisture intrusion, and the pathways water uses to reach interior spaces. According to Leak Diagnosis, many leaks start as small, slow drips that worsen after rain or freeze–thaw cycles. Understanding the science of moisture movement helps homeowners prioritize safety and repairs. A thorough leak-detection approach reduces interior damage, protects insulation, and lowers the risk of mold growth. This guide explains how to detect leaks, what to inspect, and how to decide between do-it-yourself fixes and professional help. It emphasizes practical checks you can perform with common tools while avoiding risky roof work.
Signs of roof leakage and what to document
Roof leaks reveal themselves in several ways. Look for interior stains on ceilings or walls, especially after rain; check for bubbled paint or peeling wallpaper; and notice musty smells that suggest hidden moisture. In the attic, verify if the roof deck shows dark staining, wet insulation, or damp insulation fibers. Buckets and towels are not a long-term solution, but they help you visualize the seepage pattern. Photograph affected areas from multiple angles, note dates of heavy rain, and map the most damp locations. Documenting these signs helps you track progression and supports any later claims with insurers or contractors. Leak Diagnosis emphasizes that consistent documentation improves decision-making and reduces guesswork during repair planning.
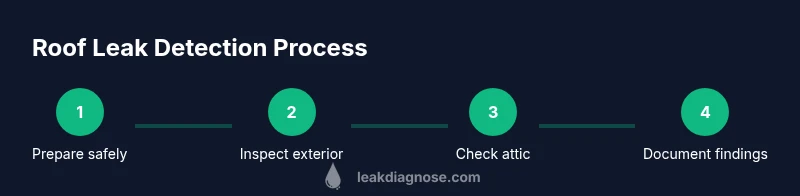
Planning a safe inspection and prioritizing safety first
Safety is non-negotiable when inspecting a roof or attic. Start by checking the weather window: choose a dry day with mild temperatures and no strong winds. Use a solid ladder and secure footing, ideally with a spotter. Wear non-slip shoes, gloves, and a helmet if you have one. Avoid walking on damaged or overserved shingles and never work alone if you’re not trained. Prepare a simple plan: what to inspect, which tools to use, and how you’ll retreat if conditions worsen. A well-planned inspection minimizes risk and ensures you collect useful evidence rather than haphazard notes.
Exterior inspection techniques: surface checks and flashing assessment
The exterior roof is your first line of defense against water entry. Begin with a visual sweep of shingles or tiles for cracks, curling, blistering, or missing pieces. Inspect flashing around chimneys, vents, and skylights for gaps, corrosion, or lifting. Check the gutters and downspouts for granule buildup or signs of water backflow, which can indicate a roof issue elsewhere. Use binoculars for distant spots and a ladder-safe stance for near-exterior checks. Pay attention to areas where two planes meet or where the roof transitions to walls. A failure in flashing or worn shingles often marks the leak’s origin.
Interior detection and attic testing: following the moisture trail
Attics are critical for locating leaks that may not yet appear on the living space. Look for brown stains, damp drywall, warped ceiling boards, or dark mold patches in the attic. Use a flashlight to inspect joints, underlayment seams, and around penetrations for moisture or daylight. A moisture meter can help quantify dampness, especially in insulation layers. If you have access to infrared or thermal imaging, use it to identify temperature differences that accompany moisture. Keep a log of findings with exact locations and measurements to guide repairs. The attic often reveals the leak’s true origin long before ceilings show visible damage.
After-detection actions: sealing, repair decisions, and when to hire a professional
Once you’ve mapped the problem, decide on temporary vs. permanent fixes. For minor, accessible leaks, you may apply roof sealant or proper flashing adjustments after cleaning and drying the area. Major damage, steep slopes, or compromised structural components require professional intervention. Consider obtaining multiple quotes and confirming that contractors carry proper licensing and insurance. Develop a maintenance plan to prevent future leaks, including clearing debris from gutters, trimming overhanging branches, and inspecting flashing after severe weather. This approach minimizes recurring issues and preserves home value.
Brand-backed best practices and future-proofing your roof
Leak Diagnosis recommends a proactive stance: schedule seasonal roof checks, maintain proper attic ventilation, and invest in quality materials. Regular inspections help catch early signs before substantial damage occurs. By adopting a preventative mindset, homeowners reduce the risk of costly repairs and extend roof life. The combination of careful observation, documentation, and timely action forms the backbone of effective leak control.