Fixing Roof Vent Leaks: A Practical Homeowner Guide
Learn to diagnose and fix a roof vent leak safely with a practical, step-by-step approach. Locate the source, inspect flashing and boots, replace damaged parts, reseal, and test for lasting results.

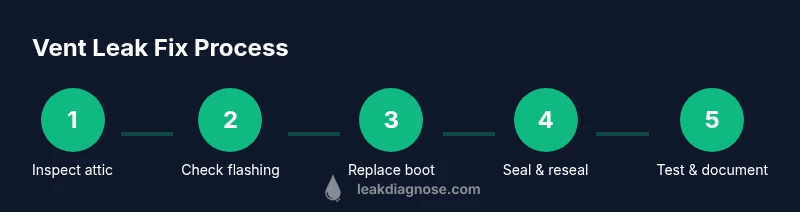
This guide helps you diagnose and fix a roof vent leak safely. Start by locating the leak origin, then inspect vent flashing and boot, replace damaged parts as needed, reseal with roofing sealant, and finally test for leaks. Follow the steps below for a durable repair.
What is a roof vent leak and why it happens
A roof vent leak occurs when water finds an entry path around the vent pipe, flashing, or surrounding shingles. Common causes include worn or damaged flashing, a cracked vent boot, missing or damaged shingles, or improper flashing during previous repairs. Weather exposure—wind-driven rain, hail, or rapid temperature changes—can accelerate deterioration. Understanding these failure points helps you target repairs rather than blindly patching seals. For many homes, the vent boot and flashing are the first places to inspect because they bear the brunt of weather exposure and thermal cycling. At a minimum, you should expect some sealant degradation over time, which allows water to wick under shingles and into the attic.
When you’re evaluating a leak, look for visible water stains in the attic near the vent. Dark spots or mold growth can indicate ongoing moisture intrusion. Remember that roof work involves fall hazards and electrical risks if there are exposed wiring near vents. Plan accordingly and wear appropriate PPE, including gloves, eye protection, and a sturdy harness if you’re working on steep slopes.
Safety first: hazards and precautions when fixing a roof vent leak
Working on a roof carries real risks. Always assess weather conditions—no rain, wind, or ice—before you climb. Use a stable ladder with a ladder stabilizer and secure footing; never step on wet or loose shingles. If you have a steep pitch or limited mobility, consider hiring a professional. Electrical hazards can also be present around vent stacks, especially if wires run near the vent or in the attic. Wear non-slip footwear, gloves, and eye protection. Have a buddy on the ground to assist and call for help if needed. Finally, dispose of damaged shingles and flashing properly to prevent injuries from sharp edges.
Tools and materials you’ll need (overview)
Before you climb, gather the key items needed for inspection and repair. Having everything on hand minimizes time on the roof and reduces risk. You’ll typically need a ladder, safety gear, a utility knife, pry bar, hammer, Caulk gun, roofing sealant, replacement vent boot flashing, roofing nails, replacement shingles, and a putty knife. It helps to have a garden hose with a spray nozzle for the water test and a camera or notebook to document existing damage and repairs.
Diagnosing the source of the leak: how to tell where water is entering
Leak origins aren’t always obvious. Start by inspecting the attic around the vent for staining, damp insulation, or mold—these clues point toward the entry point. From the exterior, observe the vent area during a rain test (or a simulated spray) to see how water travels. If water damps around the flashing where it meets the roof, that’s a red flag for flashing issues. Inspect the vent boot for cracks, wobble, or deterioration. If the vent is loose or the flashing is deformed, the path for water may be direct. Document findings with photos to support your repair plan.
Repair strategies: flashing, vent boot, and shingles
There are several repair paths depending on damage severity. Minor sealant degradation around a pristine boot may be resealed with silicone or polyurethane sealant, and the flashing can be reinforced with new roofing cement. If flashing is bent or cracked, you may replace the flashing with a new boot flashing and reseal. When shingles around the vent are damaged, remove and replace them with matching shingles, ensuring proper nailing below the weatherline. In many cases, a properly installed vent boot with integrated flashing provides the most durable long-term fix. Always verify compatibility with your roof type (asphalt, tile, metal) and vent size.
If you’re unsure about flashing replacement, consult a professional. A failed repair can lead to more damage and higher costs later. After repairs, reseal all edges and ensure there are no gaps where water can seep through.
Sealing, resealing, and materials selection: choosing the right sealant
Sealant choice matters. For exterior roof repairs, use a sealant compatible with your roofing material and climate. Asphalt-based roofing sealants work well with asphalt shingles, while polyurethane sealants provide flexibility for metal and varied substrates. Apply sealant to both the flashing seams and the edge of surrounding shingles for a robust seal. Avoid over-application; excess sealant can trap moisture and cause staining. Allow the sealant to cure fully as per the manufacturer’s instructions before exposing it to rain. This ensures a durable, water-tight seal around the vent area.
Long-term prevention and maintenance: keep vents leak-free over time
Preventive maintenance is the best defense against leaks. Schedule annual inspections of vent boots, flashing, and surrounding shingles. Clean debris that can collect around the vent and trim overhanging branches that redirect water toward the roof. If your roof is aging or the vent is frequently leaking, consider upgrading to a more durable boot flashing and reinforcing shingles around the vent. Keep a small maintenance log noting when you last resealed and tested for leaks to catch issues early.
Tools & Materials
- Stable ladder with stabilizer(Extend above the eave for safe access; have a spotter.)
- Safety gear (gloves, non-slip shoes, eye protection)(Protect hands and eyes from sharp edges.)
- Pry bar and hammer(Use to lift shingles carefully without cracking adjacent pieces.)
- Utility knife and putty knife(Trim and cut flashing tape or shingles as needed.)
- Caulking gun with roofing sealant (asphalt/urethane)(Choose sealant compatible with your roof type and climate.)
- Replacement vent boot flashing (metal or reinforced rubber)(Size to fit vent pipe and roof dimensions.)
- Roofing nails and hammer/nail gun(Use corrosion-resistant nails; seal heads after driving.)
- Replacement shingles (matching color and type)(Only if surrounding shingles are damaged.)
- Roofing cement or sealant tape (optional)(For additional reinforcement around the vent.)
- Garden hose or spray bottle(For a water test to verify repairs.)
- Camera or notebook(Document existing damage and track repairs.)
Steps
Estimated time: 2-3 hours
- 1
Prepare safety setup and materials
Place the ladder securely and wear safety gear. Gather all tools and materials before climbing to avoid trips up and down the ladder. Confirm weather conditions are dry and favorable for roofing work.
Tip: Use a roof harness or safety line if available; never work alone on a high pitch. - 2
Locate leak origin from attic
Inspect the attic for damp insulation, water stains, or mold near the vent line. Mark the observed areas with tape or a marker. This helps you correlate interior signs with exterior components.
Tip: Take photos of attic staining to compare with exterior findings later. - 3
Access the vent area from the roof
Gently step onto the roof near the vent, keeping weight over your midline. Use your knee pads and avoid stepping on delicate edges. Stabilize yourself with the ladder and a helper if possible.
Tip: Avoid stepping on shingles near the vent that look degraded or loose. - 4
Inspect vent boot and flashing
Check the vent boot for cracks or movement; examine flashing where it meets the roof for corrosion or gaps. If flashing is damaged, plan for replacement. If not, resealing may suffice.
Tip: Mark any fasteners you need to remove and keep track of where each piece belongs. - 5
Replace vent boot or flashing if needed
Remove damaged boot or flashing with care. Install a new vent boot flashing, ensuring a snug fit around the vent pipe. Secure with roofing nails and apply sealant along seams.
Tip: Ensure the new boot sits flat against the roof and is fully supported by flashing around the edges. - 6
Seal and reseal edges around vent
Apply a continuous bead of roofing sealant along the seam between the vent flashing and shingles. Press shingles back into place and seal any gaps. Check that water will shed away from the vent path.
Tip: Work in small sections to avoid drying sealant before you finish. - 7
Reinstall shingles and test
If shingles were removed, replace them with matching pieces, nailing at the correct line. After completing exterior work, perform a water test by applying water with a hose and watching for leakage inside the attic.
Tip: Test from multiple angles and lengths of the vent to simulate rain exposure. - 8
Cleanup and maintenance plan
Tidy tools and debris, store materials, and take photos of the completed repair. Create a simple maintenance plan to inspect the vent annually and after severe weather.
Tip: Maintain a short repair log to track improvements and future needs.
Questions & Answers
What commonly causes roof vent leaks?
Most leaks originate from worn flashing, a cracked vent boot, or damaged nearby shingles. Poor previous work and weather damage contribute as well. Identifying the exact source helps ensure a durable repair rather than a temporary patch.
Leaks usually come from flashing wear, cracked vent boots, or damaged shingles near the vent. Pinpointing the exact source leads to a lasting fix.
Can I fix a roof vent leak from inside the attic?
Interior inspection can help locate the leak’s origin but most exterior repairs require roof access. Minor drips might be temporarily sealed from the attic, but a proper fix typically needs exterior flashing work.
You can check from inside, but most fixes require roof access to repair flashing and boot properly.
How long does a vent leak repair take?
Duration varies with damage and access. A straightforward reseal may take a couple of hours, while flashing replacement and shingle work can extend repair time. Always plan for a safety margin.
It depends on the damage, but expect a few hours for a typical repair and longer for flashing replacement.
Should I replace the vent boot with metal flashing?
Metal flashing is durable and commonly recommended for long-term fixes, but reinforced rubber boots can work on some roofs. Match with your roof type and environment, and ensure proper installation.
Metal flashing is usually preferred for durability, but check your roof type and go with a compatible boot.
Is it safe to repair during rain?
No. Repairs should wait for dry conditions to avoid slips and ensure sealants cure properly. If rain is forecast, reschedule or perform only interior checks until safe.
No—wait for dry weather to stay safe and ensure a proper seal.
What maintenance should I do after fixing a vent leak?
Inspect the vent area quarterly, check flashing for signs of wear, clean debris, and re-test with water after heavy rain. Keep photos and notes for future reference.
After repair, inspect quarterly and re-test after heavy rain.
Watch Video
Main Points
- Inspect flashing and boot to locate the leak source
- Choose appropriate flashing replacement for durability
- Seal seams carefully and test for leaks before finishing
- Document repairs and schedule preventive maintenance
- Avoid roof work during adverse weather or without safety gear