Ceiling Water Leak Troubleshooting Guide
Urgent guide to diagnose and fix a ceiling water leak safely. Learn common causes, a step-by-step inspection, safety tips, and prevention strategies to protect your home from water damage.

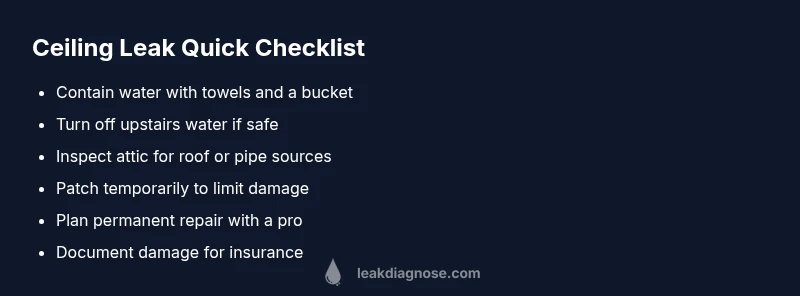
Ceiling water leaks are usually caused by roof damage or an upstairs plumbing line. Start by isolating the source: contain the water with towels or a bucket, and shut off the water supply if you can safely reach the valve above the ceiling. If leaks persist, call a licensed pro.
What a ceiling water leak really means
According to Leak Diagnosis, a ceiling water leak is a sign that water has intruded from above and is creating damage behind the surface. Treat every wet spot as urgent: water can travel through joists, drywall, and insulation, causing mold and structural issues if ignored. The source could be a roof, plumbing, or HVAC drainage, and failure to address it promptly can lead to costly repairs. In homes with attic access, you may spot staining or damp insulation first; in others, a damp ceiling may appear after a heavy rain or a running upstairs faucet. Understanding the origin helps you prioritize closing valves, protecting belongings, and planning the correct fix. This guide aligns with Leak Diagnosis’s approach to methodical troubleshooting to minimize damage and expense.
To stay safe, avoid electrical outlets near the leak and wear protective gear when handling wet materials. If you’re unsure about the source or there’s visible mold, step back and call a professional. Early containment and a clear plan reduce damage and speed up permanent repairs.
Common sources of ceiling water leaks
Water can reach a ceiling leak from several routes. Roof issues are the most frequent culprits: missing shingles, damaged flashing, or compromised seals around vents let rainwater seep into the attic and migrate to the ceiling. Upstairs plumbing is another major cause: leaky supply lines, faulty joints, or a running toilet can dribble water into the ceiling below. HVAC ice buildup or a blocked condensate drain can overflow into ceilings, especially in warmer months. Poor attic insulation or ventilation can create condensation that drips through ceiling drywall, mimicking a leak. A thorough check should consider these primary sources first, then expand to secondary possibilities like skylights or parapet walls. Remember, locating the exact origin saves time and reduces unnecessary repairs.
Inspect the attic for staining, moisture, or cooler air leaks around piping; check bathrooms or laundry rooms above the affected area; and examine any ceiling fixtures or vents for signs of leakage.
First safety and containment steps
Safety comes first when dealing with a ceiling water leak. If you can safely access the area, shut off the water supply to the upstairs line or fixture responsible for the leak if you identify it. Use buckets or towels to catch dripping water and place a plastic sheet or tarp to protect furnishings and floors. If electricity is near the leak, switch off power to the affected circuit at the main panel before approaching wet areas. Do not use electrical devices in wet rooms after a leak. Ventilate the space if possible to reduce humidity and avoid mold growth. Document the damage with photos, which helps with insurance and future repairs. If the leak worsens or you encounter mold, leave the space and contact a licensed professional immediately.
How to inspect from inside and attic
A systematic inspection starts with the interior: trace dampness from the ceiling to visible sources. Look for stains that extend across boards, bubbling drywall, or soft spots indicating water intrusion. In the attic, check roof decking for moisture, damaged insulation, and signs of insect activity or mold, all of which can indicate a longer-term issue. Inspect plumbing lines, joints, and fixtures above the ceiling—turn off upstairs water if necessary to see if the leak stops. Take notes and photos of any suspect areas. If you cannot safely access the attic or roof, or if the leak is large, stop your inspection and call a professional—safety always comes first.
A careful airflow check with a flashlight can reveal hidden drips behind drywall. Look for changes in attic insulation color and any musty odor that suggests mold growth.
Diagnostic flow: symptom to solution
The diagnostic flow for a ceiling water leak follows a simple logic: identify the symptom, hypothesize plausible causes, test each cause with safe checks, and apply targeted fixes. Start with the most common sources: roof damage if the leak appears after rainfall and there is attic exposure, or upstairs plumbing if the environment correlates with use of fixtures. If the source remains unclear, investigate HVAC drain lines or condensation issues as potential culprits. After each check, document findings and next steps. This methodical approach reduces wasted effort and speeds up repair. Safety checks should happen at every step, including turning off power and avoiding contact with standing water near electrical outlets.
Step-by-step fix for the most likely cause
This section provides a practical repair sequence for a roof-related ceiling leak, which is the most common scenario. 1) Confirm the source by inspecting the roof from ground level or safely on a ladder, looking for loose or damaged shingles and flashing gaps. 2) Temporarily seal obvious gaps with roofing cement or a sealant designed for flashing, but avoid invasive repairs without ladders or proper safety equipment. 3) If the leak is plumbing-related, tighten joints on exposed supply lines in the attic or upstairs bathroom; replace faulty hoses or washers as needed. 4) For HVAC drains, clear a clogged condensate line using the correct tool, ensuring the drain pan is clean and unobstructed. 5) After containment and source control, schedule permanent repairs with licensed professionals. 6) Re-inspect after repairs and document for records. When in doubt, prioritize safety and consult pros.
Prevention and maintenance to avoid future ceiling leaks
Prevention focuses on proactive inspections and proper maintenance. Schedule annual roof checks, especially after storms, and inspect flashing, shingles, and gutters for damage. Ensure attic insulation is adequate and vents are unobstructed to minimize condensation. Regularly test and maintain plumbing lines above ceilings, especially in aging homes, by watching for slow leaks and listening for drips. Install ceiling moisture detectors or smart water sensors in high-risk areas to receive alerts before significant damage occurs. Finally, address any minor leaks promptly; small fixes are far less costly than extensive repairs.
Steps
Estimated time: 1-2 hours
- 1
Ensure Safety and Stop the Water
If you can safely reach the source, shut off the upstairs water valve or fixture and disable power to the affected area if needed. Move occupants and valuables away from the leak and place containers to catch drips. This protects you from electrocution and reduces ongoing damage while you assess the situation.
Tip: Always prioritize safety; never work on a wet ladder or near energized outlets. - 2
Contain the Water
Place towels, a mop, and a sturdy bucket under the leak to minimize water damage. If you have a tarp or plastic sheeting, cover nearby furniture and seal the area as best as possible to prevent additional moisture wicking into walls.
Tip: Take photos before moving materials for insurance claims. - 3
Identify the Source Above
Carefully inspect the attic or crawl space above the leak to locate the water source. Look for damp insulation, damp plywood, or dripping pipes. If the source is unclear or inaccessible, proceed with the most likely cause (roof or plumbing) and prepare for professional help.
Tip: Do not cut into walls or ceilings unless you are trained to avoid structural damage. - 4
Address the Likeliest Cause
If you can visibly see a roof issue, apply temporary sealant to stop the leak while arranging permanent repairs. If a plumbing line shows a leak, tighten joints or shut off the upstream supply and plan a proper repair. For HVAC-related leaks, clear condensate drains and ensure proper drainage.
Tip: Temporary fixes are not a substitute for permanent repairs; schedule a pro visit as soon as possible. - 5
Plan Permanent Repairs
Arrange for professional roofing or plumbing services as needed. Keep notes and photos of the damage to share with technicians and insurance. Ensure access to the area for the contractor and remove obstacles that might delay the repair.
Tip: Obtain written estimates and verify licensing and insurance before work begins. - 6
Post-Repair Inspection
After repairs, re-check the area for any signs of residual moisture or new leaks. Repaint or replace damaged drywall, replace insulation if degraded, and consider installing moisture detectors for future protection.
Tip: Follow up with a secondary inspection after a major rain event to confirm the fix is permanent.
Diagnosis: Active ceiling leak with damp spots or dripping water from ceiling after rainfall or appliance use
Possible Causes
- highRoof damage or compromised flashing allowing water intrusion
- mediumUpstairs plumbing leak (toilet, sink, shower supply line) leaking through ceiling
- lowHVAC condensation drain line overflow or blocked drain pan
Fixes
- easyInspect roof for missing shingles, damaged flashing; seal with roofing cement or call a roofer
- mediumCheck upstairs fixtures and supply lines for leaks; tighten fittings or replace faulty hoses/valves
- mediumUnclog HVAC condensate line and drain pan if accessible; reset condensate pump if present
Questions & Answers
What is the most common cause of a ceiling water leak?
The most common causes are roof damage or upstairs plumbing leaks. Start by inspecting the attic for roof-related signs and check the plumbing lines above the ceiling for drips or loose connections.
Most ceiling leaks usually come from the roof or upstairs plumbing leaks. Check the attic for signs and look for dripping pipes.
Can I fix a ceiling water leak myself?
You can perform immediate containment and basic checks, but permanent repairs—roofing or major plumbing—typically require a licensed professional.
You can contain and check basics, but major fixes should be handled by a licensed pro.
What safety signs require calling a pro immediately?
Call a professional if the leak is active, there’s mold growth, electrical hazards near water, or you cannot identify the source.
Call a professional if water keeps dripping, there’s mold, or you can't identify the source safely.
How can I prevent ceiling leaks in the future?
Regular roof maintenance, attic ventilation, and prompt repair of small roof or plumbing issues reduce the risk of ceiling leaks.
Keep up with roof maintenance, ventilate the attic, and fix small problems early.
Is mold growth from a ceiling leak dangerous?
Yes, mold can affect air quality and health. If you see mold, or if the area remains damp, treat the issue as urgent and consult a professional for remediation.
Mold is a health concern; get the area assessed and remediated quickly.
Watch Video
Main Points
- Identify and isolate the leak quickly
- Most ceiling leaks come from roof or upstairs plumbing
- Contain water to minimize damage
- Consult a professional for permanent repairs
- Prevent future leaks with regular maintenance