What to Do If a Leak in the Ceiling
Learn practical, safe steps to handle a ceiling leak: containment, source identification, temporary fixes, and when to call a pro. A homeowner’s guide from Leak Diagnosis.

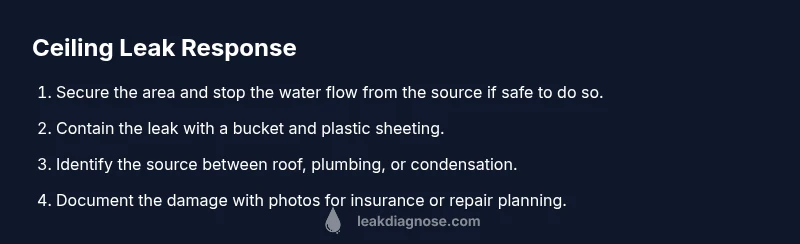
You can safely manage a ceiling leak by containing the water, identifying the source, and staging repairs while protecting yourself. Start with safety, place a bucket to catch drips, lay plastic, and isolate the area until you can seal or call a pro. This guide covers steps, tools, and safety tips.
Understanding Why Ceilings Leak
Ceiling leaks can arise from roof problems, plumbing failures, or interior condensation. According to Leak Diagnosis, many leaks start as a small issue that worsens when moisture sits behind drywall and insulation. Recognizing the common sources helps homeowners focus inspections and repairs before water damage escalates. In this guide, you’ll learn how to tell if a stain is from a roof line, a bathroom pipe, or HVAC condensate. You’ll also see why a leak is not just a drip; it can indicate a hidden issue that weakens ceiling joists and invites mold. Early detection saves time and money, so watch for spreading stains after rain, warm damp spots, and musty odors. Safety note: never chase a leak through insulation without appropriate PPE, and shut off utilities if water is near electrical outlets.
This section sets the stage for practical steps you’ll take next.
Safety First: Assessing Risks
Before you poke around, prioritize safety. Water and electricity create a serious shock risk, so locate the main breaker to cut power to the affected area if you can do so safely. Wear PPE: sturdy gloves, eye protection, and non-slip footwear. If you suspect gas lines, fumes, or damaged wiring, evacuate and contact the utility or emergency services. Do not climb on a wet ladder or lean into compromised ceilings. If you must work around water, use a flashlight instead of opening additional electrical outlets. By establishing a safe perimeter, you protect yourself and others while you assess the situation. This approach also aligns with general home safety standards from reputable sources and industry guidance.
Immediate Containment to Minimize Damage
Containment buys you time to evaluate the leak without inviting further damage. Place a sturdy bucket under the drip—ideally a 5–7 gallon container with a secure lip. Lay plastic sheeting or a tarp over nearby furniture and floors to catch splatter. Use towels or rags to wick moisture from the ceiling edge and keep a log of how much water is leaking per hour. If you can access the area above the ceiling, cover the source with additional plastic and secure with tape or zip ties. The goal is to prevent additional water from soaking insulation, drywall, or electrical components while you decide on permanent repairs.
Sourcing the Leak: Roof vs Plumbing vs Condensation
Determining the origin is the key to a proper fix. Roof leaks often show up after rain and may trace to missing shingles or damaged flashing. Plumbing leaks typically originate from pipes or fixtures and may worsen with water use. Condensation leaks occur in high-humidity spaces like bathrooms or kitchens when warm air meets cold surfaces. In the attic, look for damp insulation, dark staining along roof lines, or mold growth. If you hear dripping independently of water use, you may be closer to a roof or attic pathway. To narrow down the source, inspect from the highest point downward, compare attic signs with downstairs stains, and note timing relative to rainfall and water usage.
Assess and Document the Damage
Take clear photos and notes of all affected areas: ceiling panels, drywall, insulation, and any warped sections. Document the exact location and progress of staining over time. This record helps with insurance claims and guides contractors on what to replace. Keep a running log of when the leak started, when you contained it, and any changes after weather events. If moisture is heavy, use a moisture meter or a humidity gauge to track relative humidity in affected rooms. A thorough documentation packet accelerates repairs and reduces disputes with insurers or roofing/plumbing contractors.
Temporary Fixes: When and How
Temporary fixes should focus on safety and containment, not permanent repairs. If you can access the leak source safely, you can apply a temporary patch or seal to slow the drip, such as a water-resistant sealant or a tarp over the ceiling until a pro arrives. Avoid completing a full ceiling repair that could compromise structural integrity. For roof leaks, a temporary tarp and proper anchoring can reduce rain-driven water entry. For plumbing leaks, isolating a faulty fixture and turning off the relevant supply valve may be appropriate. Remember, temporary fixes are stopgaps, not solutions.
When to Call a Professional
Call a licensed contractor if the leak persists after containment, if the ceiling shows sagging or large cracks, or if you suspect roof structure damage or active plumbing faults. A pro can confirm whether the leak is roof, plumbing, or HVAC-related and perform safe, code-compliant repairs. If you see visible mold, significant water intrusion, or electrical hazards, contact a licensed electrician or the utility immediately. Early professional involvement often reduces total repair costs and prevents secondary damage such as wood rot or mold migration.
Permanent Repair Options and Costs Overview
Permanent repairs vary by source. Roof leaks may require shingle replacement, flashing repair, or roof deck resealing. Plumbing leaks might need pipe replacement, couplings, or fixture repair. If drywall or insulation is compromised, you'll likely need to remove and replace sections of ceiling and insulation, followed by mold remediation if needed. Costs depend on material quality, labor rates, and access. Homeowners should obtain multiple bids, check references, and verify that contractors obtain necessary permits. While price ranges vary, planning for a long-term fix helps prevent repeat incidents.
Prevention Tips to Reduce Future Leaks
Prevention focuses on routine maintenance and moisture control. Inspect roofs for damaged shingles and flashing after storms and reseal as needed. Clean gutters and downspouts so water flows away from the house. In interiors, use exhaust fans in bathrooms and kitchens, especially in humid climates, and run dehumidifiers during damp seasons. Regularly check pipes for corrosion, leaks, and fittings. A proactive approach—paired with proper insulation and moisture barriers—reduces the likelihood of ceiling leaks and interior water damage.
Common Mistakes to Avoid
Common pitfalls include delaying responses, attempting dangerous high-clip repairs, or ignoring attic or roof signs. Don’t assume a sparse stain is harmless or that a cheap patch will hold for years. Avoid using permanent drywall patching without addressing the water source, and never ignore electrical hazards near a leak. Finally, don’t neglect documentation for insurance or warranty claims. Quick, careful action minimizes damage and shortens repair timelines.
Post-Repair Maintenance and Moisture Control
After a ceiling leak is repaired, implement a moisture management plan to prevent recurrence. Re-inspect the area after the first heavy rain and monitor for any remaining moisture. Run a dehumidifier in damp rooms and improve attic ventilation if necessary. Schedule periodic roof inspections and plumbing checks to catch issues before they become leaks. Keeping humidity levels under control protects ceilings, walls, and structural components for years to come.
Tools & Materials
- bucket(5-7 gallon capacity; keep lid to avoid splashes and odor.)
- plastic sheeting(6 mil or thicker; large enough to cover affected area.)
- flashlight or headlamp(Prefer hands-free headlamp for attic or crawl spaces.)
- step ladder(Stable, rated for the height you need; avoid overreaching.)
- absorbent towels or rags(Extra towels for soaking or blotting leaks.)
- rubber gloves(Protect hands from sharp edges and mold.)
- safety goggles(Eye protection when working around debris or mold.)
- utility knife(For trimming damaged drywall or insulation as needed.)
- marker/notebook(Document locations and measurements for contractors.)
Steps
Estimated time: 2-4 hours (varies by severity and access)
- 1
Shut off power to the affected area
Navigate to the main electrical panel and switch off the circuit serving the leak area. This reduces shock risk if water contacts outlets or lighting. If you cannot access the panel safely, call an electrician rather than proceeding.
Tip: If you smell gas or see sparking, evacuate immediately and call emergency services. - 2
Contain the water with a bucket and plastic
Place a bucket under the drip and lay plastic over nearby furniture or floors to limit spread. Secure edges with tape to prevent slipping. File a quick progress note for timing and amounts.
Tip: Use multiple towels around the bucket to catch minor drips and prevent pooling. - 3
Inspect from the attic or access point
If you can safely access the attic, locate the source line above the ceiling and note for repair. Look for damp insulation, damaged roofing felt, or exposed piping. Avoid disturbing mold or loose materials if you’re unsure.
Tip: Take photos of any top-side signs to show contractors later. - 4
Identify likely source regions
Compare stains with potential origin points: roof edge, plumbing stacks, or HVAC lines. If the stain grows after rain, roof or attic condensation is likely; if it coincides with fixtures, plumbing is suspect.
Tip: Document the pattern over 24–48 hours to confirm the source. - 5
Apply a temporary seal if safely reachable
If you can safely reach the source using proper equipment, apply a temporary sealant around the leak. This is a stopgap until a professional arrives, not a substitute for permanent repair.
Tip: Avoid heavy patches that conceal the source without addressing it. - 6
Dry and monitor the area
Use a dehumidifier or fans to reduce moisture; keep doors open for airflow. Recheck the area for additional leaks and note changes in staining or mold growth over the next 24–72 hours.
Tip: Moisture control now prevents mold and wood rot later. - 7
Call a licensed professional when needed
If the leak persists after containment or you observe sagging, call a contractor for roof, plumbing, or structural repairs. Early professional involvement often reduces overall cost and risk.
Tip: Bring your documentation packet to the contractor for precise planning. - 8
Decide on a permanent repair plan
Understand whether you’ll need roof work, pipe replacement, or drywall and insulation replacement. Obtain multiple quotes, verify licenses, and ensure permits where required.
Tip: Ask about mold remediation if mold is suspected in the ceiling cavity. - 9
Plan for moisture management post-repair
Enhance ventilation, repair any insulation failures, and consider a humidity monitor. Regular checks after heavy rain keep future leaks from going unnoticed.
Tip: Schedule seasonal roof and plumbing checkups to catch issues early.
Questions & Answers
What should I do first when I notice a ceiling leak?
Prioritize safety: shut off power to the area if water is near outlets, place a bucket to catch drips, and call a professional if the leak is substantial or you see sagging. Document with photos.
First, shut off power if needed, contain the leak with a bucket, and call a pro if the leak is big or worsening.
How can I tell if the leak is from the roof or plumbing?
Look for water trails along the ceiling, attic signs of roof damage, or pipes above the ceiling. If the leak worsens after rain, it’s more likely roof-related; if it coincides with fixtures, plumbing is suspect.
Check attic signs and timing with rain; roof leaks tend to worsen with rain, plumbing with fixtures.
Can I fix a ceiling leak myself?
You can perform temporary containment and basic drywall patching, but most ceiling leaks require a professional for roof, plumbing, or structural repair.
Temporary containment is sometimes doable, but permanent repairs typically need a professional.
What safety precautions are essential?
Wear PPE, avoid electrical hazards, and never work on a wet ladder. If you smell gas or see damaged wiring, evacuate and call emergency services.
Wear gloves and eye protection, avoid electrical hazards, and don’t climb on a wet ladder.
When should I call a licensed contractor?
Call a contractor if the leak continues after containment, if the ceiling shows sagging, or if you suspect roof or pipe damage that could affect structure.
Call a pro if the leak persists or you see structural signs like sagging.
Will insurance cover ceiling leak damages?
Coverage varies by policy and cause. Document damage with photos and consult your insurer for guidance on claims.
Coverage depends on your policy; contact your insurer and keep photos for claims.
Watch Video
Main Points
- Contain water immediately to limit damage
- Identify the leak source to guide repairs
- Document damage for claims and planning
- Know when to call a licensed professional
- Implement moisture control after repairs