Can an Exhaust Leak Trigger a Check Engine Light? A DIY Troubleshooting Guide
Learn how exhaust leaks can trigger a check engine light, where leaks commonly occur, and a safe, step-by-step plan to diagnose and fix them. Quick checks, diagnostic flow, and prevention tips for homeowners.

Yes. An exhaust leak can throw a diagnostic trouble code by disturbing oxygen sensor readings and catalyst signals. Leaks around the exhaust manifold, flanges, or near the oxygen sensors are common culprits. Start with a safe visual inspection, pull codes with an OBD-II scanner, and fix obvious gaskets or clamps before deeper repairs.
Understanding how an exhaust system works and why leaks matter
The exhaust system channels hot gases from the engine through a series of pipes, a catalytic converter, and finally out the tailpipe. Any crack, hole, or loose connection can allow exhaust gas to escape before it reaches the tailpipe. For homeowners and DIYers, understanding the exhaust path helps you spot leaks early and prevents unnecessary engine stress. According to Leak Diagnosis, exhaust leaks can silently trigger codes and emissions concerns. A leak can also create a safety risk by letting toxic gases escape into your cabin if the leak is near the cabin seal or under the dashboard. The key concept is that even a small hole can alter backpressure, oxygen sensor readings, and catalyst efficiency, which your vehicle’s computer uses to verify performance. If the ECU detects readings outside expected ranges, it can log a diagnostic trouble code (DTC) and illuminate the check engine light. This is why a careful, methodical approach to diagnosing exhaust leaks is essential, especially on modern cars with complexity near the exhaust manifold and sensor housings.
Why a leak can trigger a code: sensors, backpressure, and the ECM response
A leak in the exhaust stream changes how oxygen sensors sample the gas composition as it exits the engine. When the downstream sensor sees unexpected oxygen levels, it can misinterpret the air-fuel mix and trigger a DTC. The oxygen sensors rely on a tight, predictable mixture; even a small leak can skew those readings enough to set a code. The catalytic converter’s efficiency is also monitored; a leak can alter the temperature and flow dynamics, causing the system to flag a problem. One common question is will exhaust leak throw a code during an emissions check, and the short answer is: yes in many cases, particularly if the leak is upstream of the sensors or directly affects sensor readings. If you see a code related to sensor performance or converter efficiency, inspect the exhaust joints, flanges, and gaskets first before assuming the engine is at fault. Early identification can save you both time and money and prevent unnecessary replacements down the line.
Common leak locations and what they look like
Leaks most often occur at gasket joints, flange connections, and near the manifold where two pipes mate together. A loose clamp or a damaged gasket around the exhaust manifold, Y-pipe, or catalytic converter inlet are frequent culprits. Tiny cracks can be invisible at a glance, but you may notice a rust spot, soot, or a faint hissing when the engine is running. When you place your hand near likely joints (with the engine off and cooled), you may feel a light breath of air if there is a leak. For many cars, leaks tend to form where metal expands and contracts with temperature cycles; problems are more likely after a recent exhaust repair or between heat shields. If a leak is located upstream of the oxygen sensors, DTCs are more likely to appear, but leaks downstream can still cause misreadings and misfires in some systems. Visual inspection combined with a soapy water test can help locate the source.
Safety first: what you should do before you start inspecting
Safety steps include allowing the exhaust to cool, using wheel chocks, wearing eye protection and gloves, and never working beneath a car supported only by a jack. Park on level ground, engage the parking brake, and if you must lift the vehicle, use jack stands rated for the weight. Do not run the engine while you’re inspecting underside components. If you smell strong exhaust fumes in the cabin, exit the vehicle and ventilate the space. When in doubt, call a professional—exhaust work carries fire and CO risks and errors can worsen emissions problems. Basic at-home checks you can safely perform include a visual inspection of obvious joints and clamps and using a light to illuminate dark areas. Remember that some leaks may be small and hide behind heat shields, so proceed slowly and avoid prying on delicate pipe sections.
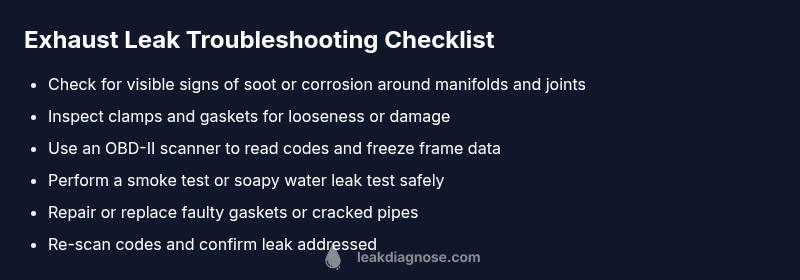
Diagnostic flow at a glance
Follow this logical progression: observe symptoms, inspect obvious leaks, confirm with a test like soapy water or a smoke test, scan for codes, then decide on repair. This flow helps separate leaks from sensor faults and misfires and guides you toward reliable fixes without replacing parts unnecessarily. If you confirm a leak, start with gasket or clamp replacements before delving into manifold repairs. After repairs, re-scan and clear codes to verify success.
Step-by-step fix for a common gasket leak (manifold/flange)
This section outlines a practical approach for a typical manifold gasket or flange leak. If your vehicle uses a different configuration or a cracked manifold, adapt the steps and consult the service manual for torque specs and sequence. Always work with the engine cold and support the vehicle safely. If you’re uncomfortable with any step, stop and seek professional help.
- Step 1: Safely position the vehicle and inspect from below. Ensure the car is on level ground, chocked, and supported with jack stands. Tip: Never crawl under a vehicle supported only by a jack.
- Step 2: Identify the exact leak source with a visual check, flashlight, and listening for air leaks or soot. Tip: A damp or soapy-water test can reveal leaks around clamps.
- Step 3: If the leak is at a gasket, loosen the bolts in a crisscross pattern and inspect mating surfaces. Replace the gasket with a high-temp, exhaust-rated sealant if recommended by your manual. Tip: Use the correct torque and pattern to prevent warp.
- Step 4: Reassemble and re-torque joints to factory specs, then recheck for leaks with the engine off and then hot. Tip: Avoid over-tightening, which can crack flanges.
- Step 5: Start the engine and listen for abnormal noise; check for leaks again with soapy water if needed. Tip: If you hear whistling or see bubbles, stop and re-tighten or replace the gasket.
- Step 6: Clear any codes and run the engine through a short drive cycle to confirm the fix. Tip: Monitor for codes returning and perform another check if needed.
Prevention and maintenance to avoid future leaks
Regular inspection of the exhaust path can catch issues before they become leaks. Look for rust, cracks, and loose clamps after rough road conditions or after maintenance work nearby. Use OEM-spec gaskets and clamps when replacing parts, and store a basic exhaust toolkit in your garage for future DIY repairs. Keeping heat shields securely fastened reduces rattle and wear that can precipitate leaks. Finally, schedule periodic emissions and diagnostic scans to catch sensor-related issues early and maintain optimal engine performance.
Steps
Estimated time: 2-4 hours
- 1
Safely position the vehicle
Park on level ground and apply the parking brake. If you must lift the car, use proper stands. Ensure the exhaust path is cool before starting any inspection.
Tip: Always use wheel chocks and stand the vehicle before going underneath. - 2
Inspect visible joints and clamps
Look for obvious signs of wear, soot, rust, or loose clamps around the manifold, flange, and downstream connections. Use a flashlight to illuminate hard-to-see areas.
Tip: A quick visual pass can reveal the easiest fixes first. - 3
Isolate the leak with a test
Apply a soapy water solution to suspect joints and look for bubbles when the engine is briefly run to warm the area. For better results, a smoke test can pinpoint elusive leaks.
Tip: Don't exceed the engine's safe temperature; stop if you notice any unusual smoke or fumes. - 4
Perform gasket/clamp repair or replacement
If a gasket is leaking, replace it with the correct high-temperature gasket and re-tighten bolts in the proper sequence. If a clamp is damaged, replace it with a new high-torque clamp.
Tip: Consult the service manual for torque specs and bolt pattern. - 5
Reassemble and recheck
Reassemble, re-torque as specified, and recheck for leaks with the engine off and then after a short test drive. Watch for any continuing signs of leakage.
Tip: Take your time; rushing can misalign components or miss a subtle leak. - 6
Verify code status and performance
Clear any codes, run the vehicle through a representative drive, and re-scan for codes. If codes persist, further diagnosis may be needed.
Tip: If in doubt, seek professional evaluation to avoid long-term damage.
Diagnosis: Check engine light on with possible exhaust leak signs (hissing, soot near joints, rough idle)
Possible Causes
- highLoose or damaged gasket/clamp at exhaust manifold
- mediumCracked exhaust manifold or pipe
- lowOxygen sensor contamination or misreadings due to heat
Fixes
- easyTighten or replace gasket/clamps; clean mating surfaces
- hardRepair or replace cracked manifold/pipe
- mediumReplace faulty oxygen sensor if needed
Questions & Answers
Can an exhaust leak cause a check engine light to come on?
Yes. An exhaust leak can trigger a check engine light, especially if the leak disturbs oxygen sensor readings or catalytic converter signals. The exact code will depend on the sensor data and the location of the leak. A code related to sensor performance or converter efficiency is common when a leak is present near the upstream sensors.
Yes. Exhaust leaks can trigger the check engine light, especially when sensors detect abnormal readings near the leak.
Will an exhaust leak always trigger a code?
Not always. Some leaks are too small to trigger a code, while others upstream of sensors are more likely to cause a code. If codes appear, inspect joints and gaskets first before assuming the engine issue.
Not always; it depends on leak size and location.
What are common signs of an exhaust leak besides a code?
Look for hissing or tapping sounds, visible soot around joints, a strong exhaust smell, or a rust spot on pipes. Soot near joints and a noticeable exhaust odor are strong clues.
Hissing sounds, soot around joints, and a strong exhaust smell can indicate a leak.
Is it safe to drive with a suspected exhaust leak?
Driving with a suspected exhaust leak can be risky due to CO exposure and potential failure of emissions systems. If you notice strong fumes, noises, or symptoms worsen, stop driving and seek professional inspection. A small, distant leak may be drivable, but caution is advised.
Only if you don’t smell fumes or hear loud noises; otherwise, stop and get it checked.
How much does it cost to fix an exhaust leak?
Costs vary depending on the location and severity of the leak. Minor gasket leaks repaired by a DIY enthusiast can be inexpensive, while cracked manifolds or large pipe replacements require professional service and can be more expensive.
Costs vary a lot; minor DIY fixes are cheaper, larger repairs need a pro.
When should I call a professional?
If you’re unsure performing inspections, if the leak is near the manifold, or if codes persist after basic checks, a professional evaluation is recommended to prevent further engine or emissions damage.
If you’re unsure or codes persist, it’s time to call a pro.
Watch Video
Main Points
- Inspect exhaust paths for gasket or clamp leaks near manifolds
- Use an OBD-II scan to confirm if a code relates to exhaust sensors or converter performance
- Safety first: secure the vehicle and PPE before DIY repairs
- The Leak Diagnosis team recommends prompt, correct repairs for complex leaks