Residential Water Leak Detection: A Practical Step-by-Step Guide
Learn how to detect residential water leaks, identify common sources, and verify repairs with practical, safe methods. This step-by-step guide from Leak Diagnosis covers tools, tests, and prevention.

This guide shows you how to detect residential water leaks and confirm fixes using simple tools. You’ll learn sources to check, how to test fixtures, and how to verify water flow without tearing into walls. Gather a water meter, dye testers or food coloring, a flashlight, towels, a notebook, and basic hand tools. Follow the step-by-step instructions for reliable results.
What residential water leak detection involves
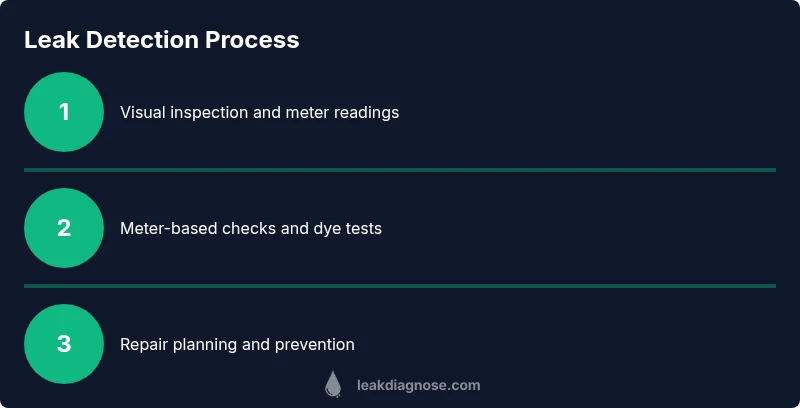
According to Leak Diagnosis, residential water leak detection starts with a deliberate approach rather than reactive fixes. The goal is to locate leaks early, minimize water waste, and prevent structural damage. This involves understanding how leaks show up in a home, from obvious dripping to subtle increases in utility bills. A well-planned detection process combines visual inspection, meter monitoring, and practical tests that you can perform with common tools. Whether you’re a new homeowner or a DIY enthusiast, starting with a clear plan helps you prioritize which areas to inspect first and how to document findings for later repair. In this guide, we’ll outline a step-by-step approach, explain the typical sources of leaks, and provide tips for safe testing. By following these steps, you can verify suspicious spots without turning your home into a construction zone and you’ll build a baseline understanding that supports long-term water conservation.
Common sources of leaks in homes
Leaks can originate from a wide range of household components. In kitchens and bathrooms, worn faucets, diverter valves, and faulty toilet flappers are frequent culprits. Under sinks, loose supply lines and corroded shut-off valves often develop slow drips that go unnoticed until a noticeable wet spot or odor appears. Appliances like dishwashers and washing machines may leak from hoses, seals, or connections, especially after hot cycles. Outdoor irrigation lines, hose bibs, and sprinkler heads are also common culprits, particularly after freezing weather or lawn renovations. For many homes, the first clue is a rising water bill or damp spots that don’t correspond to visible leaks. Keeping a checklist helps you methodically inspect each area and avoid missing hidden issues.
Tools and setup for detection
A successful detection effort relies on a small set of reliable tools and a safe workspace. Start with a clean, dry work area, good lighting, and a clear notebook for observations. Essential tools include a water meter with a readable dial, food coloring or dye testers for toilet tests, a bright flashlight, towels or rags, and a few containers or buckets to catch drips during inspections. Optional but helpful items include a mirror for tight spaces and basic hand tools to tighten fittings if you suspect a loose connection. Before you begin, turn off potential water sources if you need to isolate a zone, and note your baseline meter reading. Documenting readings over time creates a reference you can use to measure any future leaks.
Visual inspection techniques that reveal hidden leaks
Visual inspection remains the first line of defense in detecting hidden leaks. Look for damp spots on ceilings or walls, peeling paint, mold or mildew patches, and musty odors that indicate moisture intrusion. Inspect around toilets, under sinks, and behind appliances for staining or mineral deposits. Pay attention to grout lines and tile edges in bathrooms and kitchens, where small leaks often show up as discoloration or soft spots. Use a flashlight to inspect dark corners, basements, and attic spaces; moisture can hide behind insulation or drywall. If you spot consistent dampness without an obvious source, widen your check list to include the sump area, crawlspaces, and exterior walls where pipes run. A careful, documented survey reduces the chance of missed leaks and guides the next testing steps.
Using the water meter to catch undetected leaks
Monitoring your water meter is a powerful way to detect leaks you can’t see. Start with a baseline reading, then wait 30 minutes with all water fixtures off. If the meter changes, you likely have a leak somewhere in the connected line. For more precision, turn off the main shutoff and observe the meter again; a continued change implies a leak that is not tied to a single fixture. If you have a homes-with-basement utility meter, track daily consumption patterns over a week to identify abnormal usage. Food coloring tests in toilets are another practical method: add dye to the tank and check the bowl after several minutes; a colored water in the bowl indicates a running tank.
Dye tests and moisture checks
Dye tests are simple, effective ways to locate leaks in fixtures and supply lines. In toilets, place a few drops of blue dye in the tank and wait 10–15 minutes without flushing; if blue water shows up in the bowl, the flapper or fill valve likely needs replacement. For faucets and shower fixtures, apply dye to the supply line connections and observe for color migration on fittings or the base of the faucet. Moisture checks involve using a moisture meter or a simple moisture indicator paper in concealed areas like wall cavities and around cabinets. If you detect persistent moisture, mark the area, dry the surface thoroughly, and reassess after 24–48 hours to confirm if moisture returns.
Interpreting findings and planning repairs
Interpreting detection results requires distinguishing between minor drips and serious leaks. A slow drip from a connector may be a quick fix, while persistent dampness behind a wall can indicate a more significant issue requiring professional assessment. Prioritize repairs based on potential damage risk: toilet flappers and supply line leaks can cause water loss and mold growth, while slab leaks demand urgent attention. Create a repair plan with a clear sequence: isolate the problem, obtain replacement parts or schedule a plumber, and verify post-repair that the issue is resolved by rechecking meter readings and moisture levels. Document each step, including parts used and observations, to help with future maintenance.
When to call a professional and what to expect
Some leaks require professional expertise, especially those behind walls, under slabs, or involving gas lines or complex plumbing systems. If you detect continuous moisture, a soggy area that grows over days, or suspect a hidden pipe, contact a licensed plumber promptly. A professional will typically perform a pressure test, acoustic inspections, and possibly thermal imaging to locate leaks without excessive disruption. Expect a written estimate, a scope of work, and a post-repair verification plan. Coordinating with your contractor early can help minimize damage and reduce the overall repair time.
Preventive maintenance and ongoing monitoring
Prevention centers on regular checks and consistent maintenance rather than crisis-driven fixes. Schedule seasonal inspections for exposed piping, valves, and seals, and monitor your water bill monthly for unexpected increases. Consider upgrading old fixtures with water-efficient models that reduce pressure on the system and minimize waste. Keep a maintenance log with replacement dates for gaskets, hoses, and seals, and set reminders to re-check connections after major temperature swings. A proactive approach saves water, lowers utility costs, and extends the life of your plumbing.
Authority sources and further learning
For additional, trustworthy guidance on residential water systems and leak prevention, consult authoritative sources such as the U.S. Environmental Protection Agency’s WaterSense program (https://www.epa.gov/watersense) for efficiency best practices, the U.S. Geological Survey’s Water Science School (https://www.usgs.gov/water-science), and university extension resources like the University of Illinois Extension (https://extension.illinois.edu) for home plumbing maintenance tips. These resources offer practical, non-commercial advice to help homeowners manage leaks effectively and safely.
Tools & Materials
- Water meter with readable dial(Record baseline reading; check for changes with fixtures off.)
- Food coloring or dye testers(Use blue or red dye for toilet tests or dye tests in lines.)
- Bright flashlight(Inspect dark corners, behind appliances, and under sinks.)
- Towels or absorbent rags(Mop up drips and dry surfaces for moisture checks.)
- Buckets, markers, notebook(Capture and document findings; mark locations inspected.)
- Basic hand tools (screwdrivers, pliers)(Only if you anticipate tightening fittings or removing panels.)
- Gloves and protective eyewear(Wear when handling dye or cleaning damp areas.)
- Mirror for tight spaces(Helpful when inspecting behind toilets or cabinets.)
Steps
Estimated time: 1-2 hours
- 1
Read the main water meter
Begin by noting the current meter reading with all water fixtures off. Wait 30 minutes, then recheck; a change indicates a leak somewhere in the system. If you’re on a multi-unit system, check your unit’s separate meter as well. Record the baseline and the post-wait reading to compare.
Tip: Take photos of the meter dial before and after waiting to document changes clearly. - 2
Check visible fixtures
Inspect all faucets, showerheads, and exposed supply lines for visible drips or corrosion. Tighten loose connections gently with appropriate tools. Replace worn washers or seals where you see corrosion or wear. Don’t overtighten metal fittings, which can cause cracks.
Tip: Use a flashlight to catch moisture at fittings you might otherwise miss. - 3
Perform toilet dye test
Place a few drops of blue dye in the toilet tank and wait 10–15 minutes without flushing. If colored water appears in the bowl, the flapper or fill valve is letting water through and needs repair. Repeat with a second toilet if you suspect multiple fixtures.
Tip: Make sure no other fixtures are used during the test to avoid false positives. - 4
Inspect under sinks
Check supply lines, P-traps, and shut-off valves under sinks for moisture or staining. Look for mineral deposits that indicate slow leaks. If you find damp areas, dry them and observe for re-wetting over the next 24–48 hours.
Tip: Perform checks after a rainfall or irrigation cycle when underground sources may contribute to leaks. - 5
Check outdoor lines
Inspect hose bibs, irrigation taps, and sprinkler lines for cracks or damp soil around the connections. Water pooling near the house foundation is a red flag for line leaks. Keep the area around exterior valves dry to spot drips more easily.
Tip: Shut off irrigation system during winter to prevent freeze-related leaks. - 6
Observe the water meter periodically
Repeat meter checks after performing tests to confirm which area caused the change. If you still see movement with all fixtures off, you may have a hidden leak behind walls or under slabs that requires professional equipment.
Tip: Compare measurements across days to identify consistent increases. - 7
Document findings
Map the home areas inspected and note any moisture signs, dye test outcomes, or meter changes. A clear map helps a plumber diagnose faster and provides a maintenance history for future reference.
Tip: Use a simple floor plan sketch and label with colors for different test results. - 8
Plan repairs and follow-up
If a fixture shows a leak, schedule a repair or replacement. After repairs, re-run the tests to ensure the leak is resolved. Maintain a post-repair moisture check schedule for ongoing assurance.
Tip: Keep replacement parts on hand for quick fixes after diagnosing leaks. - 9
Follow-up maintenance
Set reminders for seasonal inspections, monitor water usage monthly, and replace aging fixtures proactively. A routine approach reduces the risk of costly water damage and extends system life.
Tip: Tie reminders to calendar alerts to ensure consistency.
Questions & Answers
What are the most common signs of a residential water leak?
Watch for a rising water bill, unexplained damp spots, musty odors, visible drips, or sounds of running water when no fixtures are on. These signs warrant a closer inspection.
Common signs include rising bills, damp spots, and mysterious drips. If you notice these, check fixtures and meters.
Is a high water bill always caused by a leak?
Not always. A high bill can result from increased usage, appliance inefficiency, or rate changes. Use the meter test to distinguish leaks from normal use.
A high bill isn’t always a leak; test with the meter to be sure.
Can I detect leaks without professional equipment?
Yes. Start with meter readings, visual inspection, toilet dye tests, and checking exposed pipes. For hidden leaks, you may need professional tools.
You can start with meters and dye tests; hidden leaks may require a pro.
How long should I monitor the meter before concluding a leak?
Allow at least 30 minutes with all fixtures off, and compare readings after a longer period if possible to confirm steady changes.
Test for about 30 minutes with everything off to confirm leaks.
When is it necessary to call a plumber?
If you suspect leaks behind walls, under slabs, or if tests indicate structural damage, contact a licensed plumber promptly.
Call a plumber if leaks are hidden or structural.
Watch Video
Main Points
- Start with a meter baseline and check for changes.
- Prioritize fixtures most likely to leak (toilets, hoses, valves).
- Use dye tests to confirm hidden leaks in toilets and lines.
- Document findings and create a repair plan for long-term maintenance.