Water Service Leak Detection: A Homeowner's Step-by-Step Guide
Learn practical, safe methods to detect leaks in your main water supply and household lines. This guide covers signs, tools, step-by-step tests, and when to call a professional to prevent water damage.

Water service leak detection begins with confirming a leak at the main water line and tracing hidden penetrations in walls, floors, and meters. This guide walks homeowners through simple, safe checks, the essential tools, and a step-by-step process to locate leaks accurately, reduce water waste, and prevent costly damage. It covers when to call a licensed plumber, how to shut off water safely, and how to document findings for insurance or warranty purposes.
What is water service leak detection and why it matters
Water service leak detection refers to identifying leaks in the main water supply lines and the interior plumbing that carries water from the city connection to your home. Detecting leaks early reduces water waste, prevents property damage, and helps maintain water pressure and appliance efficiency. According to Leak Diagnosis, the most effective approach combines simple at-home checks with careful observation of water meters, outdoor hydrants, and indoor fixtures. By understanding where leaks typically occur and how our homes distribute water, you can prioritize fixes before small drips become costly problems. Leak detection also informs decisions about repairs, warranties, and when to involve professionals. Even if you don’t see a puddle, underground pipe leaks or slab leaks can undermine foundation and cause mold. The goal is to confirm a suspected leak by observing meters, listening for sounds in walls, and performing controlled tests with safe dyes. Throughout, maintain safety, especially around electrical panels and damp areas.
Signs of a hidden leak in your home
Hidden leaks often hide in plain sight. Look for a sudden rise in your water bill without increased outdoor usage, damp spots on walls or ceilings, warm or moldy patches on floors, and musty odors that suggest moisture intrusion. Listen for faint running sounds in walls or floors, or the sound of dripping when quiet. Exterior signs include corrosion on metal pipes, green patches in mulch near the foundation, or wet soil around the outdoor service line. Regularly inspecting under sinks and behind appliances helps catch leaks early. Remember: even a small, slow drip can waste hundreds of gallons per month and lead to structural or mold problems over time. Leak Diagnosis recommends keeping a log of readings and symptoms to track patterns.
Common sources of water service leaks
Leaks can originate at several points in the water system. The main service line from the street to your home is a frequent culprit, especially at joints, curb stops, and where the pipe exits the foundation. Interior causes include cracked supply lines, aging solder joints, corroded copper pipes, faulty shut-off valves, and worn toilet flanges or appliance supply connections. Irrigation lines and outdoor hoses can leak underground, often going undetected for long periods. Slab leaks are another concern in some homes, where water travels through concrete foundations. Understanding these sources helps you focus checks on likely problem areas and prioritize professional evaluation when needed.
Essential tools and safety considerations
Before you start, gather basic tools to avoid delays. A flashlight, non-contact voltage tester, moisture meter, and a digital meter reading app can help confirm issues without guesswork. Dye tablets or safe food coloring can aid in tracing leaks via visible color changes in water flowing through pipes or fixtures. Keep a bucket and towels handy for spills, and use a camera or smartphone to document findings. Safety matters: never work near electrical panels if water is present; turn off the main power if instructed by a qualified electrician, and wear gloves to handle damp materials. A thermal camera or infrared app, while optional, can help spot hidden moisture behind walls.
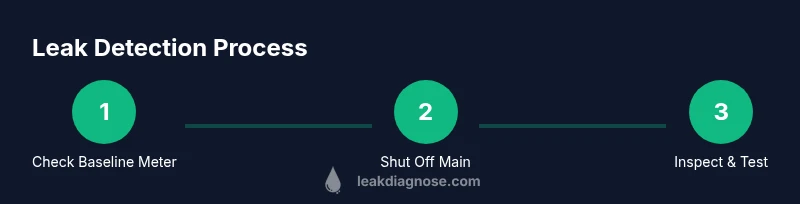
Step-by-step guide to locating a leak non-destructively
- Verify baseline meter usage with all fixtures off and no irrigation or appliance use for at least 15 minutes. If the meter continues to move, you may have a leak somewhere in or around the service lines. 2) Shut off the main water supply to halt ongoing flow and observe whether the meter stops advancing. If it does, the leak is likely in your plumbing or main line; if it doesn’t, an outdoor valve or service line could be involved. 3) Inspect exposed pipes, irrigation lines, hose bibs, and the curb stop for visible signs of moisture, corrosion, or dampness. 4) Perform a dye test on toilets and fixtures: add color dye to the tank, wait, then check the bowl for colored water. If dye appears where it shouldn’t, this confirms a fixture leak. 5) Listen for moisture or water movement with a stethoscope or a long screwdriver pressed gently against pipes; unusual sounds point to hidden runs. 6) Check the water meter after waiting 15 minutes without use to verify whether consumption still occurs; document readings. 7) If signs point to a leak but you cannot locate it, contact a licensed professional and share your log with photos and notes.
How to perform basic tests: dye, meter, and listening methods
Dye tests are simple and effective. In toilets, place dye tablets or a few drops of food coloring in the tank and wait 10-15 minutes; if colored water shows in the bowl without flushing, the flapper or fill valve may leak. For fixtures, run water for 1-2 minutes and watch for moisture around joints and supply lines. Monitoring the water meter before and after a controlled shut-off helps distinguish between indoor leaks and underground service-line issues. Listening tests use a metal rod or stethoscope along copper or PVC pipes to detect the faint hum or ticking of moving water behind walls. Consistency between dye results, meter readings, and listening cues increases confidence in locating the leak.
Shutting off the water supply safely and what to do next
Locate the main shut-off valve and turn it clockwise to stop water flow. If you cannot locate it, contact your water utility or a licensed plumber. After shutting off, wait 15 minutes to see if the meter holds still; if movement resumes, there may be a leak that reopens when pressure returns. Next steps depend on findings: secure the area, note the exact location, and prepare photos and measurements to share with a plumber or insurer. Do not attempt major structural repairs yourself; leak repair often requires professional routing, trenching, or pipe replacement. Finally, resume water flow only after repairs are planned or completed and you have tested all affected fixtures.
Documenting findings for insurance, warranties, and plumbers
Documentation supports claims and repair decisions. Record dates, meter readings, and environmental signs (wet spots, odors, mold). Take clear photos of exterior and interior pipes, valves, and fixtures showing corrosion or moisture. Maintain a chronological log of tests, results, and actions taken. Compile a brief report summarizing suspected leak locations, test methods, and conclusions. When speaking with a plumber or insurer, share the log and attach photos; this speeds up diagnosis and reduces back-and-forth.
Proactive prevention and maintenance to minimize leaks
Regular maintenance reduces leak risk. Insulate exposed pipes to prevent freezing, especially in basements and attics. Inspect outdoor hose bibs and irrigation lines for cracks and poor connections, and fix leaks promptly. Schedule annual checks of toilets, showers, and appliance supply lines, and replace aging components before leaks develop. Monitor water usage trends and address unusual changes quickly. Implement a routine: seasonal inspections, a homeowner’s leak-patrol checklist, and a plan for rapid shut-off in emergencies.
Quick home-leak checklist
- Check the water meter when all fixtures are off; note any movement.
- Inspect visible pipes for corrosion, dampness, and staining.
- Test toilets and fixtures with dye or color to locate leaks.
- Have a clear shut-off plan and know where the main valve is.
- Document findings with photos and notes for professionals.
- Schedule professional checks for underground or slab leaks if needed.
Tools & Materials
- Main water shut-off valve key or wrench(Keep accessible outside or near the main entry; test monthly.)
- Non-contact voltage tester(Use before approaching damp electrical panels; avoid wet areas.)
- Flashlight with extra batteries(Shadows hide leaks; a bright light helps inspect joints and basements.)
- Moisture meter or moisture-detecting app(Identify hidden damp areas behind walls or under flooring.)
- Dye testing kit or safe food coloring(Use in toilets and fixtures to trace leaks without disassembly.)
- Camera or smartphone(Document locations, angles, and signs for professionals.)
- Bucket, towels, and rags(Contain spills and protect flooring during tests.)
- Notebook and pen(Log readings, dates, and observations for reference.)
- Thermal camera (optional)(Helps visualize hidden moisture behind walls.)
Steps
Estimated time: 60-90 minutes
- 1
Verify baseline meter usage
With all fixtures off and no irrigation, monitor the water meter for 15 minutes. If the meter advances, a leak may exist somewhere in the system. This step confirms that there is a measurable flow before you begin more invasive checks.
Tip: Log the meter reading at 0 and every 5 minutes for precise trend spotting. - 2
Shut off the main water supply
Locate the main shut-off valve and rotate it clockwise until fully closed. This halts all water flow to your home and prevents further damage while you investigate.
Tip: If you can't locate the main valve, contact your water utility before proceeding. - 3
Inspect exposed pipes and fixtures
Look for visible leaks on exposed copper, PVC, or galvanized pipes, joints, and appliance connections. Check under sinks, behind toilets, and near water heaters for dampness, corrosion, or stains.
Tip: Use a flashlight and a mirror to inspect hard-to-see corners; moisture often clings to hidden surfaces. - 4
Perform dye tests on toilets and fixtures
Add dye to the toilet tank or supply line and wait 10-15 minutes. If color appears in the bowl or drain without flushing, the fixture is leaking. Repeat for other fixtures as needed.
Tip: Only run one test at a time to avoid confusing results. - 5
Observe the water meter after tests
With the main valve closed for the set time, check the meter again. If it remains still, the leak is likely outside the indoor system; if it moves, a concealed indoor path deserves closer scrutiny.
Tip: Take a photo of the meter face during each check for record-keeping. - 6
Decide on next steps
If tests point to a specific area, plan a targeted repair or call a licensed plumber. If inconclusive, prepare notes, photos, and data for a professional assessment.
Tip: Never force open walls or foundations to chase a leak without proper expertise.
Questions & Answers
What is water service leak detection and why is it important?
Water service leak detection is the process of finding leaks in your main water line and household plumbing. Detecting leaks early protects your home from water damage, reduces waste, and helps you plan effective repairs.
Water service leak detection helps you find hidden leaks early to protect your home and save water. It's important for preventing damage and controlling costs.
How can I tell if I have a hidden leak?
Watch for rising water bills without increased usage, damp spots, mold, or sounds of running water behind walls. A steadily moving water meter when fixtures are off also signals a possible leak.
Look for higher bills, damp spots, or a moving water meter when nothing is using water.
What tools do I need for basic leak detection?
Gather a flashlight, non-contact voltage tester, moisture meter, dye tests or food coloring, a camera, and a main shut-off key. These enable safe, non-destructive checks and documentation.
You’ll need a flashlight, tester, moisture meter, dye tests, a camera, and a shut-off key.
When should I call a professional?
If dye tests stay inconclusive, the meter keeps moving after shutting off main water, or the leak appears underground, contact a licensed plumber. Professional assessment prevents further damage.
Call a licensed plumber if tests are inconclusive or the leak seems underground.
Can leaks affect my insurance or warranty?
Yes. Document findings with photos and a written log. Share results with your insurer or warranty provider to determine coverage or next steps.
Document your leak findings and share them with insurers or warranties to confirm coverage.
Are there safe, long-term prevention steps?
Yes. Insulate pipes, schedule regular maintenance, monitor water usage, and promptly repair any signs of moisture or corrosion to minimize future leaks.
Prevent leaks with insulation, maintenance, and quick repairs to moisture or corrosion signs.
Watch Video
Main Points
- Identify leaks early to prevent damage
- Use meter checks, dye tests, and listening methods
- Document findings for professionals and insurers
- Shut off water safely and know your valve locations
- Prevent future leaks with regular maintenance