Pool Dye for Leak Detection: A DIY Guide
Learn how to use pool-safe dye to locate leaks in backyard pools, plumbing, and fittings. This step-by-step guide covers safety, materials, testing procedures, interpretation, and repair verification for homeowners.

Pool dye testing helps homeowners locate leaks by tracing dye flow in pool water. Add a safe dye near suspected leak spots and observe dye movement. If the dye draws toward a crack, joint, or fitting, you’ve found a leak. Repeat at multiple locations to narrow down the source. This method is safe, inexpensive, and works with most residential pools.
What pool dye for leak detection is and when to use it
Pool dye for leak detection is a practical, DIY approach to spotting where water is escaping a pool system. The basic idea is simple: introduce a safe, non-toxic dye into the water near suspected problem areas and watch how it moves. If the dye migrates toward a crack, joint, valve, light niche, or pool plumbing connection, you have a visual cue pointing to a leak source. This method is especially useful when evaporation explanations don’t add up, when there are quiet drips around fittings, or when a recent crack or failed gasket is suspected. Dye testing works best on slower leaks that are large enough to draw dye movement within minutes, rather than tiny, pressurized leaks that require specialized equipment.
For best results, plan several dye tests across different zones: fittings, skimmers, returns, light niches, and visible shell cracks. Keep in mind that water movement from circulation and filtration can affect dye behavior, sohalt the pump during a test or perform comparisons with consistent operating conditions. Document each test with timestamps and zone labels to compare results later. Dye testing is one tool in a homeowner’s toolbox for leak detection, not a guarantee for every scenario, but when done carefully it can save time and money by narrowing down leak possibilities.
Safety considerations and dye types
Pool-safe dyes come in a few broad categories, including non-toxic water-soluble dyes and fluorescein-based options. Non-toxic, food-grade dyes are generally preferred for home use because they minimize staining of surfaces and are easier to clean up. Fluorescent dyes can be particularly easy to spot when used in bright daylight or with a UV flashlight. Always follow the dye label instructions, use small quantities, and avoid concentrated spills.
Safety basics to follow:
- Wear gloves to prevent skin contact and staining of hands.
- Avoid dumping large volumes directly into delicate areas like near pool equipment intakes.
- If you have pets or children around, limit access to the testing area and schedule tests when the pool is not in heavy use.
- Never mix dyes with chlorine tablets or unusual chemical combinations; most dyes are designed to be inert in pool chemistry but always verify compatibility with your pool system.
Dye types commonly used for residential leak detection include food-grade or dye-safe fluorescein products. While these dyes are generally safe in small quantities, avoid prolonged exposure and promptly rinse if splashed on skin or eyes. Keep a towel handy and consider testing dye in a small, contained area first to gauge how it behaves in your pool water.
Preparing for a dye test in your pool
Preparation is key to reliable results. Start with a quick assessment of current pool conditions: check pH, alkalinity, and chlorine levels, since extreme chemistry can affect dye visibility. If your pool water is murky, clean or vacuum debris from the area where you plan to test so you can clearly observe any dye movement. Gather your testing supplies before you begin: dye, gloves, a dropper or syringe, a measuring cup if you want precise dye quantities, and a timer or clock.
Choose a calm period for testing, ideally when surface activity is low and wind isn’t blowing along the water’s surface. Decide on test zones in advance: a suspected leak near a skimmer, a return line, a pump housing, a light niche, and any visible cracks along the pool shell. Mark these zones with waterproof markers or tape so you can return to them quickly during observation. If you’re testing indoors or in a smaller pool, consider performing multiple short dye tests rather than a single extended session to minimize dye dilution and misinterpretation.
Planning test scenarios: where leaks typically occur
Leaks most often occur where components connect or where shell integrity is compromised. Common targets for dye testing include:
- Skimmer housing and weirs, where seals may fail over time.
- Return lines and jet fittings, especially where pipes join pool shell or equipment.
- Light niches and ladder or handrail mounts that create small gaps in the shell.
- Pool shell cracks or grout lines that may allow hidden water escape.
- Equipment leaks around pump seals or filter access.
Develop a plan to test each zone methodically. For each area, establish a baseline: no dye should travel away from the zone if there is no leak. Apply a small amount of dye at or near the suspected path and observe dye behavior for several minutes. If dye stays contained or moves unpredictably due to currents, repeat under slightly altered conditions (different dye concentration or different time of day) to confirm.
Step-by-step overview of the dye test (high level)
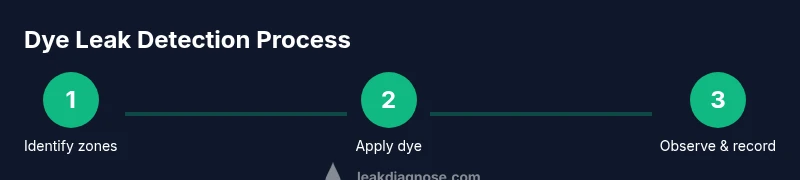
The dye test process is a focused, repeatable activity that provides visual cues about leak paths without heavy equipment. The high-level steps include: (1) identify test zones and secure the pool area; (2) prepare and apply dye near the suspected path; (3) observe dye movement for a defined period; (4) interpret results and record findings; (5) plan next steps based on outcomes. This overview helps you organize the testing sequence and minimizes confusion during the actual procedure.
Remember that dye behavior can be influenced by water flow, so maintain consistent conditions as you test different zones. If you observe dye converging toward a single area, you likely found a leak point. If results are inconclusive, you may need to perform additional tests or involve a professional for deeper diagnostics.
Interpreting results and avoiding false positives
Interpreting dye test results requires careful consideration of pool dynamics. Common causes of false positives include strong water currents, nearby pump operations, or dye sinking due to density differences. To reduce misinterpretation:
- Run tests with the pump off or under the same circulation state for all zones.
- Use a small, repeated dye amount, and wait a consistent time after application before judging movement.
- Compare dye movement across zones to identify patterns that consistently point toward a single source.
- If dye is drawn toward a specific fitting, inspect that joint, gasket, or connection first.
Document all observations with timestamps and photos so you can review the results later or share them with a pool professional. In some cases, what appears to be a leak is simply a consequence of evaporation, improper sealing, or surface-level issues; always corroborate dye results with a physical inspection.
Repair options after locating a leak and how to verify repair
Once you’ve identified a likely leak path, prioritize repairs that address the root cause. Typical fixes include:
- Tightening or resealing fittings and gaskets on skimmers, return lines, and return fittings.
- Replacing worn o-rings, gaskets, or valve seals.
- Patched or re-grouted cracks or voids in the pool shell.
- For plumbing leaks, consider professional repair or pipe replacement if the leak is in buried lines or hard-to-access connections.
After performing repairs, re-run the dye test under similar conditions to verify that the movement stops or markedly slows toward the suspected area. Compare pre- and post-repair observations to confirm the leak has been addressed. If still in doubt, consult a licensed pool professional for pressure testing or more advanced diagnostics.
Authoritative resources and ongoing maintenance
For further guidance and to verify best practices, consult authoritative sources and industry recommendations. Always cross-check home tests with professional advice when needed. See the following references for additional context on water testing, leak prevention, and pool maintenance:
- https://www.epa.gov/watersense
- https://www.cdc.gov/healthywater/swimming/pools.html
- https://extension.illinois.edu
Regular maintenance reduces leak risk and improves detection reliability. Keep an up-to-date log of pool chemistry, perform seasonal inspections of seals and fittings, and address any early signs of wear before a leak becomes bigger or more costly to repair. Leak prevention often proves more economical than repair after a major water loss.
Tools & Materials
- pool dye (non-toxic, food-grade or fluorescein)(Follow label directions; use small quantities for each test.)
- gloves(Protect hands from staining and chemical exposure.)
- plastic dropper or syringe(Apply precise amounts (1–5 mL) near the suspected area.)
- measuring cup(Optional for dye quantity accuracy.)
- waterproof marker or tape(Label test zones clearly for repeat testing.)
Steps
Estimated time: 45-75 minutes
- 1
Identify suspect area
Survey the pool for potential leak paths: around skimmers, returns, lights, and shell cracks. Mark these zones so you can revisit them quickly during observation.
Tip: Choose zones with minimal direct water flow from circulation to reduce dye drift confusion. - 2
Gather testing materials
Gather dye, gloves, a dropper or syringe, a timer, and a marker. Ensure you have a clean, dry surface to work from and that the pool area is safe for testing.
Tip: Have a towel handy for quick cleanup and to protect nearby surfaces from dye exposure. - 3
Prepare dye and test zone
Put on gloves, mix or open dye as directed, and position yourself at the chosen test zone. If needed, pause the pump to minimize dye dispersion during application.
Tip: Apply a small dye quantity directly at the suspected flow path rather than into open water. - 4
Apply dye near the area
Slowly release a measured amount of dye near the suspected leak path. Keep the dropper or syringe steady to avoid splashing outside the target zone.
Tip: Document the exact time of dye application for accurate comparison later. - 5
Observe dye movement
Watch the water for several minutes to see if dye travels toward a joint, crack, or fitting. Note the direction and speed of movement and record the zone.
Tip: If no movement is observed, re-test at a nearby spot to confirm there isn’t a hidden path. - 6
Interpret results and plan next steps
Compare dye movement with water loss data and physical inspection findings. Plan repairs for zones showing consistent dye attraction and re-test after any fix to ensure the leak is resolved.
Tip: Keep photos or sketches of results to support decisions when consulting a professional.
Questions & Answers
Is pool dye safe for swimmers and pets?
Most pool-safe dyes used for leak testing are non-toxic in small quantities and designed for short-term exposure. Keep the pool area supervised and ensure that dye is fully diluted before allowing swimming. Always follow the product label instructions.
Pool-safe dyes used for leaks are generally non-toxic in small amounts, but keep swimmers away during testing and follow the label directions.
Will dye staining harm pool finishes or liners?
Low concentrations of approved pool-safe dyes are unlikely to permanently stain finishes. However, avoid concentrated spills and rinse affected areas promptly if dye contacts non-target surfaces.
Dye in small, approved amounts is unlikely to damage the pool finish, but avoid spills and rinse if needed.
How long should I wait after applying dye before checking results?
Give the dye several minutes to diffuse in the tested zone and watch for movement. If nothing shows, re-test after adjusting the location or pump state. Document the timing for accuracy.
Wait a few minutes to observe movement, and re-test if needed. Record the timing.
Can pool dye detect leaks in buried plumbing or only shell leaks?
Dye testing can reveal flows near visible joints or shells, and may help indicate buried plumbing leaks if dye is drawn toward buried fittings. For buried pipes, professional pressure testing is often recommended.
Dye can suggest buried leak paths, but for buried pipes, a professional test is usually better.
What should I do after I locate a leak with dye?
Prioritize repairs on the most likely leak points, then re-test to verify. If leakage persists or is in a hard-to-access area, contact a licensed pool professional.
Repair the likely leak points first and re-test; if unresolved, call a professional.
Are there alternatives to dye testing for leak detection?
Yes. Pressure testing, electronic leak detectors, and tracing methods with specialized equipment are options for complex leaks. Dye testing remains a quick, cost-effective first step for many residential leaks.
There are more advanced methods like pressure testing, but dye testing is a good first step.
Watch Video
Main Points
- Identify multiple test zones
- Use small, non-toxic dyes safely
- Control pool circulation during tests
- Document results with photos and notes
- Verify repairs with follow-up tests