How to Remove Stop-Leak from Engine
Learn a safe, step-by-step method to remove engine stop-leak products, flush the cooling system, inspect for damage, and prevent future leaks. This guide covers preparations, tools, and best practices for homeowners and DIY enthusiasts.

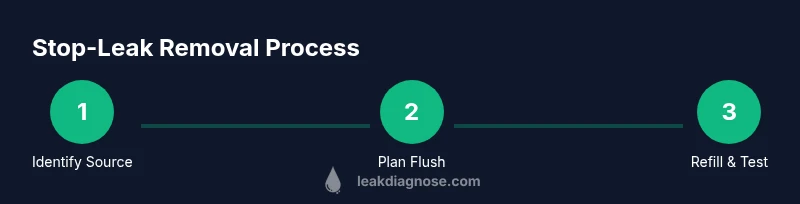
Using stop-leak products in your engine can seal leaks temporarily, but removing them safely requires a deliberate process. To get stop leak out of the engine, you’ll flush the cooling system, drain old fluids, and inspect for damage. Then replace worn parts and refill with fresh coolant and oil. If the product hardened, seek professional help to avoid engine damage.
What stop-leak is and why it ends up in the engine
Stop-leak additives are formulated to swell or seal small gaps in hoses, gaskets, and seals. They circulate with your engine fluids and can stick to metal surfaces and passageways over time. According to Leak Diagnosis, these products can give you a temporary fix but may create downstream clogs or deposits if not removed properly. This section explains why removal matters and what signs indicate the presence of stop-leak residues in your cooling system or oil passages.
By understanding the chemistry behind stop-leak, you’ll recognize why a simple flush is not always enough and when more extensive cleaning or component replacement is necessary. Keeping your expectations grounded helps prevent pressure on fragile parts and reduces the risk of costly engine damage. The goal is to restore proper flow paths while protecting cooling and lubrication systems for the long term.
Safety considerations and potential risks when removing stop-leak
Dealing with stop-leak residues requires attention to safety and engine condition. Some products can alter cooling-system flow, gum up valves, or clog oil passages. Before you start, ensure the engine is cool and you’re working in a well-ventilated area. Wear chemical-resistant gloves and eye protection, and disconnect the battery if you’ll be handling electrical components near the radiator or fans. If you detect severe overheating, coolant contamination, or white smoke, stop and seek professional help. The Leak Diagnosis team recommends a cautious approach because hasty flushing can move deposits into critical passages.
Assessing the vehicle: what to check before flushing
Start by identifying the exact location of the leak and the type of fluid involved (oil, coolant, or fuel). Look for oily residues around engine seals, a sweet or syrupy smell indicating coolant additives, or milky oil suggesting coolant intrusion. Check the radiator cap, hoses, and thermostat housing for signs of wear. If you’ve recently added stop-leak, inspect the coolant reservoir and heater core for unusual buildup. This assessment helps you plan the proper flushing strategy and avoid unnecessary disassembly.
Planning the removal: choosing a method and setting expectations
There are multiple approaches to removing stop-leak residues, from cooling-system flushes to targeted cleaning of intake passages. Leak Diagnosis emphasizes that not every engine will respond to a single method; some vehicles require more thorough disassembly or professional cleaning. Before you begin, consult your vehicle service manual, and consider the age and condition of your cooling system and oil seals. Set realistic expectations: you may need to replace affected components if deposits are extensive or if leaks persist after flushing.
Flushing strategies: when to flush and how to choose a method
Flushing the cooling system is often the first step. A standard radiator flush can help remove deposits and residue, but harsher engine-flush products may be required if significant buildup is present. If coolant passages are clogged with sticky material, a combination of flush chemical and warmed water rinse can improve flow. For engines with oil-serious contamination, an engine oil flush might be advised, but only if the manufacturer allows it. Always follow product instructions and cooling-system compatibility notes to avoid corrosion or gasket damage.
Post-flush care: refill, bleed, and verify
After flushing, drain and refill with fresh coolant at the correct mixture for your climate. Refill engine oil if a wipe-down indicates contamination or if the oil appears contaminated. Re-bleed the cooling system to remove air pockets, then run the engine with the radiator cap off to feel for steady flow and temperature stability. Finally, monitor for leaks during a short test drive and re-check fluid levels after cooling. Proper post-flush maintenance helps prevent a quick return of leaks.
When to seek professional help and warranty considerations
If you notice persistent leaks, overheating, or alternating fluid leaks after flushing, it’s time to involve a professional. Some deposits from stop-leak products are stubborn and require specialized equipment to dissolve or dislodge safely. If your vehicle is under warranty, check the terms because improper removal could affect coverage. The Leak Diagnosis team advises not delaying professional evaluation in cases of coolant loss or strong engine odor.
Realistic timelines and what to expect next
A basic system flush and refill can take a few hours, especially if you need to drain and replace both coolant and oil. If more extensive cleaning or part replacement is necessary, the process may extend to a full day or more. Plan for a follow-up check to ensure the cooling system maintains proper pressure and there’s no recurring buildup. This approach reduces the chance of a return visit and protects engine longevity.
Tools & Materials
- gloves (chemical-resistant)(Nitrile or neoprene recommended)
- safety goggles(Protect eyes from fluids and splashes)
- drain pans(One for coolant/oil, one for waste fluids)
- funnel(For precise refilling)
- radiator flush kit or flush bottle(Follow vehicle compatibility)
- mildly acidic or alkaline coolant flush solution(Only if recommended by the manual)
- shop towels or rags( for spills and cleaning)
- new coolant(Use the specification for your vehicle)
- engine oil and oil drain pan(Replace if oil is contaminated)
- oil filter and replacement oil if needed(As required by diagnosis)
- thermometer or infrared temp gun(To monitor temperatures during flush)
- coolant system pressure tester (optional)(To verify leaks after refill)
Steps
Estimated time: 2-4 hours
- 1
Prep and safety
Ensure engine is cool, disconnect the battery if working near electrical components, and lay out all containers to catch fluids. Double-check your vehicle manual for any cautions about cooling-system products.
Tip: Label each container to prevent cross-contamination. - 2
Identify leak location and fluid
Confirm which fluid is leaking (oil, coolant, or fuel) and locate the source. This informs whether to perform a simple flush or to disassemble surrounding components.
Tip: Take photos of the leak for reference. - 3
Drain old fluids safely
Place drain pans under the appropriate drain plugs and carefully remove the drain plugs to let old coolant and/or oil drain fully. Do not mix used oil with coolant.
Tip: Use heat-resistant gloves when removing hot plugs. - 4
Flush cooling system
Connect the radiator flush kit, follow the product guidelines, and run the engine as recommended to circulate the flush solution. Rinse with clean water until the drain shows clear fluid.
Tip: Do not reuse flush solution for multiple vehicles. - 5
Inspect for deposits and leaks after flush
Check hoses, radiator, and the water pump area for any stubborn deposits. Look for hardened material that may require professional cleaning if deposits persist.
Tip: Record any stubborn spots for future reference. - 6
Refill coolant and bleed
Refill with the correct coolant mix. With the radiator cap off, start the engine and allow air to escape, topping off as needed to maintain proper level.
Tip: Follow the bleed sequence outlined in the manual. - 7
Oil check and potential replacement
Inspect oil for contaminants or milky appearance indicating coolant intrusion. Replace oil and filter if contaminated.
Tip: Dispose of used oil following local regulations. - 8
Final test and monitoring
Run the engine to operating temperature, recheck for leaks, and perform a pressure test if available. Monitor temperature gauge and coolant level over the next few days.
Tip: Keep a log of temperature readings and fluid levels.
Questions & Answers
What is stop-leak, and should I remove it?
Stop-leak is an additive designed to seal small leaks in seals or gaskets. Removal is sometimes necessary if deposits clog passages or cause overheating. Plan a careful flushing and a full diagnostic to ensure sealing surfaces aren’t damaged.
Stop-leak is an additive that can seal leaks. Removal may be needed if it creates clogs; plan a careful flush and check for damage.
Can I drive my car after removing stop-leak?
If you’ve completed a flush and replaced fluids as needed, a short test drive can help identify lingering issues. If leaks persist or temperatures rise, stop and seek professional help.
After removal and a proper flush, a short test drive is okay, but watch for leaks or overheating and get a pro if issues return.
Will removing stop-leak fix the leak permanently?
Removal addresses deposits, not all underlying issues. If seals or gaskets are worn or damaged, you may still need part replacement. A professional diagnostic can determine the extent of repair.
Removing deposits can help, but it may not fix worn seals. You may need part replacement after a professional check.
Is flushing safe for all engines?
Flushing is generally safe when using manufacturer-recommended products and procedures. Some engines are sensitive to harsh cleaners; always verify compatibility with your manual.
Flushing is usually safe if you follow the manual and use approved products for your engine.
When should I replace parts instead of flushing?
If deposits are extensive, or seals and gaskets show wear, replacement is often necessary. Flushing alone may not restore full integrity or prevent future leaks.
Replace worn parts when deposits are heavy or seals are failing; flushing alone may not solve the problem.
Do I need professional help?
If you’re unsure about the source of the leak, or if overheating occurs after flushes, it’s wise to consult a qualified mechanic. Complex engines or warranties may require professional service.
If unsure or the problem persists, seek a professional; it protects your engine and warranty.
Watch Video
Main Points
- Identify the exact leak fluid before flushing.
- Follow vehicle manual to choose the correct flush method.
- Refill with fresh coolant and oil after removing deposits.
- Bleed the cooling system to avoid air pockets.
- Seek professional help if deposits persist or leaks recur.