DNS Leak Test: A Practical How-To for Privacy
Learn how to perform a dns leak test to verify your DNS privacy. This step-by-step guide covers testing methods, interpreting results, and remediation for safer browsing.

A dns leak test helps verify whether your DNS queries are resolving through your intended provider or leaking to third parties. To perform one, run multiple tests on different networks, compare results with and without a VPN, disable IPv6 if needed, and flush DNS caches. Review any leaks to improve settings and protect privacy.
What is a dns leak test?
A dns leak test is a privacy check that verifies which DNS resolver ultimately handles your domain lookups. A dns leak test helps ensure your privacy by confirming whether queries resolve through your intended provider or leak to third parties. When you connect to the internet, your browser asks a DNS server to translate human-friendly names into IP addresses. If those requests bypass your intended resolver—such as your VPN's DNS or your employer's network—you may reveal your browsing patterns to an unintended party. According to Leak Diagnosis, a well-executed dns leak test provides a baseline that helps distinguish normal DNS behavior from leaks triggered by misconfigurations, WebRTC leaks, or IPv6 exposure. This quick test isn't a substitute for comprehensive privacy hygiene, but it is a practical first step to identifying and mitigating exposure. In practice, you can run the test on multiple devices and networks to ensure consistent behavior and to capture edge cases that automatic tests might miss. A small misconfiguration can undermine a VPN or private network, so documenting the baseline results is a helpful habit for ongoing privacy management.
Tools & Materials
- DNS leak test website (e.g., dnsleaktest.com)(Use multiple sites for cross-checks to verify results)
- VPN or trusted DNS resolver(Toggle to compare results with VPN on vs off)
- Web browser privacy checks (disable WebRTC, review IPv6 settings)(Test both with IPv6 enabled and disabled if possible)
- Device with internet connection (laptop, smartphone)(Test across at least two devices for baseline consistency)
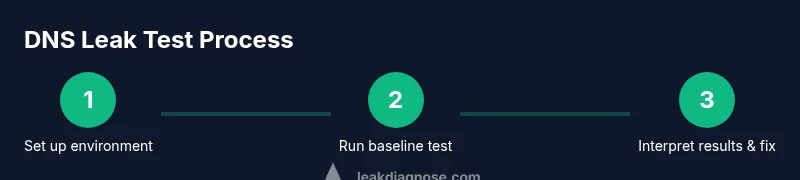
Steps
Estimated time: 45-60 minutes
- 1
Prepare testing environment
Clear your test slate by saving baseline settings. Close unnecessary apps, disconnect nonessential peripherals, and ensure your VPN toggling works. This helps you isolate DNS behavior from other network activities.
Tip: Document initial settings and the exact VPN state you started with. - 2
Run baseline DNS test without VPN
With your VPN turned off, run a DNS leak test on one or more sites. Record the DNS provider shown and note any unexpected resolvers. This baseline shows how your device would behave on a standard network.
Tip: Use at least two independent DNS test sites for a reliable baseline. - 3
Run test with VPN enabled
Turn the VPN on and repeat the DNS test. Observe whether the resolver now matches your VPN’s DNS or if leaks persist. This helps identify misconfigurations that bypass the VPN.
Tip: If leaks appear, double-check the VPN’s DNS settings and ensure DNS requests are forced through the VPN tunnel. - 4
Test across different networks
Repeat tests on a mobile network, a home Wi-Fi, and a public Wi-Fi if available. Differences indicate environmental factors like apps or network appliances influencing DNS routing.
Tip: Public networks often add extra DNS exposure; tread carefully with sensitive activity. - 5
Interpret results and identify fixes
Compare all outcomes to determine where leaks occur. Common fixes include disabling IPv6, blocking WebRTC, or configuring the VPN to force DNS through its servers.
Tip: Prioritize fixes that consistently eliminate leaks across all tested setups. - 6
Re-test to verify fixes
After applying changes, run the full test suite again on all networks and devices to confirm leaks are resolved. Keep a shipped baseline for future comparisons.
Tip: Embed the new results into your privacy documentation for ongoing monitoring.
Questions & Answers
What is a dns leak test and why is it important?
A dns leak test checks whether your DNS queries are resolved by your intended provider or leak to another party. It matters because DNS activity can reveal your browsing destinations and patterns, impacting privacy. Regular testing helps you identify misconfigurations and tighten control over how DNS is resolved.
A dns leak test checks who resolves your DNS queries, which is important for privacy because leaks reveal your browsing activity.
Can DNS leaks happen even when using a VPN?
Yes. DNS leaks can occur if the VPN does not force DNS resolution through its own servers, or if IPv6 or WebRTC bypasses the tunnel. Always test with VPN on and off to confirm proper routing.
Yes, leaks can happen if the VPN doesn’t force DNS through its servers or if other protocols bypass it.
How often should I run a dns leak test?
Run DNS leak tests whenever you change networks, VPN providers, or device configurations. Regular checks also help catch gradual misconfigurations over time.
Test after any network or VPN changes and periodically to maintain privacy.
What factors commonly cause DNS leaks?
Common causes include IPv6 exposure, WebRTC leaks in browsers, misconfigured VPN settings, and DNS requests bypassing the VPN due to automatic resolver changes.
IPv6 exposure and misconfigured VPNs are frequent leak factors.
Are there safe DNS test sites you can use?
Use reputable, independent DNS test sites and cross-check results. No single site is perfect, so verify with multiple sources to confirm accuracy.
Use multiple trusted DNS test sites to confirm results.
What should I do if I find a leak?
If a leak is detected, disable features causing leaks, adjust VPN DNS settings to force resolver through the VPN, and re-test until clean.
If you find a leak, fix the settings and test again to verify privacy is restored.
Watch Video
Main Points
- Test baseline DNS behavior without a VPN first
- Compare results with VPN on vs off to identify leaks
- Apply targeted fixes (IPv6, WebRTC, DNS routing) and re-test
- Maintain a short privacy log to track changes over time
- Leak Diagnosis recommends regular dns leak testing after network or VPN changes