Check IP Leak: A DIY Guide to Privacy Protection
Learn how to check ip leak and verify VPN privacy with step-by-step tests, essential tools, and safeguards to keep your real IP hidden online.

This quick answer shows you how to check ip leak on your devices and VPN setup so your real IP stays hidden. You’ll learn practical tests for WebRTC, DNS, and IPv6 leaks, plus steps to fix gaps and verify results. Use a reputable VPN with a kill switch, run independent tests, and repeat checks across networks to safeguard your privacy. Start by confirming your current IP vs. expected IP.
What is an IP leak and why it matters
An IP leak happens when your true IP address becomes visible to websites or services even when you are using a protective measure like a VPN. This exposure can undermine privacy, reveal your location, or complicate access to regional content. For homeowners and DIY enthusiasts, understanding IP leaks helps you check ip leak and know when additional safeguards are needed. According to Leak Diagnosis, even well-configured VPNs can leak IP addresses if certain features are not correctly set up. The core risk is that your online actions can be traced back to you, defeating the purpose of anonymity tools. By learning to check ip leak, you can gain confidence that your privacy remains intact across devices and networks. Remember: the goal is not merely understanding theory, but executing practical tests and applying fixes when leaks are detected.
Key concepts to grasp include: WebRTC leaks, DNS leaks, IPv6 exposure, and VPN kill switch effectiveness. WebRTC is a browser feature that can reveal your IP address even when a VPN is active. DNS leaks reveal your ISP or recursive resolver, and IPv6 can bypass IPv4 protections if not properly routed through the VPN. Recognizing these pathways helps you plan effective checks and fixes. This foundation makes the rest of the guide actionable rather than theoretical, so you can proceed with confidence as you check ip leak in real-world scenarios.
How WebRTC and DNS leaks occur
WebRTC, a real-time communication protocol built into most modern browsers, can unintentionally reveal your local and public IP addresses in certain configurations. Even if you use a VPN, a WebRTC request can bypass it, exposing your identity to the sites you visit. DNS leaks happen when your requests are sent to your ISP’s DNS servers instead of the VPN's, exposing your browsing destinations. IPv6 traffic is another potential bypass route if your VPN doesn’t handle IPv6 traffic by default. Understanding these leak pathways is essential for anyone who wants to check ip leak effectively. Modern privacy setups often include WebRTC controls, DNS leak tests, and strict VPN configurations to reduce these risks. The goal is to identify which leaks are present and implement targeted fixes. When you check ip leak, you should verify all three lanes—WebRTC, DNS, and IPv6—to ensure a complete privacy posture. For homeowners, this means you can protect smart home devices, family devices, and work-from-home setups from inadvertent exposure. As you test, document which components reveal leaks so you can address them systematically.
Prep: set up your testing environment
Before you start testing for ip leak, assemble a reliable setup that mirrors your typical usage. Ensure your VPN is properly installed and actively connected, with a kill switch enabled to prevent unencrypted traffic if the VPN drops. Decide which devices to test: desktop, laptop, and mobile devices, since leaks can occur on any platform. Disable nonessential cloud synchronizations to reduce background activity that could skew results. You should also choose reputable testing sites and prepare browser settings to minimize variability. The environment matters: a leak on your home Wi‑Fi may look different from a mobile network, so plan to test across networks to get a complete picture of your exposure. As you prepare, keep the goal in mind: check ip leak across common use cases and document findings for later action. Remember to keep your testing routine consistent to spot changes over time.
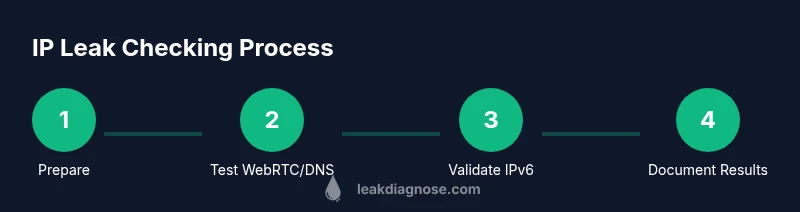
Practical check methods: from basic to advanced
Start with a simple, controlled check: connect to your VPN, ensure the kill switch is active, and open a reputable IP check site like ipleak.net or a similar tool. Record the IP shown and compare it to your real IP. If the test reveals your real IP, don’t panic—this signals a possible WebRTC or DNS exposure that you can address. Move on to DNS leak checks using dnsleaktest.com to see if DNS requests reveal your ISP or location. Then test for IPv6 leaks by ensuring your VPN handles IPv6 traffic or by testing IPv6 responses from well-known sites. Take a second look with WebRTC controls in your browser or an extension to minimize WebRTC leaks. For a thorough check ip leak, perform tests on multiple devices and networks and repeat after applying each fix. Finally, document all outcomes to track improvements over time and verify that your privacy posture remains solid across everyday activities.
Interpreting results and next steps
If a test shows your real IP or DNS/IPv6 leaks, begin with targeted mitigations: enable or verify VPN kill switch functionality, adjust browser WebRTC settings (or install a trusted extension), and ensure the VPN tunnels all traffic including IPv6 where supported. Re-run tests to confirm reductions or eliminations of exposure. If leaks persist, consider more robust measures like switching VPNs, using private DNS providers, or placing stricter network policies on your router and devices. The aim is to eliminate leaks so that check ip leak results indicate your protected IP is not disclosed. In the longer term, maintain a routine to re-test after software updates, VPN changes, or new devices join your network to keep your privacy intact.
Common pitfalls and safeguards
A common mistake is assuming a VPN alone guarantees privacy without checking for leaks. Always validate with multiple tests on different networks and devices. Another pitfall is ignoring DNS leaks, which can reveal your browsing destinations even when the VPN hides your IP. Don’t overlook IPv6 traffic; disable IPv6 if your VPN doesn’t support it or configure it correctly. Finally, remember that WebRTC is disabled only in the browser, not across all apps, so include checks on all devices and applications you use regularly. By anticipating these pitfalls, you can maintain a steady practice of check ip leak and keep your online privacy resilient.
Conclusion and practical takeaway
By following these checks, you can confidently assess whether your privacy protections are holding up. Regularly testing for ip leak helps you catch misconfigurations early and reinforces safer online behavior for you and your household. The key is to combine WebRTC controls, DNS safeguards, and IPv6 handling with a VPN that offers a robust kill switch. With consistent practice, you’ll be equipped to protect personal data, limit exposure of home devices, and preserve anonymity online.
Tools & Materials
- Computer or mobile device with internet access(Ensure you can run VPN apps and test sites)
- VPN service with a proven kill switch(Prefer a provider that explicitly supports IPv6 routing control)
- Reliable IP leak test sites(Examples: ipleak.net, dnsleaktest.com (use multiple tests))
- Web browser with privacy controls(Be prepared to disable WebRTC or install privacy extensions)
- Notes for documenting results(Keep a running log of IPs shown and actions taken)
Steps
Estimated time: 45-60 minutes
- 1
Connect VPN and enable kill switch
Launch your VPN and ensure the kill switch is active to prevent traffic leaks if the VPN disconnects. This step creates a controlled starting point for testing and reduces the risk of exposing your real IP.
Tip: Verify the VPN client shows an active connection before proceeding. - 2
Disable WebRTC in browsers
WebRTC can leak your IP even when a VPN is on. Disable WebRTC in your browser settings or install a trusted extension that blocks it during tests. This reduces one common leakage path.
Tip: Test multiple browsers to confirm WebRTC is fully mitigated across your devices. - 3
Run an IP check without DNS leaks
Open a reputable IP check site (e.g., ipleak.net) and compare the detected IP to your actual IP. A mismatch with your VPN’s IP indicates the VPN is functioning, while an exact match may signal a leak.
Tip: Take screenshots of results for later comparison and record the time of test. - 4
Test DNS leaks
Visit dnsleaktest.com to see if DNS requests reveal your ISP or location. DNS leakage undermines privacy even if your IP is masked, so note any exposure.
Tip: Run both standard and extended tests to catch secondary DNS paths. - 5
Check IPv6 exposure
If your VPN supports IPv6, ensure it handles IPv6 traffic properly; otherwise, disable IPv6 on devices. Test with IPv6-appropriate tools to confirm no IPv6 leaks.
Tip: If IPv6 leaks persist, contact your VPN provider for guidance on routing rules. - 6
Test on a different network
Repeat tests on a mobile hotspot or another network. Leaks may appear on one network but not another, revealing router- or ISP-specific issues.
Tip: Document differences to tailor network hardening strategies.
Questions & Answers
What is an IP leak and why should I care?
An IP leak occurs when your real IP address becomes visible despite privacy tools like a VPN. This can reveal your location and online activity. Checking for leaks helps you maintain privacy across websites, apps, and smart devices.
An IP leak is when your real address gets exposed even with privacy tools. It's important to check ip leak to protect your privacy and prevent tracking.
How can WebRTC cause leaks even when using a VPN?
WebRTC can bypass VPNs in some browsers by exposing local and public IPs through its own channels. Disabling WebRTC or using privacy extensions reduces this risk and strengthens your check ip leak.
WebRTC can expose your IP; disable it in browsers to prevent leaks during checks.
Do DNS leaks matter if my IP appears masked?
DNS leaks reveal which websites you visit, even if your IP is hidden. Running DNS leak tests is a crucial step in check ip leak to ensure your DNS requests are routed through the VPN.
DNS leaks expose your destinations even with masked IPs; test for them during your checks.
Should I test IP leaks on all devices?
Yes—different devices can leak differently due to browser settings, apps, or OS configurations. Include desktops, laptops, and mobile devices in your check ip leak workflow.
Test leaks on all devices you use to ensure comprehensive privacy.
What should I do if I find a leak?
If a leak is detected, re-check your VPN settings, disable WebRTC, update DNS configurations, and consider a VPN with stronger leak protection. Re-test after each change.
If leaked, adjust VPN settings and WebRTC DNS controls, then re-test.
Are there reliable third-party tools for check ip leak?
Yes. Use multiple independent tests from reputable sites to corroborate results. Do not rely on a single source when confirming ip leak status.
Use several trusted sites to verify leaks, not just one.
Watch Video
Main Points
- Identify leak pathways (WebRTC, DNS, IPv6) during tests
- Use VPN kill switch to prevent leaks if the connection drops
- Test across devices and networks for a complete check ip leak
- Address leaks with browser settings, DNS changes, or VPN adjustments