What to Do When You Find a Water Leak: A Practical Guide
A comprehensive, step-by-step guide for homeowners to respond quickly to water leaks, minimize damage, and prevent future incidents with practical tips and safety considerations.

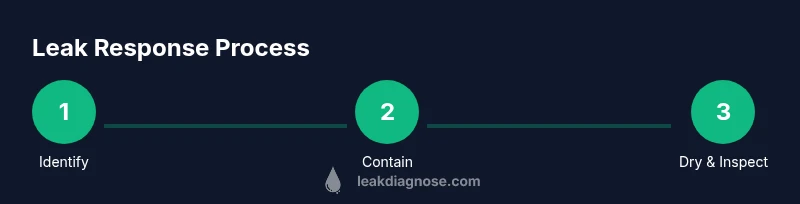
When you find a water leak, the priority is to stop the water and limit damage. This quick guide outlines immediate actions, essential tools, and the decision points for DIY versus professional help. By acting quickly and safely, you reduce water damage, mold risk, and repair costs. Leak Diagnosis provides practical guidance to navigate every step with confidence.
Immediate Actions When You Find a Water Leak
If you discover water pooling or a damp odor, stay calm and assess safety first. According to Leak Diagnosis, quick containment reduces total damage and helps you keep costs down. Scan the area for electrical hazards, and if water is near outlets or appliances, switch off power at the main panel only if you can do so safely. If you cannot reach the panel without stepping into standing water, evacuate and call for professional help. Collect essential details (location, source hints, time of discovery) so you can relay them to responders or your insurer. This moment sets the tone for how much water you’ll lose and how quickly you’ll recover.
Contain the Flow: Shutoff Valves and Main Water Shutoff
Locate the shutoff for the affected area first, typically under sinks, behind panels, or near the water meter. If you can reach the main shutoff safely, turn it off to stop the entire building’s water flow. Use a wrench or valve handle to close valves firmly but gently to avoid further damage. If the leak is confined to a fixture, turning off that fixture’s supply line may be enough. Document the exact valve positions for future reference and label shutoffs for quick access in emergencies.
Contain the Spill with Towels, Buckets, and Barriers
Place absorbent towels or rags around the leak to soak up standing water and prevent it from spreading to other rooms. Use a bucket to catch drips and move valuables away from the wet zone. For large spills, create a simple barrier with plastic sheeting or bags to protect floors and furniture. Keep a dry area nearby for electronics or items that could be damaged by moisture. Remember to avoid contact with water near electrical devices and outlets; wear gloves and boots for safety.
Identify the Source and Scope of the Leak
Try to determine whether the leak comes from a faucet, a supply line, a fitting under a sink, or a damaged appliance. Look for signs like dripping from joints, rust, or a hissing sound behind walls. If the source isn’t obvious, assume a hidden leak inside walls or ceilings and proceed with caution. Document any visible damage, such as staining, warping, or bulging walls, as this will guide repairs and insurance claims.
Document the Damage and Notify Stakeholders
Take clear photos and short videos from multiple angles before moving items or starting repairs. This evidence helps with insurance claims and contractor estimates. Notify household members and neighbors if shared plumbing could affect them, and contact your insurer as soon as practical. Keep a log of dates, times, and actions taken so you have a thorough record for future reference and potential disputes.
Drying, Cleaning, and Mold Prevention
After containment, begin drying the area with fans, dehumidifiers, and open windows if weather permits. Remove moisture-sensitive items and dry out any porous materials like carpet, underlayment, or drywall where feasible. Clean and sanitize the affected zone to prevent mold growth, and monitor for musty odors over the next several days. Document drying progress and any ongoing dampness to decide if further remediation is needed.
DIY vs Pro: Making the Right Call
Some leaks are simple fixes—tightening a connector or replacing a washer—while others require licensed plumbing. If you’re unsure about the source, lack the tools, or the leak is behind walls or above a ceiling, it’s wise to call a professional. A pro can pressure-test, repair hidden leaks, and ensure code-compliant fixes. For smaller, visible leaks with clear access, you may proceed cautiously using manufacturer instructions and local codes.
Cleanup, Repairs, and Insurance Considerations
Once repairs are complete, schedule a follow-up check to confirm there are no remaining drips. Save receipts for materials and any professional services, and update your home inventory with new appliances or fixtures. Review your policy for water damage coverage, and consider adding riders for mold remediation or emergency repair costs. Long-term prevention includes regular inspections and promptly addressing any signs of moisture.
Long-Term Prevention and Maintenance
Preventing leaks starts with proactive maintenance: inspect hoses, supply lines, and appliance connections every six to twelve months; replace old rubber hoses on washers or dishwashers; install water-detection devices in flood-prone areas; and consider a home water audit from a licensed pro. By building a routine, you’ll catch issues before they escalate and protect your home from costly water damage. The Leak Diagnosis team emphasizes ongoing vigilance and scheduled maintenance to reduce future incidents.
Tools & Materials
- Bucket(To catch drips; choose a sturdy, deep bucket)
- Absorbent towels or rags(Mop up standing water and protect floors)
- Mop and sponge(For thorough drying in tight spaces)
- Flashlight(Inspect dark corners and behind panels)
- Non-contact voltage tester(Check for live circuits safely if water is present)
- Adjustable wrench or pliers(Tighten/loosen fittings without damage)
- Plumber’s tape (Teflon)(Seal minor leaks at threaded joints)
- Rags, gloves, and eye protection(Personal safety and hygiene)
- Camera or smartphone(Document damage and repairs)
- Plastic sheeting or barriers(Contain spills and protect valuables)
- Moisture meter/hygrometer(Monitor humidity after a leak)
Steps
Estimated time: 2-4 hours
- 1
Identify the leak source
Scan the affected area to locate where water is coming from. Note whether it’s a fixture, a supply line, or a hidden pipe behind walls. This identifying step informs your immediate safety actions and whether you should shut off a local valve or the main supply.
Tip: If you’re unsure about the source, treat it as a probable leak from a supply line and proceed with caution. - 2
Shut off the water supply
If you can reach the shutoff safely, close the valve for the affected line first. If the leak appears to affect the whole building, turn off the main water valve. Do not force valves open or closed; if the valve is stiff, pause and consult a professional.
Tip: Label the shutoffs for quick access in future emergencies. - 3
Contain the spill
Place towels and a bucket to capture drips. Move furniture and valuables away, and lay plastic or a barrier to prevent water from spreading. Keep children and pets away from the damp area to reduce risk of slips and exposure.
Tip: Act quickly to keep water from seeping into walls or under flooring. - 4
Check for electrical hazards
If water is near outlets or appliances, avoid touching the wet areas. Use a non-contact tester if you must approach, and only power down at the main panel if it’s safe. If you suspect electrical exposure, call a licensed electrician.
Tip: Never handle electrical components with wet hands or while standing in water. - 5
Document the damage
Take detailed photos and videos of the leak source, damaged items, and affected areas. This evidence will support insurance claims and contractor estimates. Keep a dated log of actions you take and any materials replaced.
Tip: Photograph before moving items to ensure you capture the full extent of damage. - 6
Dry and ventilate the area
Use fans, dehumidifiers, and ventilation to dry the space within 24-48 hours. Remove wet textiles and dry porous materials as soon as possible to minimize mold growth. Recheck humidity levels regularly until the area is dry.
Tip: Dehumidifiers are most effective when placed in the center of the affected room with doors closed. - 7
Decide on DIY vs professional help
If the leak is minor and easily accessible, you may attempt a straightforward fix with proper instructions and tools. For hidden leaks, structural damage, or gas or electrical involvement, hire a licensed plumber or qualified contractor. Risk assessment matters.
Tip: When in doubt, choose safety and咨询 a pro before proceeding. - 8
Plan repairs and prevent recurrence
Create a simple repair plan with cost estimates, required parts, and a timeline. Schedule follow-up inspections or maintenance to prevent future leaks, such as hose replacements and valve testing. Consider installing water detectors in risk-prone zones.
Tip: Set up a maintenance calendar and reminders for quarterly checks. - 9
Review insurance and documentation
Compile your photos, invoices, and reports for submission. Review the policy terms for water damage coverage and mold remediation, then file promptly. Keep a file accessible for future claims and potential rate adjustments.
Tip: Maintain digital backups of all documentation.
Questions & Answers
Should I turn off the main water valve first when I find a leak?
If the leak is spreading rapidly or involves multiple fixtures, turn off the main water valve. If it’s isolated to a single fixture, shut off that fixture’s supply line first. Always prioritize safety and avoid stepping into water near electrical sources.
If the leak is spreading, shut off the main valve; otherwise address the local shutoff first. Safety comes first.
Can I fix a leaking pipe myself?
Some minor leaks at accessible joints may be DIY-friendly with basic tools and proper instructions. Hidden leaks behind walls or near gas lines usually require a licensed plumber. If you’re unsure at any point, pause and call a pro.
Minor, accessible leaks might be DIY, but hidden leaks call for a professional.
What should I do if the leak is behind a wall or ceiling?
Leaks behind walls require careful assessment; avoid guessing the source. Cut a small test opening only if safe and you can clearly identify the leak direction. Large or recurring leaks behind walls should be handled by a licensed plumber to prevent structural damage.
Leaks behind walls need caution and often a professional assessment.
How long before mold can start after a leak?
Mold can begin affecting porous materials within 24-48 hours of exposure to moisture. Quick drying and proper ventilation reduce mold risk significantly. If you notice a musty odor, treat it as a sign to inspect further.
Mold can begin growing within a couple of days, so dry promptly.
Will my home insurance cover water damage and repairs?
Most policies cover sudden or accidental water damage from burst pipes or appliance failures, but exclusions apply. Review your policy and file promptly with documented evidence. If the cause is negligence or long-term wear, coverage may vary.
Insurance can cover sudden damage; read your policy and document everything.
When should I hire a plumber or water-damage professional?
Call a licensed plumber if the source is unknown, involves concealed piping, or if there’s any sign of structural damage or ongoing dripping after initial containment. A professional can perform pressure tests and ensure code-compliant repairs.
Call a pro if you’re unsure about the source or ongoing leaks persist.
What safety steps should I take during cleanup?
Wear protective gear, shut off power if near water, and ventilate the area. Avoid mixing bleach with ammonia or other cleaners. Remove and dry fabrics promptly to prevent mold growth.
Wear protection, shut off power when needed, and ventilate well.
Can water detectors help prevent future leaks?
Yes. Installing battery-powered or hard-wired water detectors in flood-prone areas provides early warnings and can trigger automatic shutoffs in some systems. Combine detectors with routine maintenance for best protection.
Water detectors give early warnings and can trigger shutoffs.
Watch Video
Main Points
- Act quickly to stop the flow and prevent damage.
- Know where your local shutoffs are and how to use them.
- Document damage for insurance and repairs.
- Dry thoroughly to prevent mold and odor.
- Decide between DIY fixes and professional help based on safety and scope.