What to Do When Your Radiator Leaks: A Homeowner's Guide
Learn safe, practical steps to handle a leaking radiator at home, diagnose the source, apply temporary fixes, and plan permanent repairs with confidence.

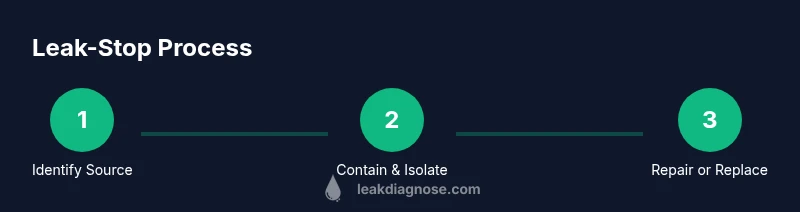
What to do leaking radiator? Safety first: shut off the heating system, isolate the radiator, and put on protective gear. Place a bucket under the drip, then locate the source—valve, bleed screw, pipe, or gasket. Tighten loose fittings if safe or apply a temporary seal while you plan a permanent repair. If unsure, call a pro.
What to Do Leaking Radiator: Understanding the Risk and Immediate Steps
A radiator leak can cause water damage and mold if left unchecked. If you’re asking what to do leaking radiator, safety must come first. Start by turning off the heating system to stop the flow of hot water. If your setup allows, shut off the boiler's supply valve as well. Put on gloves and eye protection, and place a bucket or towels under the drip to minimize damage. Then take a moment to identify the leak source: is it the valve, the bleed screw, a cracked pipe, or a worn gasket? By prioritizing safety and source identification, you reduce the risk of burns and water damage while you prepare for a proper repair. According to Leak Diagnosis, many leaks come from loose fittings or degraded seals, which are often fixable without a full replacement. This practical approach aligns with common home-maintenance wisdom and helps homeowners avoid escalation of damage while planning a permanent solution.
Immediate Safety Steps for a Leaking Radiator
When you discover a leak, the first priorities are safety and containment. 1) Turn off the thermostat or boiler to halt the circulating hot water. 2) If your system has a manual shut-off valve near the radiator, close it to isolate the unit. 3) If it’s safe to do so, cut power to the boiler to prevent electrical hazards and overheating. 4) Place a bucket or towels under the leak and protect nearby flooring with an absorbent mat. 5) Vent the area if you notice steam—hot steam can cause burns. These steps reduce risk while you assess the leak source and prepare for repairs. Leak Diagnosis emphasizes quick containment to minimize water damage and make future fixes easier.
Identifying the Leak Source: Valve, Bleeder, or Pipe
Leaks originate from several common points: the radiator valve connections, the bleed valve, pipe joints, or a damaged gasket. Inspect each connection closely with a flashlight, feeling for moisture and listening for hissing sounds. If you see moisture around a valve nut, tighten it by hand with a wrench, then snug—avoid overtightening which can crack fittings. Bleeder screws should be opened just enough to release trapped air, then resealed. Cracked pipes or corroded sections require inventorying replacement parts. Mark the exact location so you don’t chase a phantom leak. In many homes, the culprit is a loose connection or worn gasket, which is addressable with basic tools. As you work, keep a record of what you check and what you replace—this helps if the leak recurs. The Leak Diagnosis team notes that accurate source identification saves time and prevents unnecessary part swaps.
Temporary Fixes: When and How to Use Them
Temporary fixes can buy you time, but they are not a substitute for a proper repair. If a connection is loose, you may be able to tighten it after depressurizing the system. Avoid duct tape or epoxy on hot water or steam lines, as these are not reliable long-term solutions and can introduce hazards. A small leak at a valve might be managed with a repair washer or a gasket replacement, provided you can safely access the part with the system off. Radiator sealants are controversial: some manufacturers advise against them, and they may interfere with future servicing. If you must use a temporary seal, do so only after confirming it is compatible with your heating system and that it does not obstruct future professional repairs. The goal is to slow the drip without creating a new hazard. Leak Diagnosis cautions that temporary fixes should be followed by a permanent repair as soon as possible to prevent corrosion and structural damage.
Permanent Repair Options: Replacing a Valve, Gasket, or Section
Permanent repairs depend on the leak’s cause and your radiator type. A worn valve gasket can often be replaced with standard plumbing parts. If the bleed valve or valve stem is faulty, replacing those components is common and straightforward, provided you have the right size and tool access. For leaks in joints, resealing with Teflon tape on threaded connections and ensuring clean, dry surfaces improves seal integrity. In some cases, a cracked radiator section or corroded pipe means replacing the affected section or the entire radiator. If you’re unsure about your ability to perform these repairs safely, it’s wise to schedule a professional assessment. Early, accurate diagnosis and correct part selection reduce long-term damage and downtime.
Maintenance to Prevent Future Leaks
Preventing leaks starts with regular inspection and maintenance. Schedule an annual check of valve fittings, bleed screws, and pipe joints. Keep an eye on boiler pressure and system temperature to avoid overpressurization, which accelerates wear. When refilling the system after a fix, purge air from the radiators so the system runs efficiently and evenly. Corrosion and mineral buildup can incrementally worsen joints, so flushing the system or using appropriate corrosion inhibitors can help, depending on your boiler type. Prompt address of any signs of dampness or staining around the radiator will minimize hidden damage and extend the life of the heating system. The Leak Diagnosis analysis shows that proactive maintenance correlates with fewer unexpected leaks and lower repair costs over time.
Authority Sources and Learn More
For trusted guidance on heating-system safety and leak prevention, consult official resources and institutional publications. This article references reliable sources to help you make informed decisions and avoid risky DIY mistakes. Visit Energy.gov for energy-saving and heating-system safety tips, Oak Ridge National Laboratory for equipment maintenance insights, and the NFPA for fire-safety considerations related to leaks and water damage. These sources support safe, effective home maintenance and align with Leak Diagnosis’s mission to provide practical, safe leak guidance. https://www.energy.gov/ https://www.ornl.gov/ https://www.nfpa.org/
Tools & Materials
- Safety gear (gloves, eye protection)(Protect hands and eyes from hot water and debris)
- Drain pan or bucket(Catches water and prevents floor damage)
- Towels or absorbent mats(Contain spills and keep area dry)
- Adjustable wrench and screwdriver set(Loosen nuts and screws without stripping)
- PTFE tape or thread sealant(Seal threaded fittings after replacement)
- Replacement parts kit(Valve gaskets, bleed screws, or a radiator valve if needed)
- Flashlight or headlamp(Inspect hard-to-see joints behind the radiator)
Steps
Estimated time: 60-120 minutes
- 1
Power down and protect yourself
Turn off the thermostat or boiler and allow the system to cool. Put on gloves and eye protection to prevent burns from hot water and sharp edges.
Tip: Taking a minute to gear up reduces scalding risk during the fix. - 2
Isolate the radiator
Close the radiator’s shut-off valve if present, or switch off the boiler to stop the flow. Use a drain pan to catch any water and place towels around the area.
Tip: Isolation minimizes further leakage while you work. - 3
Identify the leak source
Carefully inspect valve connections, bleed screw, joints, and nearby pipes. Look for moisture, rust, or dampness and note the exact spot.
Tip: Label parts or take a photo to guide repairs later. - 4
Apply a temporary measure if safe
If you can access the leak safely, snug loose fittings and consider a manufacturer-approved temporary seal. Do not rely on temporary fixes for long-term repairs.
Tip: Temporary steps are for buying time, not a permanent solution. - 5
Plan the permanent repair
Determine whether a gasket, valve, or section replacement is required. Gather correct replacement parts and consider whether to consult a professional.
Tip: Accurate part sizing prevents repeat leaks. - 6
Test and restore
Reassemble, slowly refill the system, purge air, and run the heating to test. Check for fresh leaks and monitor pressure readings.
Tip: If new leaks appear, stop and reassess—do not overfill the system.
Questions & Answers
What should I do first when I notice a radiator leak?
Turn off the thermostat and isolate the radiator to stop water flow. Protect yourself and begin source inspection.
First, turn off the heat and secure the area, then check where the leak is coming from.
Can I fix a radiator leak myself?
Some minor leaks from fittings or gaskets can be repaired by a confident DIYer with basic tools. More complex leaks or corroded components benefit from a professional.
You can fix small leaks if you’re comfortable with basic plumbing, but call a pro for major issues.
Is temporary sealant safe to use on a leaking radiator?
Temporary sealants may be used in select situations only if approved by the manufacturer and compatible with your system. They are not a substitute for permanent repair.
Temporary sealants can help in a pinch if the system allows it, but they aren’t a real fix.
How long does a radiator repair take?
Time varies with the source and parts needed; minor tightening can be quick, while full part replacements take longer. Plan for a few hours if a professional is involved.
Repair time depends on the leak; some fixes are quick, others require more time.
When should I call a professional for a leaking radiator?
Call a professional if you cannot clearly identify the leak source, if leaks persist after initial checks, or if you suspect a cracked component or pressure problem.
If you’re unsure or the leak keeps coming back, it’s time to get a professional.
Watch Video
Main Points
- Prioritize safety before any repair.
- Identify the exact leak source to choose the right fix.
- Small fixes can prevent big damage when caught early.
- Temporary fixes should be followed by a permanent repair.
- Regular maintenance reduces future leak risks.