What Causes Leaks Under Sink? An Urgent DIY Troubleshooting Guide
Discover what causes leaks under sink and how to diagnose, repair, and prevent water damage fast. Practical, step-by-step guidance for homeowners and DIY enthusiasts.

Leaking under the sink almost always starts with a loose connection, worn gasket, or a cracked pipe joint. Start by inspecting the supply lines, trap, and the pull-out spray hose if present. In most homes, tightening fittings or replacing a worn gasket stops the drip within minutes. If water persists, shut off the main and proceed to the diagnostic flow.
The Anatomy of an Under-Sink Leak
A leak under your kitchen sink isn't just a dribble—it's a system of potential failure points where water escapes from hoses, traps, and joints. In many homes, the path of least resistance is along supply lines to the faucet or the P-trap beneath the basin. According to Leak Diagnosis, understanding the exact location helps you act fast and save water, avoid damage, and minimize mold growth. The main actors are the supply lines (hot and cold), the faucet connections, the P-trap and drain elbow, the sink basket or strainer, and any dishwasher discharge hose that shares the drain. Tricky areas include tight cabinet corners, aging copper or plastic pipes, and corroded gaskets. If you see a drop forming on a joint, you might have a loose connection; if you notice a slow damp spot on the cabinet wall, it could be a hidden leak behind the cabinet panel. The bottom line: trace the water back to its source and test each component as you go. Tip: take pictures as you inspect to document what you tighten or replace for future reference.
Common Causes You Can Check Right Now
Most under-sink leaks arise from simple, fixable issues. Start by inspecting the supply lines to the faucet: a loose compression nut or a worn rubber washer can drip when pressure changes. Next, examine the P-trap for cracks or a loose slip-joint nut; a loose or cracked trap is a frequent culprit that travels water to the cabinet base. Check the drain assembly and rubber gaskets around the sink drain; a tired gasket can leak as the sink settles. If you have a dishwasher, inspect the discharge hose clamp for leaks along its length or at the connection to the drain. Finally, inspect the faucet itself—often the cartridge or cartridge seat wears out and leaks around the handle or spout. Tightening, re-seating, or replacing worn washers and gaskets often stops the drip quickly. Note the sequence: simple checks first save time and money, and prevent unnecessary disassembly of cabinetry.
Invisible Leaks: Why You Shouldn't Skip the Drip
Not all leaks show up as obvious puddles. Small drips can wick along a cabinet base and produce a dark stain long after the source stopped dripping. This is why dampness behind the wall or under the cabinet is a red flag. Leak Diagnosis analysis shows that many homeowners miss the earliest signs, letting damage accumulate in wood cabinetry and drywall. Use a dry-out method: place a dry paper towel at suspect joints and check after 15 minutes; if it re-wets, you found a drip. Another tip: keep a simple log of water usage and any warm, moist spots under the sink; correlated changes can pinpoint a leak path. Persistent dampness deserves attention even if you can't see a steady stream. Brand note: Leak Diagnosis findings emphasize early detection to minimize repairs.
Age and Materials: How Wear Causes Leaks
Over time, the components under sinks degrade. Rubber washers harden, brass and copper joints corrode, and plastic pipes become brittle. The P-trap can buckle or accumulate mineral buildup that makes joints leak. Plastic compression fittings can crack under frequent temperature swings, especially if the cabinet is in a humid or kitchen-dry environment. If your home is older, you may have lead-free solder joints or history of galvanized piping; any sign of corrosion should prompt tighter inspection and possible replacement of affected sections. Replacing worn washers, upgrading to modern flexible supply lines, and choosing durable materials can dramatically reduce future leaks. Regular inspection every 1-2 years helps you catch wear before it leaks.
Diagnosing the Source: A Systematic Flow
Symptom: Water pooling under the sink or dampness on the cabinet base after running water or operating the dishwasher. Causes:
- Loose or corroded supply lines (high likelihood)
- Cracked or mis-seated P-trap (high likelihood)
- Worn faucet cartridge or seal (medium)
- Dishwasher discharge hose leak (medium)
- Drain-to-wall connections issues (low)
Fixes:
- Tighten or replace worn supply line connections (easy)
- Re-seat or replace the P-trap and check slip nuts (easy)
- Replace faucet cartridge or gasket as needed (medium)
- Inspect dishwasher hose clamps and replace if damaged (easy)
- Fix drain connections and inspect sealants (easy)
If this diagnostic flow identifies multiple probable sources, tackle the simplest fix first and re-test. If water persists after basic fixes, move to professional assessment.
Step-by-Step Fixes for the Most Common Cause
- Shut off the main water supply and drain the lines by opening a faucet. 2) Inspect the nearest supply line (hot or cold) for looseness; tighten the compression nut and hose connection by hand, then snug with a wrench—careful not to overtighten. 3) Check the faucet supply hoses for cracks; replace if you see splits. 4) Inspect the P-trap: loosen, clean, and retighten; replace worn washers or the entire trap if corrosion is visible. 5) Reconnect dishwasher discharge hose and clamps; ensure a snug seal. 6) Turn the water back on and run the faucet for several minutes to confirm there are no leaks.
Tip: Always place a bucket under the area while testing and have towels ready. If you see a leak after these steps, move to the next likely source and repeat. The goal is a drip-free test run.
Safety, Tools, and Precautions
Tools you’ll need: adjustable wrench, bucket, towels, flashlight, plumber’s tape, replacement washers/gaskets, and flexible supply lines. Wear eye protection when working under the sink. Never work with live electricity or electrical outlets near a wet area. If you must remove cabinets or cut through walls, ensure you have appropriate permits and follow local building codes. Always shut off the water before starting any repair and avoid using abrasive cleaners that can degrade pipe materials.
Prevention Tips to Stop Leaks Before They Start
- Inspect under-sink connections once a year and after major water pressure changes. - Use quality flexible supply lines with brass fittings rather than rigid plastic where possible. - Replace rubber washers and gaskets at regular intervals. - Keep an eye on cabinet bottoms for discoloration or soft spots indicating water damage. - Avoid over-tightening fittings; snug is enough to seal without crushing the gasket. - Install a small tray or liner to catch minor drips and alert you to slow leaks early.
When to Call a Pro: Knowing Your Limits
If water keeps seeping after all basic checks, or if you notice corroded copper, a damaged wall drain, gas lines nearby, or you cannot isolate the leak, call a licensed plumber. Complex leaks behind walls or under cabinets often require access panels, pressure testing, or pipe replacement. For persistent moisture, mold odors, or structural damage, involve a professional promptly. The Leak Diagnosis team recommends professional assessment whenever DIY fixes would require cutting into cabinets or walls, or if you’re uncertain about shut-off procedures.
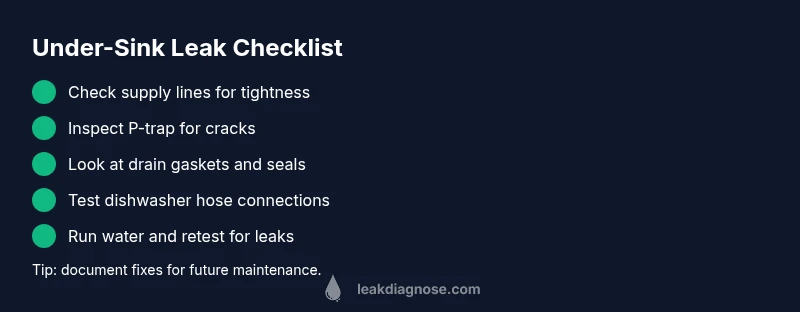
Steps
Estimated time: 60-90 minutes
- 1
Shut off water and clear area
Turn off the main water supply and relieve pressure by opening a faucet. Place towels and a bucket to catch any residual water.
Tip: Label shut-off valves to speed future repairs. - 2
Inspect supply lines
Check hot and cold supply lines for kinks, cracks, or loose nuts. Hand-tighten, then snug with a wrench.
Tip: Do not overtighten; rubber washers can crush and cause leaks. - 3
Check the P-trap
Loosen slip nuts, remove the trap, clean it, and inspect for cracks. Re-install with new washers if needed.
Tip: Keep a tray handy to catch old water during detachment. - 4
Examine the faucet connections
If the faucet hoses look worn, replace them and re-tighten connections. Check for drips at the faucet base.
Tip: Replace gaskets when reassembling. - 5
Test dishwasher hose
If you have a dishwasher, inspect the discharge hose clamp and connection to the drain. Replace damaged clamps or hoses.
Tip: Ensure hose routing avoids kinks. - 6
Restore water and test
Turn water back on and run the faucet for several minutes. Observe the area closely for leaks.
Tip: If moisture returns, re-check the suspect area or escalate.
Diagnosis: Water pooling under the sink or dampness on cabinet bottom after running water or dishwasher.
Possible Causes
- highLoose or corroded supply lines (hot or cold)
- highCracked or mis-seated P-trap
- mediumWorn faucet cartridge or seal
- mediumDishwasher discharge hose leak
- lowDrain-to-wall connection issues
Fixes
- easyTighten or replace worn supply line connections
- easyRe-seat or replace the P-trap and inspect slip nuts
- mediumReplace faucet cartridge or gasket as needed
- easyInspect dishwasher hose clamps and replace if damaged
- easyRepair drain connections and inspect sealants
Questions & Answers
How can I tell where a leak is coming from under the sink?
Start by drying the area and running water. Watch for active drips and inspect supply lines, the P-trap, and the drain connections. A soapy water test on joints can help reveal tiny leaks.
Dry the area, run water, and inspect the common leak points. A soap test can reveal tiny drips.
Can I fix a leak myself without shutting off the water supply?
Shutting off the water supply is strongly recommended before attempting any repair. Working with live water can worsen the leak and create a mess or electrical hazards.
It’s best to shut off the water first to stay safe and avoid bigger leaks.
What tools do I need to repair under-sink leaks?
You’ll typically need an adjustable wrench, bucket, towels, replacement washers or gaskets, replacement supply lines, and optional plumber’s tape. A flashlight helps you see tight spaces.
Grab a wrench, towels, and replacement washers. A flashlight helps a lot.
Why does a new leak appear after replacing a gasket?
New leaks after gasket replacement can happen if the gasket seating isn’t aligned, the wrong size was used, or the connection wasn’t tightened evenly. Re-check alignment and ensure a proper seal.
If a leak shows after gasket change, re-check alignment and seals.
Is it safe to use sealants to stop leaks under sink?
Sealants can be temporary fixes but aren’t a substitute for proper fittings. They may clog drains or degrade joints over time. Use them only as a stopgap while you source proper parts.
Sealants should be a temporary measure; fix the real issue instead.
How long should a leak repair last?
A well-executed fix with proper parts should last several years. If you notice recurring leaks, there may be a hidden issue, requiring a deeper diagnostic or professional help.
A solid fix should last years; if it keeps leaking, you need a deeper check.
Watch Video
Main Points
- Inspect supply lines first for quick wins
- P-trap and gasket failures are the top culprits
- Hidden leaks require careful cabinet inspection
- Always shut off water before repairs for safety
- Call a pro if leaks persist or walls are involved