Bathroom Sink Leak Underneath: Troubleshooting Guide 2026
Learn how to diagnose and fix a bathroom sink leak underneath quickly and safely. Step-by-step checks, common causes, and safe fixes to prevent water damage.

What "bathroom sink leak underneath" means
A leak beneath a bathroom sink is usually moisture escaping from the trap, supply lines, or faucet connections that travel behind the cabinet. This is a common sign of aging fixtures or improper installation. For homeowners, addressing it quickly reduces the risk of water damage, mold growth, and costly repairs. In this guide, we focus on safe, DIY-friendly checks that can stop most leaks at the source. If you notice standing water or damp cabinetry after extended use, treat it as an active leak and begin a careful inspection. Remember to shut off the under-sink shut-off valves before touching any fittings to avoid a flood.
Common Causes at a Glance
- Loose supply lines: under-sink cold or hot water hoses can loosen over time, especially after heavy use or recent maintenance.
- Worn or damaged washers: faucet stems and drain washers wear out, allowing slow seepage.
- Damaged P-trap or corroded pipes: metal traps can corrode; plastic traps can crack.
- Improper sealant or gaskets: mis-sealed drain connections can leak behind cabinet.
- Condensation and improper drainage: high humidity plus blocked drainage can mimic a leak. According to Leak Diagnosis Analysis, 2026, the top culprits are connections and gaskets rather than large cracks. Regular inspection helps catch small issues before big damage.
Visual Cues and Tools
Spotting a leak under the sink starts with the cabinets. Look for damp wood, mineral deposits on metal fittings, and persistent puddles after several minutes of water use. A musty smell behind the panel can indicate hidden moisture. Gather a few tools: a flashlight, clean towels, a bucket, adjustable wrench, pliers, plumber's tape, replacement washers, and a basin wrench for tight connections. Calibrate your expectations: some leaks only appear when the faucet is in use, others drip continuously from a failed seal. Use a small moisture meter if available for early warning and to confirm hidden dampness behind wooden panels.
Diagnostic Flow: Symptom → Diagnosis → Solutions
Begin with the simplest checks (loose connections) and progress to more involved steps (trap and drain). If you notice water leaking from a supply line joint when you wiggle the hose, the fix is usually tightening or replacing the ferrule and washer. If the leak is only while running water, the issue is likely a worn faucet washer or a cracked P-trap. The flow below helps you decide the right fix and when to stop and call a pro. Safety note: always turn off the shut-off valve before touching any fittings. If moisture remains after basic tightening, move to the next diagnostic step rather than forcing a fix.
Step-by-Step Fixes for the Most Common Cause: Loose or Worn Connections
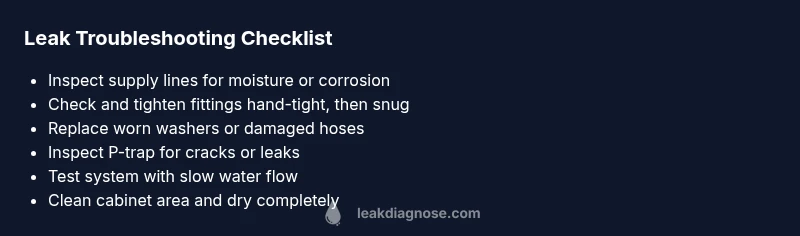
- Step 1: Turn off the water at the shut-off valves under the sink and place a towel to catch any drips. Tip: Have a bucket ready for larger leaks.
- Step 2: Dry the area with towels and inspect all supply lines for moisture or corrosion. Tip: Lay a tray under the traps to catch drips during work.
- Step 3: Tighten all visible fittings hand-tight, then with a wrench, snug them one-quarter to one-half turn—avoid overtightening. Tip: Use two wrenches to prevent twisting the lines.
- Step 4: If a hose ferrule or coupling shows wear, replace the fitting and a washer as needed. Tip: Apply plumber’s tape to threaded connections.
- Step 5: Reconnect and run a test by turning on the hot and cold valves slowly while watching the joints for drips. Tip: Do not run full blast initially.
- Step 6: If moisture persists after the fix, proceed to Step 2 of the next section (P-trap inspection). Tip: Keep the area dry to catch slow leaks.
Step-by-Step Fixes for the Most Common Cause: P-Trap and Drain Assembly
- Step 1: Place a bucket under the P-trap to catch water. Step 2: Loosen the slip nuts and remove the trap. Step 3: Inspect for cracks or corrosion; replace if damaged. Step 4: Clean the trap threads and pipes. Step 5: Reassemble with new washers or gaskets and tighten securely. Step 6: Refill with water and check for leaks. Tip: Use plumber’s tape on threaded joints for a better seal. Estimated time: 20-40 minutes.
Prevention: Keeping It Dry and Mold-Free
Maintaining a leak-free under-sink area pays dividends over time. Practice these habits:
- Schedule quarterly visual checks of under-sink connections.
- Replace washers every few years or when you notice stiffness or cracking.
- Install a small tray or liner to catch minor drips and simplify cleanup.
- Keep cabinet humidity low with a vent or fan to reduce mold risk. This proactive maintenance reduces the odds of leaks turning into costly water damage. The Leak Diagnosis team recommends documenting a quarterly check and addressing even tiny drips promptly to preserve cabinetry and flooring integrity.
Quick Test After Repair and Next Steps
After completing fixes, perform a controlled test:
- Run the faucet very slowly for 2-3 minutes, then observe for drips at all joints.
- Check behind the cabinet for any signs of moisture or seepage over the next 24 hours.
- If you still detect moisture, re-inspect the connection and consider replacing components or consulting a pro. Next steps: Keep a maintenance log, note any irregularities, and schedule follow-up checks every 3-6 months to prevent future failures. If you notice persistent water damage or signs of mold, contact a professional immediately to prevent health risks.