How to Fix a Leak Under the Sink: A Practical DIY Guide
Learn to locate, diagnose, and fix leaks under the sink with safe, practical steps. This guide covers common causes, DIY fixes, safety tips, and indicators you may need a professional.

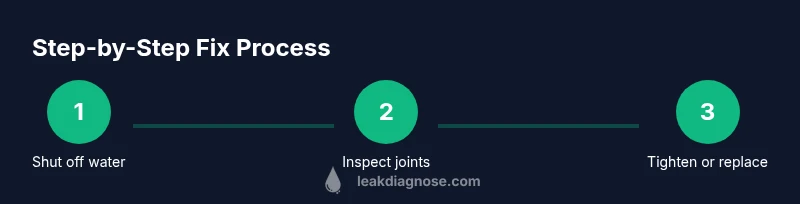
According to Leak Diagnosis, if you want to know how to fix a leak under the sink, start by shutting off the local water supply and draining the line, then inspect connections for looseness or worn washers. Tighten fittings, replace worn gaskets, and reseal joints with plumber's tape or joint compound as needed. If the leak persists, consider enlisting a professional.
Identifying the source of the leak
Leaks under the sink usually originate at the connections around the faucet supply lines, the P-trap, or the dishwasher inlet hose. According to Leak Diagnosis, the most common culprits are loose fittings, degraded washers, and worn rubber seals. Start by visually inspecting every joint and following the path of dampness from the cabinet floor to the wall. A careful touch and a quick spray with soapy water can help you spot tiny drips that you might otherwise miss. By taking a methodical approach, you can distinguish between a simple tightening job and a sign of a larger issue, such as a cracked component or corroded pipe.
Safety first: shut-off valves and precautions
Before you touch any plumbing, turn off the water at the under-sink shut-off valves. If you can't locate them, shut off the main water supply to avoid a flood. Do not ignore electrical components under the sink—if you see exposed wiring or a garbage disposal/dishwasher, unplug the unit or switch off the corresponding circuit. Use a bucket and towels to catch any residual water and keep children or pets away from the cabinet during the inspection. These precautions protect you and your home while you diagnose the problem.
DIY fixes you can perform today
Many leaks can be stopped with basic maintenance. Tighten loose supply-line fittings by hand first, then with a wrench—do not overtighten, or you risk cracking fittings or strip threads. If you notice worn washers or O-rings, replace them with appropriate-sized replacements. Apply plumber's tape to male threaded connections and reseal joints with pipe dope where recommended for metal threads. Dry the area thoroughly before testing, and keep a close eye on every joint as you restore water flow.
When to call a professional
If the leak continues after tightening fittings, or you see cracks in the pipes, corroded copper, or a leaking valve, it's time to call a plumber. Persistent dampness behind cabinets can indicate hidden corrosion or compromised plastic components that require specialized tools and replacement parts. The Leak Diagnosis team recommends seeking professional help for leaks that involve structural damage, electrical hazards near water, or situations where you cannot safely shut off water.
Tools & Materials
- Adjustable wrench(Fits common pipe fittings; have a range of jaw sizes)
- Pipe wrench(For stubborn fittings in tight spaces)
- Bucket(Large enough to hold water and drips)
- Rags or towels(Absorb spills and keep the area clean)
- Plumber's tape (PTFE tape)(Wrap on threaded connections to seal)
- Replacement washers/O-rings(Assorted sizes for supply lines and faucet)
- Gloves(Protect hands during inspection)
- Flashlight(Bright light to inspect dark cabinet corners)
- Silicone sealant(Use sparingly on dry surfaces; not for pressure joints)
- Pipe joint compound(Only on recommended metal threads)
Steps
Estimated time: 60-90 minutes
- 1
Shut off the water
Turn the under-sink valves clockwise to stop water flow. If those valves are not accessible, shut off the main supply. This prevents further water damage while you work.
Tip: If you can't find any shut-off, locate the main valve or call a neighbor for help. - 2
Prepare the workspace
Place a bucket under the area, spread towels, and clear the cabinet. Dry the cabinet surfaces so you can see any new drips clearly. This setup also makes cleanup easier after you finish.
Tip: Have a rag ready to wipe up puddles as you work. - 3
Inspect for the source
Carefully examine supply lines, the P-trap, and the connections to the faucet and dishwasher hose. Look for moisture, corrosion, or crusty deposits that indicate a slow leak. A bright flashlight helps you spot tiny drips that may be missed by eye alone.
Tip: Trace leaks from the bottom up to identify the exact joint. - 4
Tighten or reseat fittings
Hand-tighten loose fittings first, then finish with a wrench if needed. Avoid overtightening, which can crack fittings or strip threads and cause more leaks.
Tip: If the joint is still wet after tightening, loosen slightly and re-tighten to reseat the seal. - 5
Replace worn parts
Install new washers or O-rings where you found wear. Ensure the replacement parts match the exact size and type of the originals.
Tip: Keep old parts for comparison to ensure correct fit. - 6
Apply sealant where appropriate
Apply PTFE tape to male threaded connections and use pipe dope only on recommended metal threads. Do not apply sealant to non-threaded joints.
Tip: Only apply where specified by manufacturer instructions. - 7
Test for leaks
Turn the water back on slowly and watch all joints. Look for drips and verify that the entire area is dry after a few minutes.
Tip: If you see moisture, re-tighten or re-seal the suspect joint.
Questions & Answers
What is the most common cause of leaks under the sink?
Loose fittings, worn washers, and degraded seals in supply lines and the P-trap are the typical culprits. Start inspection at these joints.
Most under-sink leaks come from loose fittings or worn washers, especially in the P-trap.
Can I fix a leak under the sink myself?
Many minor leaks can be fixed with basic tools and replacement washers or O-rings. More complex leaks or damaged pipes may require a licensed plumber.
Yes, for simple leaks you can DIY, but more serious problems should be handled by a pro.
Should I replace the P-trap if it’s old or corroded?
If the P-trap shows cracks, corrosion, or persistent leakage, replacing it is usually best. It’s a common, affordable fix.
Replace a corroded P-trap to prevent ongoing leaks.
What safety precautions should I take?
Shut off water first, keep power away from wet areas, and wear gloves. If you smell gas or see electrical hazards, evacuate and call a professional.
Turn off water, avoid electricity near water, and wear gloves.
When should I call a professional for a leak under the sink?
If multiple joints leak, if you see cracked pipes, or if the leak persists after basic fixes, contact a licensed plumber promptly.
Call a pro if leaks persist or pipes are damaged.
Watch Video
Main Points
- Shut off water before starting any work
- Check supply lines and the P-trap first
- Replace worn washers and O-rings as needed
- Use PTFE tape on threaded connections
- Call a pro for persistent leaks or damaged pipes