Leak or Leakage: Urgent Home Troubleshooting Guide
A practical, urgent guide to diagnose and fix common leaks in your home—faucets, pipes, toilets—with step-by-step checks and safety tips.

Most likely culprit is a dripping faucet or a hidden pipe leak. Start with simple checks: inspect visible fixtures for drips, then test for moisture around ceilings, walls, and under sinks. If you hear running water or smell damp air, shut off the main supply and call a professional if the leak persists.
Why leaks threaten your home
A leak or leakage is more than a minor nuisance—it can quietly undermine the structure of your house, damage drywall, warp wood, and invite mold. The financial cost stacks up quickly with higher water bills and potential insurance complications. According to Leak Diagnosis, the moment you notice a damp patch or a sudden spike in your meter, you should treat it as an urgent warning sign. Prolonged leaks can lead to structural damage, compromised insulation, and health risks from mold. This section explains why leaks demand immediate attention and what you can do in the first hours after you notice something off. We’ll cover the most common leak paths, how to verify moisture, and the safest way to stop further damage while you plan a fix. The goal is to protect your family and save money by acting fast and methodically.
Where leaks hide in a typical home
Leaks are rarely obvious at first. In most homes, they hide in places you wouldn’t expect until the damage becomes visible. Common hiding spots include under sinks and around cabinet bases where moisture can collect behind panels. Faucets, shower and tub connections, toilet flappers, and supply lines are frequent culprits. Roof penetrations around skylights, chimneys, or vent pipes can leak when weather turns bad. Appliances such as dishwashers and washing machines may leak from hoses, valve seals, or faulty drains. Exterior hose bibs and irrigation lines can also energize damp patches that look like indoor leaks. A methodical sweep of each zone helps pinpoint the source without tearing apart walls.
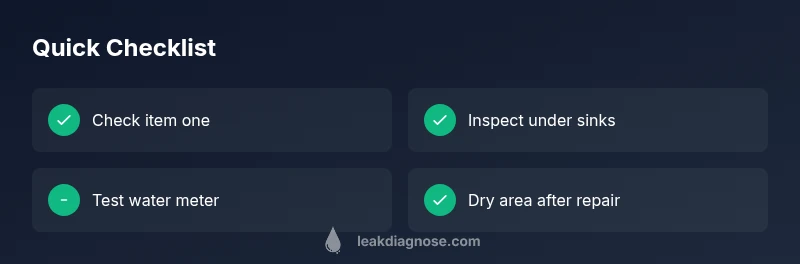
Quick checks you can do today
Start with the lowest-friction checks: look for visible drips around faucets, valves, and toilet connections. Check the meter when all fixtures are off; a spinning dial can indicate a slow leak. Inspect under sinks and around the base of cabinets for dampness or soft flooring. Examine ceilings and upper walls for brown stains that hint at a roof or plumbing issue. If you find moisture behind appliances, unplug or power down the unit according to the manufacturer’s guidance and check hoses and seals. Remember to prioritize safety: shut off water at the main valve before poking around and avoid handling pressurized lines without appropriate tools.
Symptoms that signal a leak
Water stains on ceilings or walls, musty odors, or persistent damp patches are classic signs of a leak. Listen for a faint running water sound when all fixtures are off. Unexplained increases in your water bill or a hidden pool of water under appliances also indicate a leak. If you notice soft floorboards, squeaky or buckling flooring, or peeling paint, there’s a good chance moisture is attacking the structure. For outdoor areas, keep an eye out for soggy patches, unusually green spots, or mud builds around irrigation lines. Quick recognition helps prevent bigger problems later.
Diagnostic flow primer: symptom → likely cause → action
Begin with the most obvious symptom and expand outward. A visible drip from a faucet points to a worn washer or loose connection. Damp cabinetry around the sink suggests supply-line leaks or trapped moisture behind panels. Ceiling staining after rain may mean a roof leak, while a damp basement floor could be a foundation or plumbing issue. Document dates and symptoms, then test one variable at a time: shut off water to a single fixture, reassess moisture, and note changes. If a fix affects the main line, or if you detect gas, stop and call a professional immediately.
Common fixes you can perform safely
Simple fixes can stop most household leaks, especially from faucets and fixtures. Replace worn washers or seals, tighten loose connections, and clean aerators to stop mineral buildup. Re-seat toilet flappers and replace cracked gaskets where visible. Ensure hoses and clamps on dishwashers and washing machines are secure and undamaged. For minor roof leaks, apply temporary sealant and cover the area until a roofer can assess it. Always shut off the main water supply before working on plumbing, and avoid using power tools on pressurized lines or live wiring. If you’re unsure, stop and call a pro to prevent escalation.
When to call a professional and what to expect
If you’re unable to locate the source, if water damage is visible, or if you detect a gas smell, stop and contact a licensed plumber or water damage specialist. Professionals use leak detection equipment, pressure testing, and thermal imaging to locate hidden leaks behind walls or under slabs. Expect a detailed inspection, a written estimate, and a plan for remediation that includes stopping the leak, drying affected areas, and repairing damaged components. Malfunctioning gas lines or sewer issues require immediate professional attention. The sooner you involve a pro, the lower the risk of mold growth and structural damage.
Prevention tips to reduce future leaks
Take proactive steps to reduce leaks before they start. Regularly inspect hoses, fittings, and seals on appliances; replace aging supply lines and washers preemptively. Install water-shutoff valves that are easy to reach in case of a surge. Consider a leak detector with alert notifications near the washer, under sinks, and in basements. Maintain roof integrity with seasonal inspections and clean gutters to prevent water from pooling at the foundation. A small monthly check can catch issues early and save thousands in potential repairs.
Quick maintenance routine for leak prevention
Schedule a monthly 20-minute review of critical water points: inspect visible pipes, check appliance hoses, and listen for the sound of running water when fixtures are off. Monitor the water meter for any unexpected movement with no use; even small fluctuations can indicate a hidden leak. Keep emergency shutoffs accessible and labeled, and replace aging gaskets and seals on fixtures every few years based on manufacturer recommendations. A proactive routine reduces unexpected water damage and helps protect your home long-term.
Steps
Estimated time: 60-90 minutes
- 1
Shut off the water and assess safety
Locate and turn off the main water supply to prevent further damage. If you suspect a gas line or sewer issue, evacuate and call emergency services. Use a flashlight in dark areas and wear gloves to inspect safely.
Tip: Verify the shutoff valve is easy to reach and clearly labeled. - 2
Inspect fixtures for visible leaks
Check faucets, showerheads, and exposed supply lines for drips or moisture. Tighten fittings if you see minor seepage and replace worn washers or gaskets as needed.
Tip: Take a picture of the fitting before removing parts to remind you how it was assembled. - 3
Check under sinks and around appliances
Look for pooled water, soft cabinetry, or black mold growth. Inspect appliance hoses and seals; replace damaged hoses and clamps. Run a brief test with water off and then on to confirm fix.
Tip: Place a towel or drain pan to catch residual water during testing. - 4
Test for hidden leaks using a meter test
With all fixtures off, note the water meter reading. Wait 1-2 hours and re-check; a changing reading indicates a hidden leak. If you can't locate it, move to professional-grade detection.
Tip: Record the baseline meter reading for future reference. - 5
Avoid dangerous fixes and call a pro as needed
If you encounter gas lines, electrical wiring near water, or suspect structural damage, stop immediately and contact a licensed professional. Don’t attempt complex repairs beyond your training.
Tip: Keep emergency numbers handy near the main shutoff. - 6
Finalize repairs and dry out the area
Replace any damaged drywall or flooring after fixing the leak. Use dehumidifiers and fans to dry the area thoroughly to prevent mold growth.
Tip: Document the repair with photos for insurance claims or future reference.
Diagnosis: Visible water stain or damp patch, or abnormal water meter activity when fixtures are off
Possible Causes
- highDripping faucet or worn washer
- highLeaking supply line under sink
- mediumToilet flapper or fill valve leak
- mediumShower/tub valve leak
- lowRoof leak around penetrations
- lowBasement or slab foundation crack with water intrusion
Fixes
- easyTighten connections, replace washers, or reseat valve seats; replace worn hoses
- easyReplace toilet flapper or fill valve; check wax ring for toilet leaks
- mediumApply sealant or replace damaged roofing shingle around penetrations
- hardSeal cracks in foundation with epoxy or consult pro for structural repair
Questions & Answers
What is the first thing I should check for a suspected leak?
Begin with obvious sources like faucets and supply lines. Look for damp cabinets and water marks, then test the water meter with all fixtures off to see if there is a hidden leak.
Start by checking visible fixtures and the water meter for any unexpected movement when nothing is using water.
How can I tell if a leak is hidden behind walls?
Watch for musty smells, musty odors, or unexplained damp spots on ceilings or walls. Moisture meters or infrared cameras used by professionals can detect hidden moisture behind walls.
Hidden leaks show up as damp patches or a musty smell; a moisture meter helps locate the moisture behind walls.
Do I need to turn off the main water supply?
Yes, if you suspect a leak, turn off the main water supply to prevent further damage. Then narrow down the source by testing individual fixtures.
Turn off the main water supply to stop more water from leaking while you inspect.
What tools should I have for basic leak troubleshooting?
Keep a set of wrenches, pliers, replacement washers, Teflon tape, a flashlight, and a moisture meter. These basics let you inspect and perform minor repairs safely.
A few basic hand tools and a moisture meter will handle most DIY checks.
When should I call a plumber?
Call a plumber if you can’t locate the source, if you detect gas or sewage odors, or if water damage is spreading. A pro can perform pressure testing and provide a lasting fix.
If you can't find the source or detect dangerous conditions, call a licensed plumber.
Watch Video
Main Points
- Act quickly to minimize water damage
- Tighten, replace, or reseat minor components first
- Know when to call a professional without delay
- Use a preventive routine to reduce future leaks
- Document repairs for insurance and future maintenance