Leak Inspection Guide: Find and Fix Household Leaks
Learn how to perform a comprehensive leak inspection at home with a practical, step-by-step process. Identify hidden leaks, verify with tests, and plan repairs to save water and prevent damage.

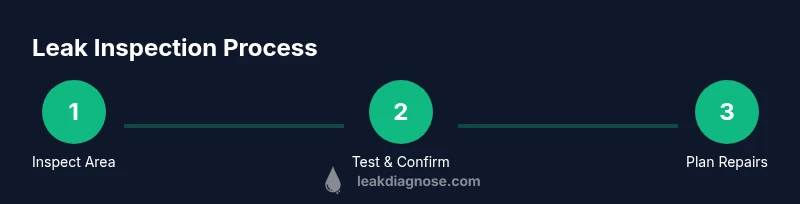
With this guide, you will identify and verify household leaks using simple, safe checks. Start by inspecting fixtures, meters, and visible piping, then perform dye tests and appliance checks to confirm leaks before planning repairs. This step-by-step approach helps homeowners save water, reduce damage, and cut utility costs today and dramatically.
What a leak inspection covers
According to Leak Diagnosis, a proactive leak inspection helps homeowners save water and reduce damage by identifying hidden issues before they escalate. This stage assesses all areas where water moves through your home: supply lines, fixtures, appliances, and the surrounding structure. A thorough inspection combines visual checks, testing methods, and a plan for repairs. You will typically look for: damp spots on walls or ceilings, musty odors, unexplained increases in your water bill, dripping sounds, or wet basements after rain.
During an inspection, focus on three goals: confirm whether water is escaping your system, locate the source, and estimate the potential cost of repair. Start with a quick exterior scan to spot foundation cracks, roof penetrations, and gutter overflow that could lead to interior leaks. Then move indoors, concentrating on the most water-intensive areas: bathrooms, kitchen sinks, laundry areas, and laundry connections. A methodical approach reduces the risk of overlooking small drips that become large problems.
Pre-inspection planning and safety
Before you begin, shut off power in wet areas and wear closed-toe shoes. Plan to work in daylight or well-lit spaces, and keep towels handy for spills. Gather your tools and set up a clear workspace. Inform household members about the test to prevent accidental usage that could skew readings. If you rent, obtain permission for controlled tests on plumbing fixtures.
This stage also involves setting a baseline. Record the water meter reading at a consistent time (e.g., first thing in the morning) and re-check after a short interval (15-30 minutes) while appliances are idle. Any change in usage that cannot be explained by normal household operations warrants closer inspection. Documenting baseline numbers helps you distinguish between a real leak and a temporary fluctuation.
Visual inspection techniques
Carry a flashlight and a calm, methodical approach to look for telltale signs of leakage. Inspect visible pipes under sinks, behind toilets, and around appliances. Look for stains, mineral deposits, or damp patches on walls, floors, and ceilings. Check around the toilet base for a wet ring, and around supply lines and shut-off valves for corrosion or dripping. Use dry paper towels to wipe surfaces and re-check—drops may appear after movement or pressure changes.
With careful observation you can often locate the leak source without dismantling walls. Note any areas where warm or cool air is escaping from gaps, since air leaks can mask water issues behind insulation.
Diagnostic tests and tools
To confirm a leak, use targeted tests: a toilet dye test, color-change in water of hidden lines, and a meter comparison test. For toilets, add a few drops of dye or food coloring to the tank and wait 15-30 minutes without flushing; if color appears in the bowl, the seal or flapper is failing. For visible pipes, place a dye tablet in suspected drainage lines or use a color solution to observe flow. For whole-house checks, monitor the water meter before and after a 15-minute period of no water use.
Tools: moisture meter for surface dampness, flashlight for dark spaces, towels to control drips, and a bucket for capture. You may also use an acoustic listening device or a simple stethoscope to hear small leaks behind walls.
Inspecting common leak hotspots
Most leaks show up in predictable places: toilets, sinks, and laundry areas; kitchens are frequently affected by faucet leaks and dishwashers; outdoor hoses and irrigation lines can also leak, often unnoticed until damp patches appear. Inspect toilets for tank-to-bowl seals, wax rings, and supply line connections. Check faucets for even drips when off and replace washers as needed. Inspect under sinks for supply lines and P-trap corrosion. In laundry areas, verify hoses to washers are tight and hoses to dishwashers are properly seated. Also inspect irrigation lines and outdoor faucets during dry weather to detect hidden cracks.
If you live in an older home, inspect around the foundation and crawlspaces for moisture and efflorescence, which hint at hidden leaks in the plumbing behind walls.
Recording findings and planning repairs
Create a log of each potential leak with location, signs observed, test results, and photos if possible. Prioritize repairs by safety risk, potential water waste, and cost. For minor leaks like dripping faucets or worn washers, plan a DIY repair with the right tools, parts, and safety gear. For more complex leaks behind walls or under slabs, obtain quotes from licensed professionals. Always turn off the water supply before disassembly and wear protective gear. After repairs, re-test to confirm the fix and monitor water usage for a week.
Authority Sources
Here are trusted resources on leak detection and water conservation to guide your process:
- https://www.epa.gov/watersense/leak-detection
- https://www.energy.gov/energysaver/save-energy-water
- https://www.usgs.gov/
These sources provide guidelines on water efficiency, leak prevention, and best practices for diagnosing leaks in residential settings.
Tools & Materials
- Moisture meter(Pinless model preferred for surfaces; use on walls and floors.)
- LED flashlight(Bright, reliable light for dark cabinets and basements.)
- Absorbent towels/paper towels(Capture drips and dry surfaces for accurate checks.)
- Dye test kit or safe food coloring(For toilets and drainage lines to visualize leaks.)
- Bucket and plastic sheeting(Contain spills and protect areas during tests.)
- Notebook or mobile log app(Record observations, test results, dates.)
Steps
Estimated time: 2-3 hours
- 1
Check main water usage
Begin by noting the current water meter reading at a consistent time, then avoid using water for 15-30 minutes and re-check. A steady change indicates a potential leak that merits further checks.
Tip: Use the same time window for each reading to ensure consistent baselines. - 2
Survey the interior and exterior
Walk the home’s exterior and interior for damp patches, stains, or unusual odors. Pay special attention to basements, crawl spaces, and areas around windows where condensation can disguise leaks.
Tip: Document any suspicious spots with photos for reference. - 3
Test toilets with dye
Add dye to the toilet tank and wait 15-30 minutes without flushing. If dye appears in the bowl, the flapper or seal needs attention. Repeat on other toilets if present.
Tip: Keep a log of which toilets were tested and results. - 4
Inspect faucets and exposed piping
Look for visibly leaking joints, dripping handles, and corrosion on supply lines under sinks. Tighten or replace worn washers as needed.
Tip: Shut off the valve before disassembly to prevent water spray. - 5
Evaluate appliances
Check washing machine and dishwasher hoses and connections for leaks. Run a short cycle with the machine unloaded and observe for gradual damp patches.
Tip: Turn off machines if you notice continuous drips and consult manuals for hose replacements. - 6
Use meter and listening tests
Compare multiple readings on the main meter with no water use. Listen near walls and behind cabinets with a stethoscope or acoustic device to detect hidden flow.
Tip: A small continuous sound can indicate a concealed leak. - 7
Document findings and plan repairs
Create a prioritized repair plan based on safety, cost, and impact. For minor issues, DIY fixes may suffice; for complex leaks behind walls, obtain professional quotes.
Tip: Re-test after repairs and monitor water usage for 1 week. - 8
Know when to call a pro
If leaks are behind walls, under slabs, or involve gas lines, contact licensed professionals. Early consultation can prevent costly damage.
Tip: Keep a maintenance log and contact info for trusted plumbers.
Questions & Answers
What counts as a leak in a home?
A leak is any unintended flow of water through pipes, fixtures, or appliances that results in wasted water or potential damage. It can be visible or hidden behind walls and may show up as damp spots, stains, or increased water bills.
A leak is any unintended water flow, visible or hidden, that wastes water or risks damage.
Can I detect leaks without special tools?
Yes, you can start with visual checks for damp patches and listen for dripping sounds. Monitor your water meter and watch for unexplained usage. However, some leaks require tools like a moisture meter or dye tests for confirmation.
You can start with visuals and meter checks; some leaks need simple tools for confirmation.
How long should a toilet dye test run?
Run the dye test for 15-30 minutes without flushing after adding dye to the tank. If dye appears in the bowl, the seal or flapper likely needs replacement.
About 15 to 30 minutes is enough to see if dye exits into the bowl.
What if I find a leak behind a wall?
Leaks behind walls should be approached carefully. Turn off water, document the location, and contact a licensed plumber if the leak involves hidden pipes or structural risk.
Leaks behind walls require careful steps and often a professional.
Is it worth hiring a professional for a small leak?
For small, easily accessible leaks, DIY fixes can be cost-effective. If the leak is behind walls, in ceilings, or involves gas lines, professional inspection is recommended.
For hidden or gas-related issues, a professional is best.
Watch Video
Main Points
- Identify leaks with a systematic, room-by-room approach
- Use dye tests and meter readings to confirm leaks before repairs
- Document findings thoroughly for DIY fixes or to justify pro help
- Prioritize safety and utility savings in your plan
- Re-test after repairs to confirm a successful fix