Leak in the Ceiling from Bathroom: Diagnosis & Fix
Learn how to identify, diagnose, and safely fix a leak in the ceiling from bathroom plumbing. Practical steps, safety tips, and prevention to stop mold and water damage.

The most likely cause of a leak in the ceiling from bathroom is a plumbing leak from above: a dripping supply line, a leaking drain pipe, or a failing fixture seal. First, contain the water with towels, avoid electrical hazards, and try to shut off the water supply if it’s safe. If moisture continues after a short period, contact a licensed plumber.
Why a Leak in the Ceiling from Bathroom Demands Urgency
A leak in the ceiling from bathroom is a warning sign that water is moving through your home’s structure. While staining and dampness may appear cosmetic at first, repeated moisture can lead to mold growth, wood rot, and electrical hazards. Treat this issue as urgent and begin a safe containment plan right away. According to Leak Diagnosis, most ceiling leaks start with plumbing overhead—drips from a supply line, a drain connection, or a faulty fixture seal. Quick action reduces damage and shortens repair time.
When you notice water intrusion, remember: the ceiling is the system boundary. Water may travel along joists and spread further than the visible stain, so don’t assume the problem ends where you see it.
Key takeaway for homeowners: addressing a leak early minimizes drywall damage and mold risk, and it buys you time to form a proper repair plan.
Immediate Safety and Containment Steps
Before anything else, assess safety. Water near electrical outlets, light fixtures, or switches creates a serious shock hazard. If you can do so safely, switch off the affected circuit at the breaker; if not, avoid the area and call an electrician. Then proceed with containment:
- Place a bucket or waterproof container under the drip and lay down towels to catch runoff.
- Move furniture away and protect flooring with plastic sheeting to reduce secondary damage.
- If you can locate the upstairs shutoff valve for the bathroom and it’s safe, shut it off to stop further water flow.
If the leak persists after containment attempts, contact a licensed plumber promptly. Mold risk increases with moisture exposure, so quick professional evaluation is prudent.
Common Causes in Residential Homes
Understanding typical culprits helps narrow the diagnostic path:
- Leaking supply lines or fixture connections above the ceiling (shower, tub, toilet) are frequent sources.
- A failing wax ring or drain seal in a toilet or shower drain can allow water to seep into the ceiling below.
- Condensation alone is less common but can contribute when combined with poor attic insulation or ventilation.
- Roof or exterior leaks traveling along ducts or framing may manifest in the bathroom ceiling after rain.
By noting where the water first appears, you can distinguish between a slow plumbing leak and a capillary moisture issue. Leak Diagnosis notes that most ceiling leaks tied to bathrooms involve hidden plumbing joints rather than drywall defects alone.
How We Diagnose: From Symptoms to Solutions
Effective diagnosis starts with documenting symptoms and following a systematic flow:
- Observe the drip pattern: is it continuous, intermittent, or only after use of a fixture?
- Check upstairs bathrooms, closets, and the attic for signs of a leak or moisture on pipes.
- Look for staining patterns on ceilings, warped drywall, and mold smells that indicate sustained moisture exposure.
- Use a moisture meter to map damp areas and track whether the leak is spreading.
Based on these observations, you can determine whether you’re facing a small fixture seal issue or a larger pipe repair. The goal is to minimize further damage while arranging appropriate repairs. Leak Diagnosis emphasizes a cautious approach: if you are unsure, involve a professional to avoid electrical and structural hazards.
Preventing Future Ceiling Leaks: Pro Tips
Prevention is better than repeated repairs. Implement these practices to reduce recurrence:
- Regularly inspect plumbing lines in crawl spaces or attics for corrosion, rust, or moisture signs.
- Ensure attic insulation is dry and vented to prevent condensation buildup.
- Install water alarms or moisture sensors in ceilings adjacent to bathrooms to provide early warning.
- Schedule annual plumbing and roof inspections, especially in homes with older piping or recent renovations.
By combining routine maintenance with prompt response to any signs of moisture, you lessen the chance of a costly ceiling leak in the future.
What to Do If the Leak Persists or Worsens
If the leak continues after you’ve taken containment steps, or if you observe large water intrusion, mold, or electrical exposure, call a licensed professional immediately. A plumber can locate and repair the source, and a contractor can restore drywall and paint once the leak is fixed. Don’t delay; slow leaks can lead to hidden mold behind walls and structural damage.
Documentation and Next Steps
Capture photos and notes of staining, damp areas, and water flow. This documentation helps when you file insurance claims or schedule repairs. Prepare to discuss:
- The suspected source (fixture, pipe, or roof)
- Any electrical hazards observed
- The extent of water damage and any visible mold
- The age and condition of pipes and fixtures in the bathroom and overhead space
Maintaining a repair log keeps your project organized and supports timely remediation.
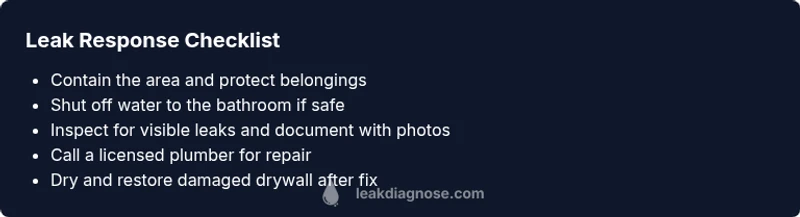
Steps
Estimated time: 2-6 hours for initial containment and inspection; drying and drywall repair may extend to 1-3 days depending on severity.
- 1
Assess safety and power
Before touching any water, turn off the bathroom circuit at the breaker if you can do so safely. This reduces the risk of electric shock if water contacts outlets or fixtures. Inspect the area for exposed electrical hazards and avoid touching wet surfaces.
Tip: If you’re unsure about electrical safety, skip the power shutoff and call a licensed electrician first. - 2
Contain the leak
Place a bucket under the drip and use towels to absorb moisture on the ceiling and floor. Move valuables out of the way and protect furniture. If possible, shut off the bathroom water supply valve from the main shutoff or upstairs valve.
Tip: Keep a spare bucket and towels ready for quick containment in future incidents. - 3
Identify the source
Check upstairs bathrooms, attic spaces, pipes, and fixtures for visible leaks or damp areas. Look for dripping from joints, loose connections, or cracked fittings. Document any signs of water intrusion.
Tip: Use a flashlight and a camera to document the exact location before disturbing insulation or pipes. - 4
Decide on the repair approach
If you locate a clear supply line or fixture leak and you’re comfortable, you may perform a temporary fix (tighten a fitting, apply plumber’s tape). Otherwise, contact a licensed plumber for a permanent repair.
Tip: Temporary fixes are not permanent solutions and should be followed by a professional repair. - 5
Dry and assess damage
Ventilate the area well; use fans and dehumidifiers to dry moisture behind walls and ceilings. Check for signs of mold, warped drywall, or stained wood. Schedule drywall repair and repaint after the area is dry.
Tip: Keep humidity below 50% to speed up drying and reduce mold risk. - 6
Repair and restore
Have the pipe or fixture repaired by a professional, then replace damaged drywall, insulation, and ceiling finish. Repaint and seal to restore the room’s appearance and prevent future water damage.
Tip: Recheck for leaks after repair with a small water test before fully sealing the space.
Diagnosis: Water dripping or staining on ceiling below bathroom fixtures
Possible Causes
- highLeaking supply line or fixture above ceiling
- highLeaking drain or wax seal in bathroom fixture (toilet/shower)
- lowRoof or exterior leak that travels indoors to the bathroom ceiling
Fixes
- easyShut off the dedicated water supply to the bathroom if safe
- easyContain area with towels and plastic sheeting; protect floors
- mediumCall a licensed plumber for source repair and pipe replacement
- hardDry out and replace damaged drywall; repaint after repair
Questions & Answers
What should I do first when I notice water coming from my ceiling?
Shut off the water to the bathroom if safe, contain the area with towels, and turn off nearby electrical power if you can do so safely. Then call a plumber for an assessment.
First, shut off the water if it’s safe, contain the area, and call a plumber for next steps.
Can I fix a ceiling leak myself?
Small, clearly localized leaks may be managed temporarily, but most ceiling leaks from bathroom plumbing require professional repair to prevent recurring damage and mold growth.
Minor fixes aren’t reliable long-term; a pro should handle most bathroom ceiling leaks.
How can I tell if mold has formed from the leak?
Look for a musty odor, dark stains, or visible fuzzy growth on ceilings or walls. Persistent moisture increases mold risk if left untreated.
If you smell mold or see stains, stop work and call a pro for mold remediation.
How long does it take to dry after a ceiling leak?
Drying times vary with humidity and ventilation, but most cases require 24–72 hours for the area to dry fully; more extensive damage takes longer.
Usually a day or two of drying, but it can take longer if insulation or framing is wet.
When should I hire a plumber vs. a general contractor?
Hire a licensed plumber for active plumbing leaks or pipe repair. A general contractor is more suited for drywall repair and finishing once the leak is fixed.
Call a plumber for the leak, and a contractor for drywall restoration after the fix.
Watch Video
Main Points
- Act quickly to contain the leak and protect occupants.
- Identify the true source before costly drywall repairs.
- Drying and ventilation minimize mold risk.
- Engage a licensed plumber for pipe or fixture leaks.