Leak in Shower Drain Pipe: Diagnose and Fix Fast
A practical, urgent guide to identify and repair a leak in shower drain pipe. Learn common causes, quick fixes, safe testing, and when to call a pro to stop water damage and restore your shower.

A leak in the shower drain pipe is most often caused by a loose connection or a worn gasket. Start by tightening the slip-nut connections under the drain and replacing worn washers. If the leak persists after tightening, the drain flange or pipe behind the wall may be damaged—call a professional.
Understanding the Shower Drain System and Why Leaks Happen
A shower drain system is a compact assembly of a drain cover, drain body, slip-nut connections, gaskets or seals, and the drain pan or shower base. When any part loosens or wears, water can seep into joints and show up as a leak around the drain or as dampness under the floor. According to Leak Diagnosis, many leaks originate from imperfect seals or worn components that fail once water pressure increases. Knowing the basic parts helps you target the right spot quickly and avoid unnecessary wall or floor damage during inspections.
Common Causes of Leaks in Shower Drain Pipes
The most frequent culprits are loose slip-nut connections or degraded gaskets that lose their seal over time. A cracked or warped drain flange can also leak, especially if the pan or base around the drain has settled or warped. Blocked or slow-draining pipes can create pressure that forces water into seams. In some cases, improper sealing around the drain during installation leads to persistent leaks. A systematic check of each element narrows down the problem without invasive testing.
Safety and Immediate Actions When You Discover a Leak
Before you dive in, prioritize safety. If you notice standing water near outlets or electrical fixtures, turn off the bathroom circuit at the breaker panel and dry any moisture to reduce shock risk. Wear gloves and eye protection. Keep a bucket or towels handy to control water flow while you inspect. If the leak seems to involve the wall or subfloor, limit access and plan a careful inspection rather than ripping out drywall immediately. Leak Diagnosis emphasizes safety first to protect both you and your home.
Diagnostic Checklist You Can Do Today
- Visually inspect the drain cover and base for movement or gaps.
- Check the slip-nut connections beneath the drain for looseness.
- Look for obvious cracks in the drain flange or the base around the drain.
- Run water at low flow and watch for leaks around joints, then increase flow gradually to see if pressure reveals a hidden seal problem.
- Inspect the area under the shower (if accessible) for dampness or discoloration that indicates a hidden leak path.
How to Inspect and Tighten Drain Connections
Start with the drain cover: remove it with a flathead screwdriver and inspect the flange. Lightly tighten all slip-nut connections by hand, then snug them with a wrench—avoid over-tightening which can crack seals. If a gasket or sealing washer shows wear, replace it and re-seal with plumber’s putty or silicone as recommended by the manufacturer. After resealing, reassemble and run water to test for leaks before sealing the final trim. If water still escapes, the problem likely lies with a damaged flange or concealed piping.
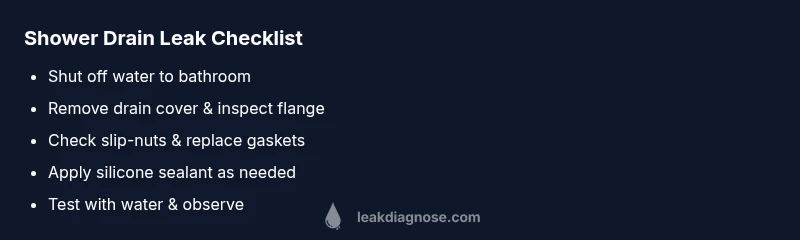
Step-by-Step Repair for the Most Common Cause
- Gather tools: adjustable wrench, replacement gasket, silicone sealant, plumber’s putty, a bucket, and towels. 2) Shut off water to the bathroom and remove the drain cover. 3) Inspect and hand-tighten all slip-nut connections; replace any worn gasket. 4) Apply silicone sealant sparingly around the gasket before reassembling. 5) Reinstall the drain cover, turn the water back on, and observe for any dripping. 6) If still leaking, perform a controlled test by filling the pan and watching the drain, then escalate to replacing the drain flange or consulting a pro. 7) After successful repair, clean the area and store your tools for future maintenance.
Prevention Tips to Avoid Future Leaks
Routine maintenance pays off. Regularly inspect drain covers and seals for wear, replace gaskets at signs of corrosion, avoid pouring harsh chemicals down the drain which can degrade seals, and reapply silicone sealant every few years. Consider a water-softening system if minerals are a recurring issue, and periodically test the drain by running water full-tilt to catch slow leaks early.
Steps
Estimated time: 60-90 minutes
- 1
Prepare tools and safety gear
Gather an adjustable wrench, replacement gaskets, silicone sealant, putty, a bucket, towels, and a flashlight. Put on gloves and eye protection before you start. Clear the area and protect the bathroom floor to catch any spills.
Tip: Know where the main water shut-off for the bathroom is located. - 2
Shut off water and remove the drain cover
Turn off the bathroom water supply and, if needed, the home’s main valve. Remove the drain cover with a screwdriver and inspect the flange for cracks or warping. Keep a towel ready for any incidental water.
Tip: Take a photo of the setup before removing parts to aid reassembly. - 3
Inspect slip-nuts and gaskets
Check all slip-nut connections for looseness and inspect gaskets for wear or cracks. If a gasket looks degraded, replace it with a compatible seal. Wipe the surfaces clean before resealing.
Tip: Do not overtighten; snug is enough to stop leaks. - 4
Re-seat and reseal
Apply a thin bead of silicone sealant around the gasket area if recommended by the manufacturer. Reassemble the drain parts carefully and ensure even seating.
Tip: Use plumber’s tape on threaded connections if applicable. - 5
Test the repair
Turn the water back on and run water into the shower at low and high flow. Watch for drips around seams and joints. If no leak is observed after several minutes, proceed to a longer test.
Tip: Leave the test running for at least 5 minutes to catch slow leaks. - 6
Escalate if leaks persist
If water continues to leak after resealing, the issue may be a damaged flange or concealed pipe. Mark the area and plan a more in-depth inspection or call a plumber.
Tip: Avoid damaging the shower pan or wall while investigating. - 7
Plan for professional assistance
Schedule a professional inspection if wall or subfloor moisture is suspected, or if the leak is behind walls. A licensed plumber can assess structural damage and safely replace hidden components.
Tip: Document moisture patterns with photos for the pro. - 8
Cleanup and maintenance
Dry the area thoroughly to prevent mold. Clean up tools and store sealant properly. Consider a preventive check every 6–12 months.
Tip: Keep a sealant kit stocked for quick future fixes. - 9
Final verification
Run a final test after repairs to confirm the leak is resolved. Check again after 24 hours for any slow seepage.
Tip: If any doubt remains, don’t hesitate to call a pro.
Diagnosis: Continuous water leak around the shower drain or puddling beneath the shower floor
Possible Causes
- highLoose slip-nut connections or worn gaskets
- mediumDamaged drain flange or posterior piping due to corrosion or movement
- lowBlocked or slow-draining line causing pressure and seepage at joints
Fixes
- easyTighten slip-nut connections and replace worn gaskets; reseal with silicone where needed
- mediumReplace a damaged drain flange or faulty seal in the shower base, ensuring proper fit and seal
- hardConsult a licensed plumber to access concealed piping or perform a full drain replacement if behind-wall damage is suspected
Questions & Answers
What are the most common causes of a leak in a shower drain pipe?
Loose connections, worn gaskets, and damaged drain flange are the most common causes. Poor sealing or installation can also create leaks.
Common causes are loose connections, worn seals, and a damaged drain flange.
Can I fix a shower drain leak myself?
Many leaks can be fixed with basic tools and careful resealing. If the leak persists or involves concealed piping behind walls, consider professional help.
Yes, many leaks can be fixed yourself, but if it persists or is behind a wall, call a pro.
What safety steps should I take before starting?
Shut off water to the bathroom, unplug nearby electrical fixtures if safe to do so, and wear gloves. Keep a towel handy for spills.
Turn off water and electricity to the bathroom if needed, and wear protective gear.
How long should I test after a repair?
Run water for several minutes at low and high flow to observe leaks. Re-test after 24 hours to confirm.
Run water for a few minutes, then re-check after a day.
When should I call a professional?
If you see wall staining, persistent leaks after fixes, or suspect concealed piping behind walls, hire a licensed plumber.
Call a pro if leaks persist or you see wall damage.
What tools will I need for a basic repair?
Adjustable wrench, replacement gasket, silicone sealant, putty, bucket, and towels are usually enough for basic fixes.
You’ll typically need a wrench, replacement gasket, sealant, putty, a bucket, and towels.
Watch Video
Main Points
- Start with simple fixes: tighten and reseal.
- Check flange and wall areas if leaks persist.
- Test thoroughly after each repair step.
- Know when to call a pro for concealed damage.
- Prevent future leaks with regular maintenance and seals.