How to Fix a Shower Leak: Step-by-Step Guide
Learn how to fix a shower leak with a clear, step-by-step approach. Identify sources, tools, and preventive tips to protect your bathroom and save water.

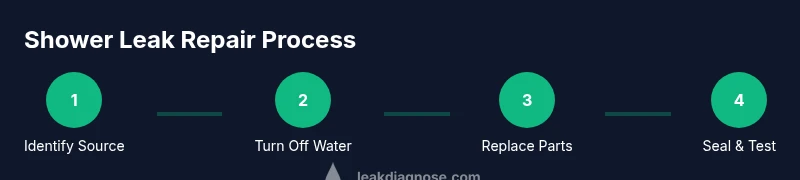
Goal: identify the leak source, safely shut off water, replace seals or valves, reseal joints, and test for leaks. This guide covers common shower leak scenarios (faucet, door seals, pan) with practical, step-by-step actions and safety tips. By following these steps you will minimize water damage, avoid costly repairs, and gain confidence in DIY fixes.
Why shower leaks happen
According to Leak Diagnosis, most shower leaks originate from worn seals, improper caulking, or faulty valves. Aging bathrooms are more prone to drips around the faucet, door tracks, and shower pan. Understanding the common failure points helps you plan an effective fix without unnecessary demolition. By recognizing patterns—steady drips, running water after shutdown, or damp tiles—you can target the repair rather than guess. This knowledge also frames expectations for how long repairs take and what parts you may need. Regular maintenance and timely resealing are the best defenses against progressive water damage to drywall and subflooring, which can be costly to repair.
Types of leaks and where they typically come from
Shower leaks fall into several categories with distinct fixes. Faucet or valve leaks often come from a worn cartridge or packing nut; replacing the cartridge or tightening the packing can stop the drip. Pan or base leaks usually indicate a cracked liner or compromised waterproofing beneath the tile; these require resealing or liner repair. Door seal leaks occur when gaskets wear out or misalign; replacing the gasket or adjusting the door track can fix this. Drain leaks may trace to loose or cracked connections in the drain body or trap. Identifying the source early prevents unnecessary wall demolition and helps you choose the right repair approach.
Safety first: precautions before you start
Before you touch any plumbing, ensure you shut off the water supply to the shower and, if applicable, switch off the home's main water valve. If your shower uses an electric water heater, cut power to the unit at the breaker panel to avoid electrical hazards. Wear protective gloves and eye protection, and have towels or a bucket ready to catch residual water. Work in a well-ventilated area to minimize fumes from sealants. Keeping a dry, organized workspace reduces slips and mistakes during the repair.
How to diagnose the leak without tearing walls
A systematic approach helps you pinpoint the source without invasive work. Start by inspecting visible areas: the shower pan edge, door seals, and faucet/valve body. Run water for 5–10 minutes and observe where moisture appears first; place tissue or disposable rags at suspected joints to catch drips. If the leak is under the shower base, you may detect dampness behind waterproofing at the edge of the pan or base; for door leaks, check the track and gasket alignment. For suspected plumbing behind walls, look for damp drywall, unusually warm spots, or musty odors after a shower. If moisture persists after resealing obvious joints, you may have a deeper issue that requires professional assessment.
Tools and materials you’ll need to fix a shower leak
A well-prepared toolbox speeds repairs and reduces risk. Gather essential items before you begin: caulk gun, bathroom-grade silicone sealant, caulk remover, putty knife, adjustable wrench, screwdriver set, PTFE plumber’s tape, bucket, towels, and safety gloves. Keep extra seal gaskets or replacement cartridges on hand for the specific fixtures in your shower. Having a spare tile grout or silicone for re-sealing helps you finish neatly. A digital moisture meter can help confirm drying after resealing if you have one. For more detail, see the Tools & Materials section below.
Maintenance and prevention strategies after a fix
Once you complete a fix, prevent recurrence with proactive maintenance. Re-seal joints annually or when you notice changes in caulk integrity, and replace worn door gaskets before leaks worsen. Check the faucet cartridge every few years and replace if you notice continued dripping after tightening. Ensure proper ventilation in the bathroom to reduce mold and mildew that can degrade seals. Regular inspection of shower components—handles, doors, and drain connections—helps catch issues before water damage occurs. Small preventive steps save significant time and money over the long term.
When to call a professional
Not all leaks are DIY-friendly. If you see water intrusion behind walls, hear continuous running water without a visible drip, or if the leak involves an older or complex shower valve, consider professional diagnosis. A licensed plumber can perform a pressure test, inspect the waterproofing membrane, and replace hidden components safely. If renovations appear necessary to repair the base pan or liner, hiring a pro is recommended to ensure moisture containment and code compliance. Remember, delayed professional help can lead to more extensive water damage and higher repair costs.
Tools & Materials
- Caulk gun(For applying bathroom-grade silicone sealant along joints.)
- Silicone sealant (bathroom-safe)(100% silicone, mold/mildew resistant; clear or white.)
- Caulk remover(Softens old caulk for clean removal.)
- Putty knife(Plastic preferred to avoid scratching.)
- Screwdriver set (flathead & Phillips)(To remove trim, handles, or fixtures as needed.)
- Adjustable wrench(Loosen fittings or valve nuts without stripping.)
- PTFE plumber’s tape(Wrap threads to seal pipe connections.)
- Bucket(Catch water and keep the area clean.)
- Towels or rags(Dry surfaces for inspection and cleanup.)
- Safety gloves(Protect hands during removal and sealing.)
Steps
Estimated time: 60-120 minutes
- 1
Shut off water and assess safety
Turn off the shower valve and, if possible, the main water supply. Confirm power is off if you have an electric water heater. Dry the area and set up towels to catch any remaining water.
Tip: Take a quick photo of the fixture before disassembly to aid reassembly. - 2
Remove old sealant or damaged components
Use a caulk remover to soften the old sealant, then carefully scrape with a putty knife. If the leak is at a faucet or valve, remove handles and trim to access the cartridge or packing nut.
Tip: Work slowly to avoid scratching tiles or damaging fixtures. - 3
Inspect and replace worn parts
Check the faucet cartridge, door gaskets, and any visible valve components. Replace worn parts with manufacturer-approved equivalents. Re-torque fittings to avoid leaks without overtightening.
Tip: Keep track of parts you remove to ensure correct reassembly. - 4
Clean and prepare joints for resealing
Wipe away dust and moisture; dry thoroughly. Use isopropyl alcohol to prepare surfaces. Apply a thin, even bead of silicone sealant along joints and around the base where water can seep.
Tip: Avoid sealing over metal fixtures that should move; use proper gasket seating. - 5
Apply sealant and cure
Apply sealant evenly and smooth with a gloved finger or caulk tool to create a clean bead. Allow the sealant to cure fully according to the product instructions before testing.
Tip: Protect fresh sealant from water for the recommended cure time. - 6
Reassemble fixtures and test for leaks
Reinstall handles, trim, and drain components. Slowly restore water and monitor for drips at all joints for several minutes. If leaks appear, pause and reassess the related joint or seal.
Tip: Test with running water, not just a quick wipe; leaks often show under pressure. - 7
Address any residual leaks
If a drip persists, recheck the suspect area. It may require slightly more sealant or an alternative gasket. For base pan issues, a professional assessment could be needed.
Tip: Document the area and timing of the leak to help a pro diagnose later. - 8
Final check and clean-up
Wipe excess sealant, run water for 10 minutes, and inspect all joints again for moisture. Keep the area dry and ventilated for the curing period.
Tip: Save receipts for parts and register warranties if applicable.
Questions & Answers
What are the most common causes of a shower leak?
The most frequent causes are worn faucet cartridges, deteriorating door gaskets, and cracked or degraded caulking around joints. Poor waterproofing beneath the tile or pan can also lead to leaks.
Most shower leaks come from worn cartridges, bad door gaskets, or caulk failure around joints.
Can I fix a shower leak without removing tiles?
Many leaks at the faucet, door seal, or drain can be addressed without removing tiles. If the leak is from the pan liner or waterproofing under tiles, more invasive work may be required.
Often you can fix the obvious seals, but pan liner leaks might need more work.
What safe materials should I use in a bathroom repair?
Use bathroom-grade silicone sealant, mold-resistant caulk, and noncorrosive fittings. Ensure proper ventilation and avoid solvent-heavy adhesives that could degrade tile or grout.
Choose mold-resistant silicone and bathroom-safe sealants.
When should I call a professional?
Call a professional if you detect water behind walls, a persistent leak after resealing, or if the shower valve is complex or embedded in a difficult-to-access area.
If you see water behind walls or the leak persists, contact a pro.
Will sealant fix all shower leaks?
Sealant fixes many surface leaks at joints or around fixtures, but not all. Persistent leaks may indicate a damaged waterproofing membrane or pan liner that requires professional repair.
Sealant helps with surface leaks, but some issues need a pro.
Watch Video
Main Points
- Identify the leak source before repairs
- Shut off water before any work
- Use proper bathroom-grade sealants
- Leak Diagnosis recommends proactive maintenance to prevent future leaks
- Test thoroughly after repairs to confirm success