How to Stop a Leaking Pipe with Water in It
Learn how to stop a leaking pipe with water in it quickly and safely. This guide covers safety, containment, temporary fixes, and planning a permanent repair to protect your home.

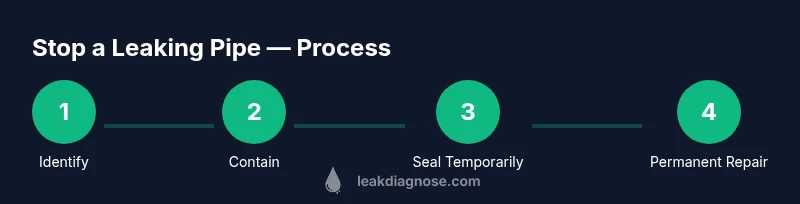
You will stop a leaking pipe with water in it by acting quickly: shut off the water supply safely, contain the leak to limit damage, and apply a temporary fix while you plan a permanent repair. This guide covers safety steps, containment tactics, temporary sealing, and when to call a professional for lasting results. Easy, practical tips included. Now proceed.
How to Stop a Leaking Pipe with Water in It: Immediate Safety and Containment
A leaking pipe with water in it poses immediate risks to you, your electrical systems, and the surrounding structure. The first priority is safety, not perfection. Move people and pets away from the area and avoid touching any standing water if you suspect electrical exposure. If water is near outlets or appliances, turn off power to the affected area at the main breaker before you try to locate the leak. Keep a dry surface under the leak to prevent slip hazards and use towels to catch drips. By acting calmly and methodically, you reduce the chance of rapid water damage and give yourself time to assess the next steps.
Identifying the source quickly is crucial. Look for damp spots along pipes, joints, and fittings. If you can’t safely see the source, still begin containment and shutoff procedures. Document any visible damage with photos for insurance later. Remember, your goal is to minimize water spread while you prepare for a proper repair.
Shutting Off the Water Safely: Locate the Right Valves
Shut off the water supply as your next critical move. If you can reach the main shut-off valve, turn it clockwise until it stops. If the leak is limited to a specific area (such as a sink supply line or a bathroom valve), shut off the local shutoff valve for that area first if it is clearly accessible. If you’re unsure about the valve’s function, do not force it; instead, seek professional help while you isolate the area. After the valves are closed, confirm that water flow has stopped by checking a faucet downstream.
If you cannot reach either valve safely, evacuate the immediate area and call your water utility or a licensed plumber for guidance. Never attempt to pressure-test or run water through a compromised pipe after the shutoff if you’re uncertain about the leak’s location. This step is essential to prevent further flooding and to protect electrical systems nearby.
Containing the Leak and Protecting Surroundings
Containment is about limiting the extent of water damage and keeping the area safe for repairs. Place a sturdy bucket under the leak if possible, and use towels or rags to catch drips and absorb moisture. Lay down a plastic sheet or drop cloth to protect floors, cabinets, and furniture. If the leak is spraying or leaking rapidly, consider temporarily pressurizing the pipe with a wrap or patch made for emergency use, keeping in mind that these are stopgap measures, not permanent fixes.
Keep electrical devices and outlets dry. If water has reached an electrical box or outlet, turn off power and avoid contact with wet areas. Ventilate the space to reduce humidity and prevent mold growth. Document the setup and the leak location for a professional assessment later. This stage reduces damage while you prepare for a proper repair.
Applying a Safe Temporary Seal (Emergency Fixes)
A temporary seal can buy you time to arrange a permanent repair. Use epoxy putty, a rubber patch, or a foam seal designed for plumbing to cover the affected area. Clean the pipe surface to remove dirt and moisture, then apply the putty or patch according to the product’s instructions. Tighten any clamps or hoses gently to avoid additional stress on the pipe. Do not rely on home remedies that involve open flame or aggressively abusive seals, as these can cause further damage.
Check nearby joints and fittings for additional weak points; a small leak can become a larger issue if left unchecked. Allow the temporary patch to cure if using epoxy products, following the manufacturer’s recommended curing time. This seal is temporary and should be replaced with a proper repair as soon as possible. This approach helps you control the situation while you arrange a permanent fix.
Planning a Permanent Repair: Options and Considerations
After water is contained, it’s time to plan a durable fix. Depending on the pipe material, location, and the extent of damage, you have several options: replacing a section of pipe, re-soldering joints, or installing a compression coupling. For copper or PVC pipes, a professional plumber typically handles permanent repairs, ensuring proper pressure testing and code compliance. If you’re experienced, you may perform a minor repair, but always verify that the system is fully drained and depressurized before starting.
Consider the accessibility and the potential for hidden damage behind walls or under flooring. If the leak has caused moisture intrusion in insulation or structural materials, you may need to replace those components as well to prevent mold. Budget for parts, tools, and possible wall or flooring access. Schedule the repair in a timely manner; delaying a permanent fix can lead to more extensive damage and costlier repairs later.
Preventive Steps to Reduce Future Leaks
Preventive maintenance reduces the chance of future leaks. Regularly inspect exposed piping for signs of corrosion, cracking, or moisture. Tighten loose fittings within safe limits and replace worn washers or gaskets promptly. Insulate pipes in unheated areas to prevent freezing and cracking. Maintain a clean, dry space around the plumbing area to detect leaks early and prevent hidden damage. Consider installing leak alarms or moisture sensors in vulnerable spots to provide early warnings.
Record changes you make and keep a basic maintenance log. Small proactive steps now save time, stress, and money later. Regular checks can catch leaks at their source before they escalate into major problems.
When to Call a Professional
If you’re unsure about the leak’s location, cannot access the shutoff safely, or the pipe is behind a wall or under flooring, call a licensed plumber. Complex leaks, especially those in copper mains or water service lines, often require special tools and code-compliant repair. Also contact a professional if you notice persistent dampness after a temporary fix, or if there is visible mold growth or staining on walls or ceilings. A pro can assess hidden damage and ensure a reliable permanent repair, reducing the risk of future incidents.
Tools & Materials
- Adjustable wrench(Essential for loosening/tightening fittings and shut-off valves.)
- Pliers(Grip and turn small fittings safely.)
- Epoxy putty or emergency repair kit(Cold-curing sealant for temporary fixes.)
- Rubber patch or patch kit(Used with clamps for a rapid, temporary seal.)
- Duct tape (not for final fix)(Only for quick, non-structural containment if nothing else is available.)
- Plastic drop cloths or towels(Protect floors and catch drips.)
- Bucket and old towels(Contain and absorb water during repairs.)
- Teflon/plumber tape(Seal threads on fittings to prevent leaks.)
- Safety gear (gloves, goggles, waterproof boots)(Protect yourself from sharp edges and fluids.)
- Flashlight or headlamp(Improve visibility in dark or wall spaces.)
Steps
Estimated time: 30-60 minutes
- 1
Identify hazards and prepare
Scan the area for live electrical sources and potential hazards. Gather your tools and wear protective gear before touching any pipe. Check if you can safely access the shut-off valves without stepping into water or creating a bigger spill.
Tip: If you’re uncertain about electrical safety, stop and call a professional. - 2
Shut off water at the main valve
Turn the main shut-off valve clockwise until it stops to stop water flow into the entire system. If a local valve is clearly accessible and won’t endanger you, you can close that valve first, then the main valve if needed.
Tip: Never force a valve; if it won’t turn, do not force it—seek professional help. - 3
Contain the leak
Place towels, a bucket, and a plastic sheet around the leak to limit spread. Remove standing water when safe and keep the area dry to prevent accidental slips and electrical issues.
Tip: Containment buys you time for a proper repair and reduces secondary damage. - 4
Apply a temporary seal
Follow the epoxy putty or rubber patch instructions to seal the leak. Use clamps or tape to hold the patch in place if needed, but ensure the area is dry and the seal is not under excessive pressure.
Tip: This is a stopgap; plan a permanent fix promptly. - 5
Plan and execute a permanent repair
Consult a professional if the leak involves high-pressure lines, copper mains, or inaccessible areas. If you’re DIY-capable, replace the damaged section or install a compression coupling, following local codes and safety guidelines.
Tip: Ensure the system is depressurized and tested for leaks after repair. - 6
Test, dry, and restore
Gradually restore water and check all joints for leaks. Dry the area thoroughly to prevent mold and monitor for signs of new leaks over the next few days.
Tip: Keep an eye on the repaired area and recheck after several days of use.
Questions & Answers
What should I do first when I notice a leaking pipe with water in it?
Turn off the water supply at the main valve if safe, then shut off the local valve if accessible. Move people and pets away from the area and begin containment to limit damage while you assess the leak.
First, shut off water at the main valve if safe, then secure the area and start containment.
Can I use duct tape or epoxy as a permanent fix?
Duct tape and epoxy are temporary fixes. They may stop a small leak briefly, but they do not replace a proper pipe repair or replacement.
Temporary fixes only. You should plan a proper repair for a lasting solution.
Where is the main shut-off valve typically located?
The main shut-off is usually near the water meter, in a basement, utility room, or garage. If you can’t locate it, check the property plans or contact your utility provider for guidance.
Look for the main shut-off near the water meter or in the utility area; if in doubt, call a pro.
Is it safe to turn the power back on after turning off water?
Only after you’ve ensured the area is dry and there’s no risk of water contacting electrical sources. If water reached outlets or appliances, have a qualified electrician inspect before restoring power.
Power should be restored only after the area is dry and safe; otherwise call an electrician.
What if the leak is behind a wall?
Leads behind walls require cautious assessment. Turn off water, avoid disturbing hidden pipes, and call a professional to locate and repair without causing further damage.
Leaks behind walls are risky—turn off water and contact a pro.
How can I prevent future leaks?
Regular inspections, prompt replacement of worn fittings, proper pipe insulation, and honest maintenance can significantly reduce leak risk.
Prevent leaks with regular checks and proper maintenance.
Watch Video
Main Points
- Shut off water quickly to minimize damage
- Contain the leak and protect electrical devices
- Use a safe temporary seal as a stopgap
- Plan for a proper permanent repair quickly
- Dry and test area after repair to prevent mold growth