How to Fix Leak Around Pool Steps: A DIY Guide
Learn to locate, diagnose, and seal leaks around pool steps safely. This step-by-step guide from Leak Diagnosis covers tools, materials, and testing to restore a watertight pool.

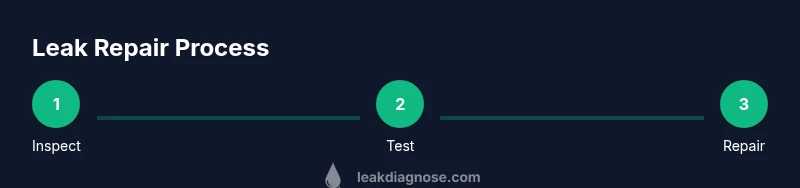
According to Leak Diagnosis, learn how to diagnose and repair leaks around pool steps using common tools and safe sealants. This guide covers locating the source, choosing the right materials, and verifying a successful seal with a water test. Follow a methodical approach to minimize damage and downtime. We'll outline practical steps, safety tips, and what to do if you encounter stubborn leaks.
Understanding the source of leaks around pool steps
Leaks around pool steps can originate from several areas: gaps between the step and surrounding shell, cracked or deteriorated grout, worn-out sealant at joints, or plumbing lines running behind the steps. The first signs are usually damp patches at the base of the steps, especially after refilling or running the pump. A careful inspection focusing on joints, cracks, and connections helps distinguish between a cosmetic blemish and a structural leak. Common culprits include shifting soil around the deck, loose treads, or degraded connectors that allow water to travel behind the shell. By mapping potential leak paths, you’ll know where to apply repairs and what materials to choose for a durable fix.
Safety considerations before you begin
Safety comes first when working near a pool. Power down nearby equipment to prevent electrical shocks, and avoid working when the surface is wet and slippery. Wear protective gloves and eye protection, and use a mask if you’re sanding or grinding rough edges. Keep children and pets away from the work zone, and use tarp or plastic sheeting to protect nearby surfaces and plants. If you see any dramatic water loss, structural movement, or cracks larger than a hairline, treat the situation as high priority and plan repairs during dry conditions to reduce slip and slip-related injuries.
Diagnosing the leak with a methodical approach
Begin with a careful visual walkthrough of the steps and adjacent decking. Look for hairline cracks, gaps at joints, loose fasteners, or movement when pressure is applied. Clean the area with a stiff brush and dry it thoroughly before testing. Use leak-detection methods such as a dye tablet near suspected joints or a UV dye trace to see if color or dye migrates toward the leak source. Mark suspect spots with chalk to reference during repair. Keeping a log of where the dye travels helps you quantify the likely leak path and avoid unnecessary resealing elsewhere.
Repair strategies depending on leak type
For minor cracks or gaps around the step-to-shell interface, apply a pool-grade epoxy or polyurethane sealant to seal the joints. If you find larger gaps or a failing joint between the step and deck, consider hydraulic cement or a structural epoxy with proper curing time, followed by re-grouting if needed. If fittings behind the steps are leaking, remove the fitting, inspect the gasket, and reseal with silicone or an appropriate marine-grade sealant. In all cases, avoid applying curing products underwater; work on a dry surface and let the product cure fully per the manufacturer instructions. If the leak persists after a DIY repair, escalate to a professional for assessment and potential structural work.
Post-repair testing and verification
Allow repairs to cure according to product instructions—often 24–48 hours for epoxy and longer for polyurethane-based products. Refill the pool gradually and monitor the repaired area for several days, paying attention to moisture patterns around the steps. Re-check joints and surrounding surfaces after the water level stabilizes. If no damp patches reappear and the dye test shows no color migration, the repair is likely successful. Document the test results and timing for future reference.
Maintenance tips to prevent future leaks
Regular inspections of step joints and grout lines help catch issues before they worsen. Clean seams and joints routinely and reapply sealants as needed when you notice cracking or chalkiness. Address soil shifts, root intrusion, or deck movement that can stress the pool steps. Maintain proper water chemistry, since extreme pH or chemical imbalances can degrade sealants over time. Consider seasonal checks after heavy rainfall, freeze-thaw cycles, or after heavy pool usage to catch problems early.
Tools & Materials
- Pool-grade epoxy or polyurethane sealant(Choose a product rated for submerged or water-exposed joints; follow curing instructions.)
- Epoxy putty or marine-grade adhesive(For filling small cracks before sealing)
- Silicone sealant (pool-grade)(Used on deck-to-shell joints; ensure it's chlorine resistant)
- Hydraulic cement(Use for larger cracks or joints if epoxy alone isn’t sufficient)
- Caulking gun(For precise application of sealants)
- Putty knife(Scrape away old sealant and smooth new material)
- Wire brush(Clean metal or concrete surfaces before sealing)
- Chalk or marking pencil(Mark suspected leak spots for reference)
- Non-toxic leak-detection dye or UV dye(Trace leaks without invasive methods)
- Tarp or plastic sheeting(Protects surrounding areas during repair)
- Protective gloves and safety glasses(Personal protection when handling chemicals)
- Rags and cleaners(Wipe surfaces and clean tools)
- Measuring tape(Useful for documenting repair extents)
- Mixing container(For portioning epoxy or cement mixtures)
Steps
Estimated time: 4-6 hours (including inspection and minor repairs) plus curing time as required by materials
- 1
Inspect the pool steps and surrounding area
Do a thorough visual survey of the step-to-shell junctions, grout lines, and deck joints. Look for cracks, gaps, loose tiles, or displacement. Document potential leak paths with photos and notes to guide your next moves.
Tip: Take multiple angles and mark suspect spots with chalk for easy reference. - 2
Dry the area and prepare for testing
Remove any loose debris, brush away algae, and dry the surface completely. A dry surface ensures sealants adhere properly and cures evenly. Close the pool or isolate the area if possible to control water exposure during the repair.
Tip: Use a clean, dry cloth and a heat source placed safely to speed up drying when weather is moist. - 3
Conduct a dye test to locate the leak
Place a small amount of leak-detection dye near suspected joints or cracks and observe dye migration. If color shows progression toward a joint or hollow area, you’ve likely found the leak path. Chalk the path and proceed to sealing.
Tip: Use non-toxic dye and watch for color drift over several minutes for accuracy. - 4
Choose the repair method based on leak type
For tiny cracks and pinholes, epoxy or polyurethane sealants usually suffice. For wider gaps or compromised joints, hydraulic cement or structural epoxy offers stronger adhesion. Reserve silicone around deck-to-shell joints if UV exposure is a concern and ensure compatibility with pool chemicals.
Tip: If the crack runs through structural components or feels unstable, stop and consult a professional. - 5
Apply sealant and allow proper curing
Apply sealant evenly along the crack or joint, smoothing with a putty knife. Wipe away excess and keep the area dry during cure. Allow the product to cure per manufacturer instructions—these times vary between products.
Tip: Avoid water contact or heavy traffic on the repaired area during the cure window. - 6
Test the repair and monitor for recurrence
Refill the pool gradually and watch the repaired area for 24–48 hours. Recheck joints and surrounding surfaces for dampness after the water stabilizes. If no moisture or dye migration appears, the repair is likely successful.
Tip: Document the test results with dates and photos for future reference.
Questions & Answers
What are the most common signs of a leak around pool steps?
Common signs include damp patches near the step base, a sudden drop in water level not explained by usage, and active dye migration during testing. Moisture around grout lines or deck joints can also indicate a leak path.
Look for damp patches near the steps, unexplained water loss, or dye movement during tests.
Can I fix leaks around pool steps myself, or do I need a pro?
Small cracks and gaps can often be repaired with pool-grade sealants and epoxy. Larger cracks, shifting steps, or leaks behind fittings may require a licensed pool contractor for safety and warranty reasons.
Small cracks are usually DIY-friendly; bigger structural issues should be handled by a professional.
What sealants are best for pool step leaks?
Pool-grade epoxy, polyurethane sealants, and silicone sealants designed for pool use are standard choices. Match the product to the leak location (surface crack vs. joint) and curing requirements.
Use pool-rated epoxy or silicone designed for wet environments.
How long does a repair take to cure?
Cure times vary by product but typically range from 24 to 48 hours for epoxy and longer for polyurethane. Do not expose the repair area to heavy use or water until fully cured.
Most repairs cure within one to two days, depending on the product.
Should I drain the pool to perform repairs?
Draining is usually unnecessary for minor leaks. If the water table is low and structural issues risk air gaps, consult a professional before draining.
Usually you don’t need to drain the pool; assess the leak first.
Watch Video
Main Points
- Identify leak paths before sealing any joint
- Dry working surfaces improve sealant performance
- Choose pool-grade materials for durability
- Test repairs with a controlled refill and monitor
- Know when to call a professional for structural issues